

TD 9366
-
Posts
48 -
Joined
-
Last visited
-
Days Won
4
Content Type
Events
Profiles
Forums
Posts posted by TD 9366
-
-
Congrats! Amazing works!
-
Thank you for following up. My photographer friend is a little busy recently, I'll do it as soon as he has time.

-
PM sent
-
PM sent
-
So proud of my approval! Actually it's my birthday today... what a coincidence! No doubt this is one of the best birhtday present in my life!

Thank you my MEPD brothers, I can't make it without your support and the knowledge you share.
SWAT won't be the final stop for me. I'll never stop improving my armor.
Best Regards Kainan
-
 1
1
-
-
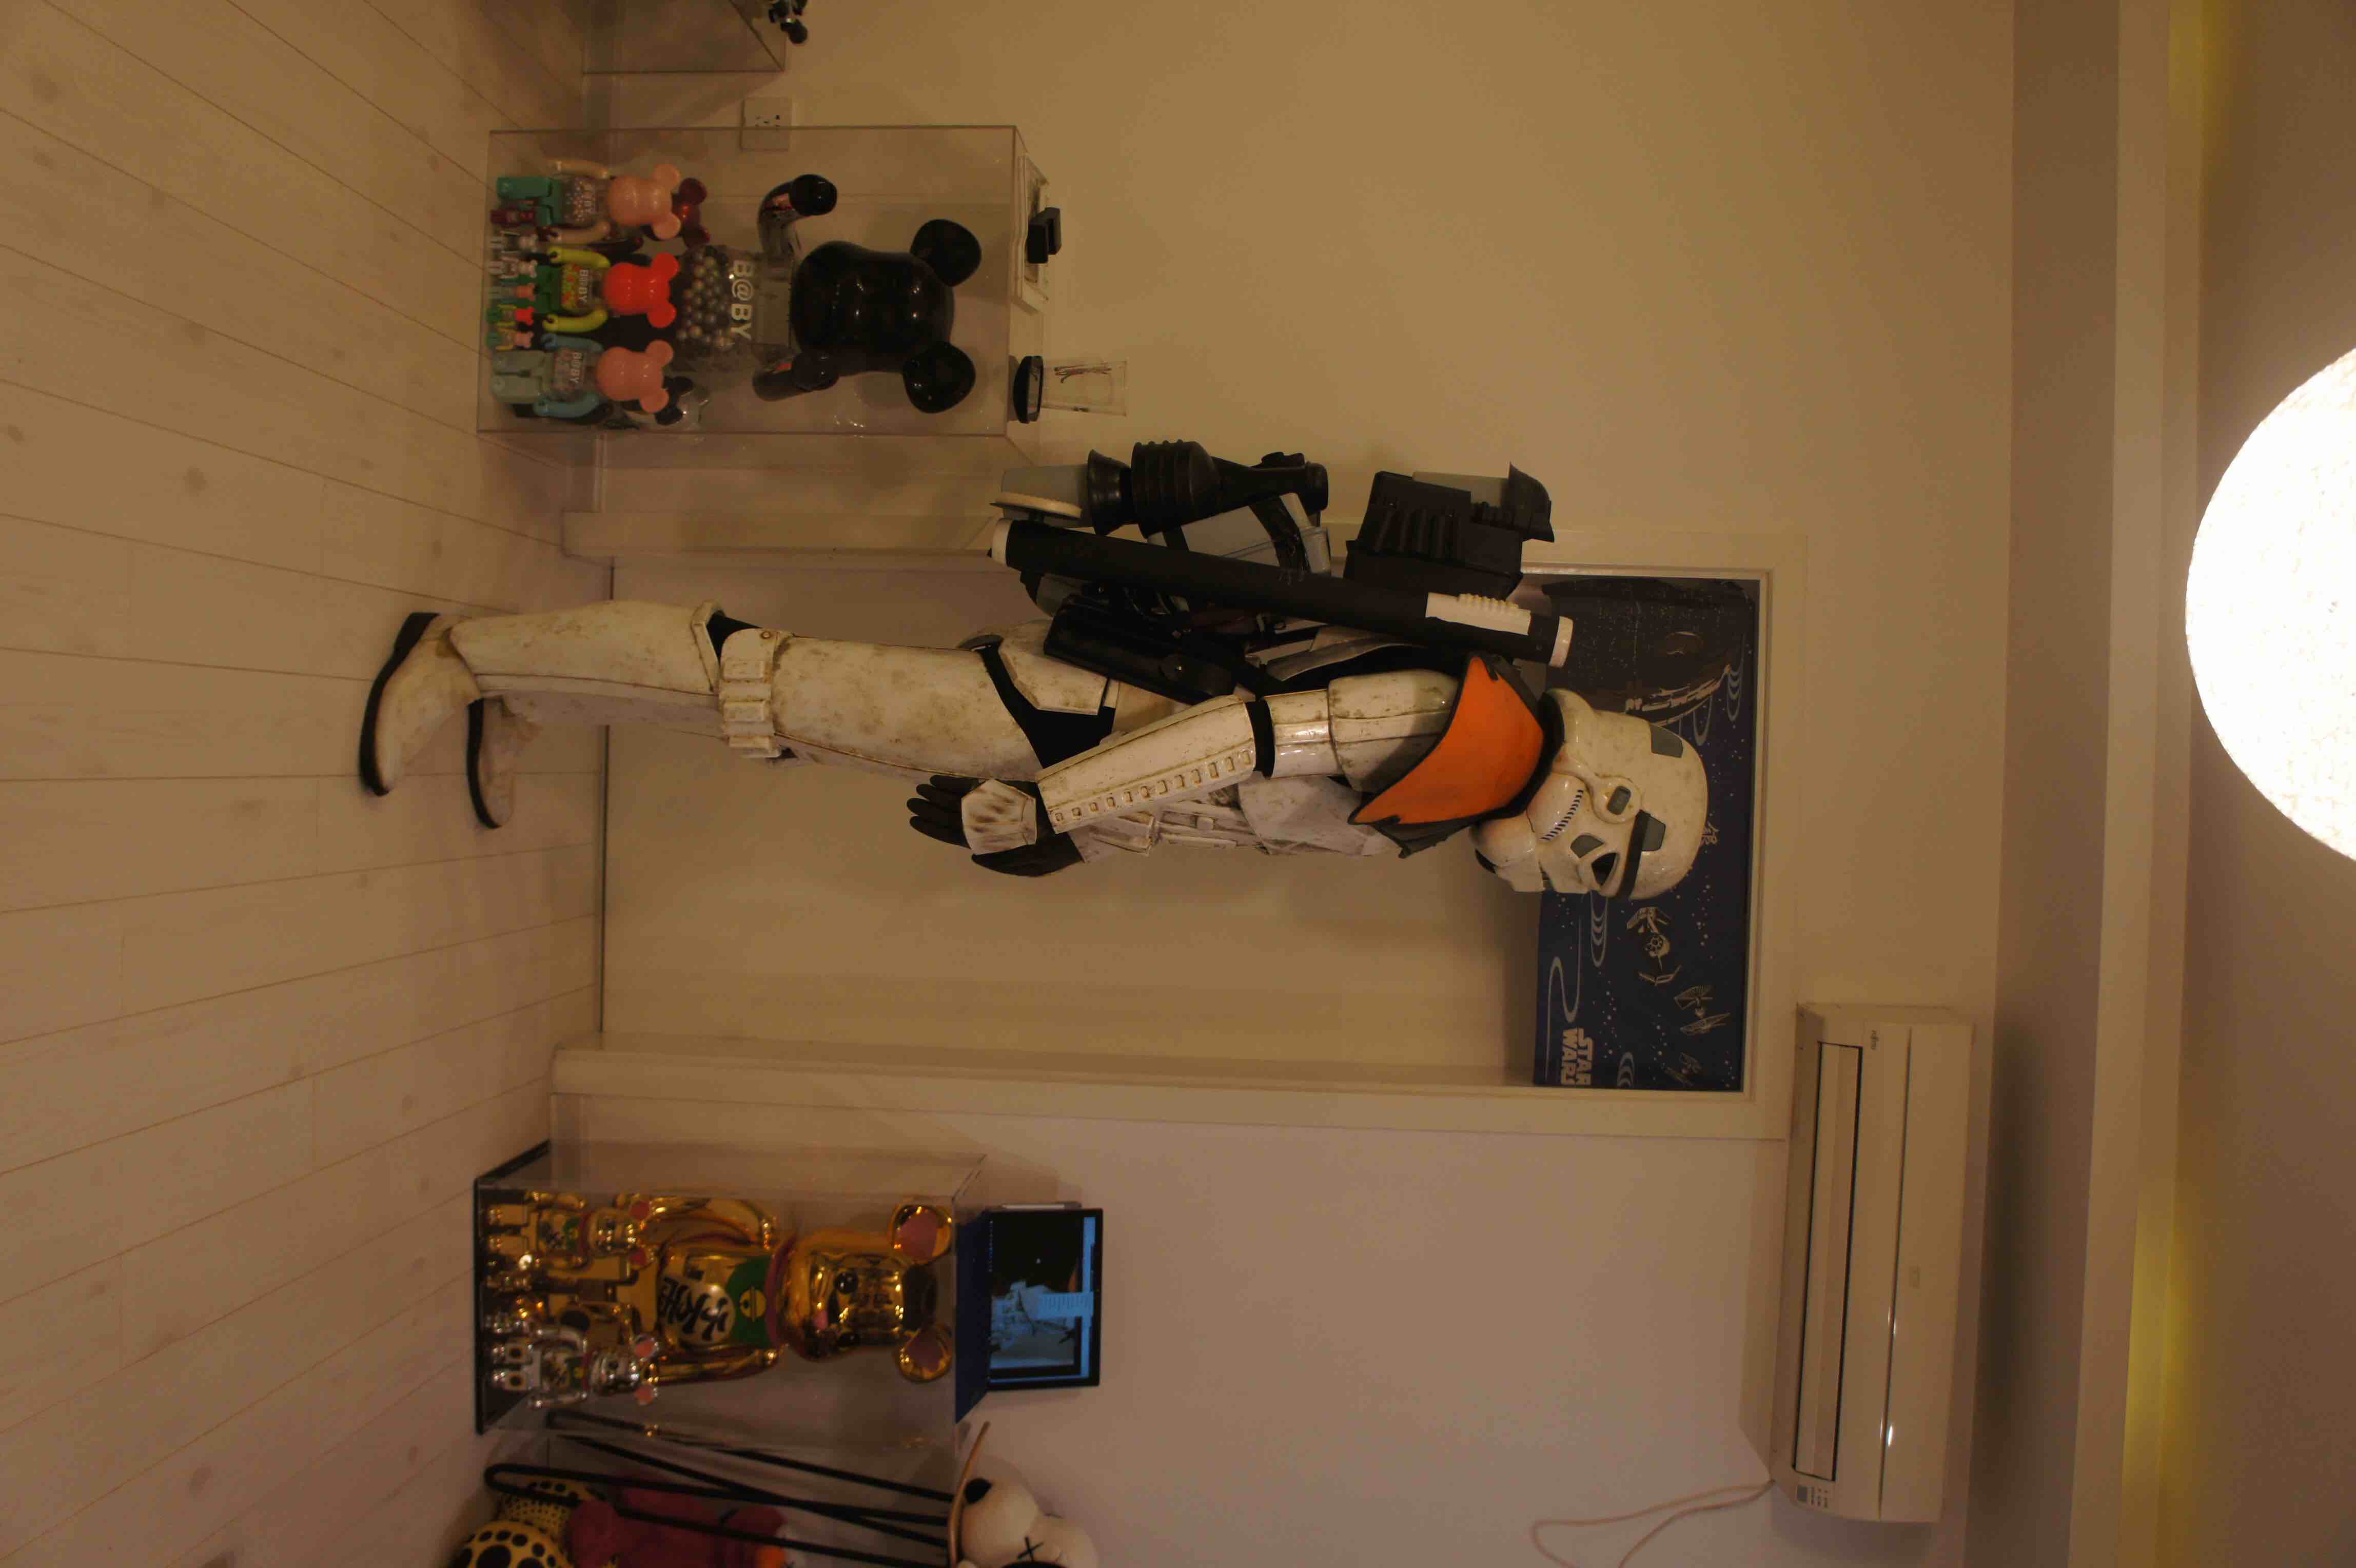
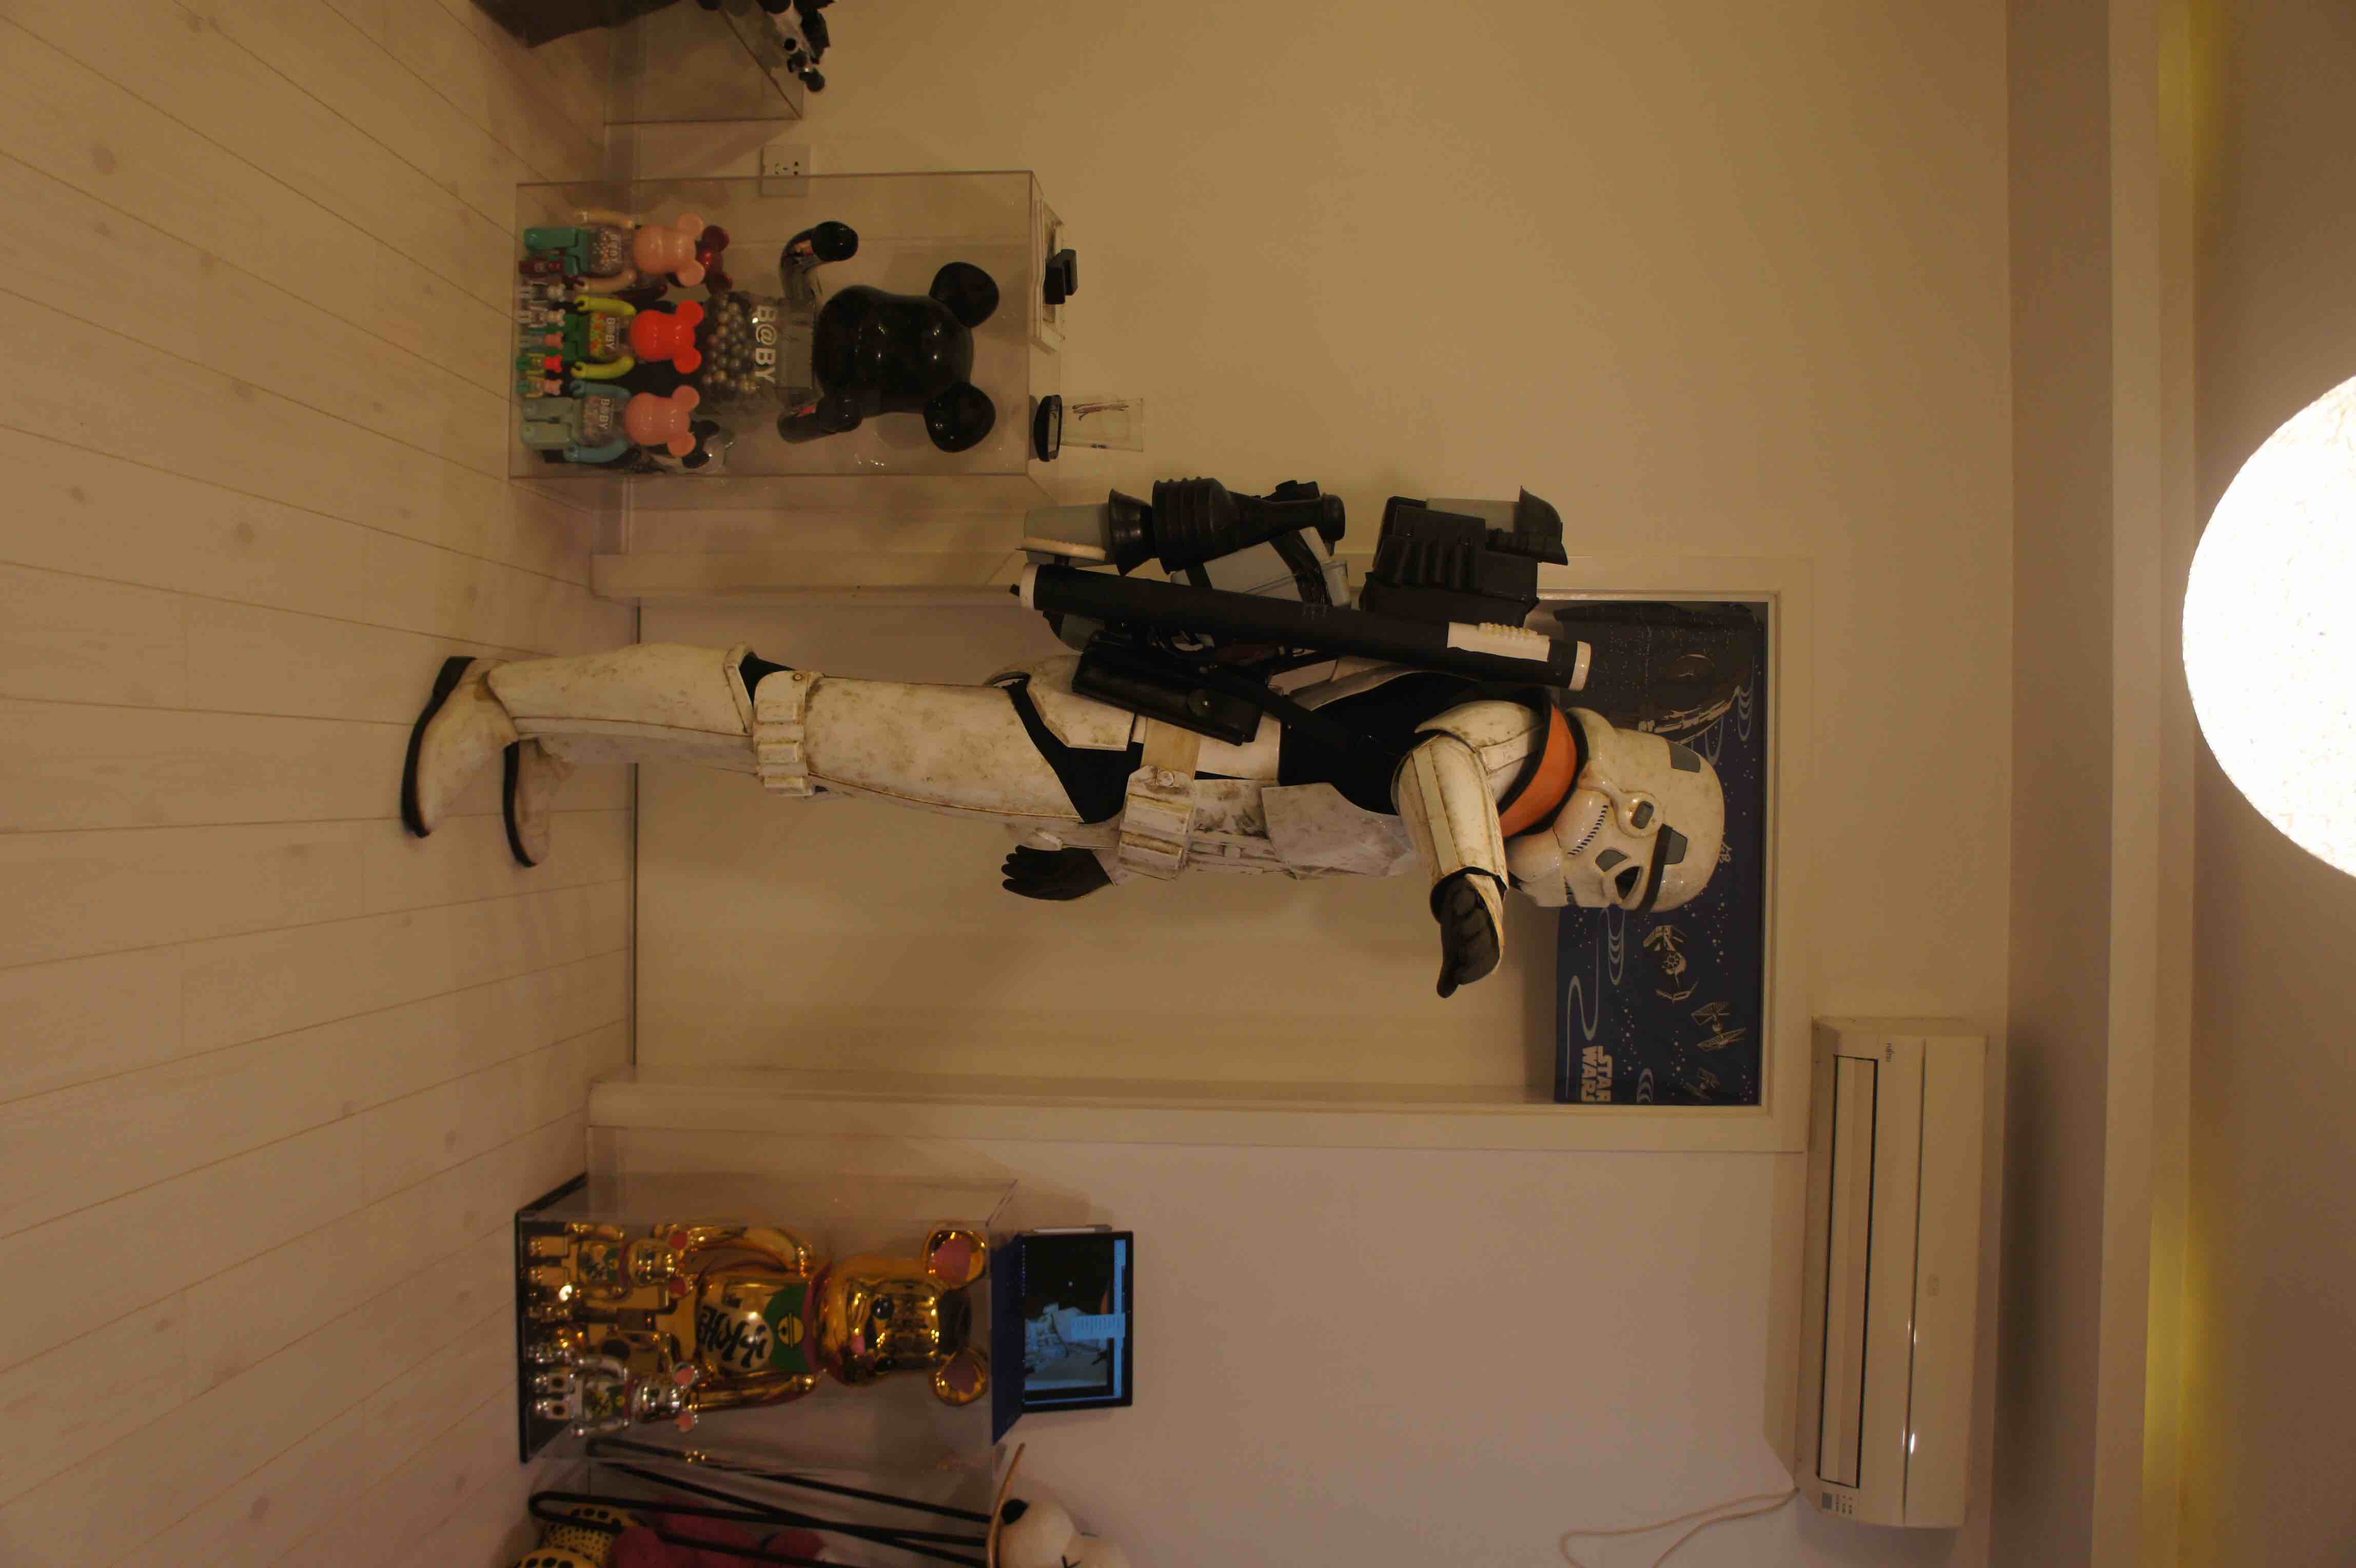
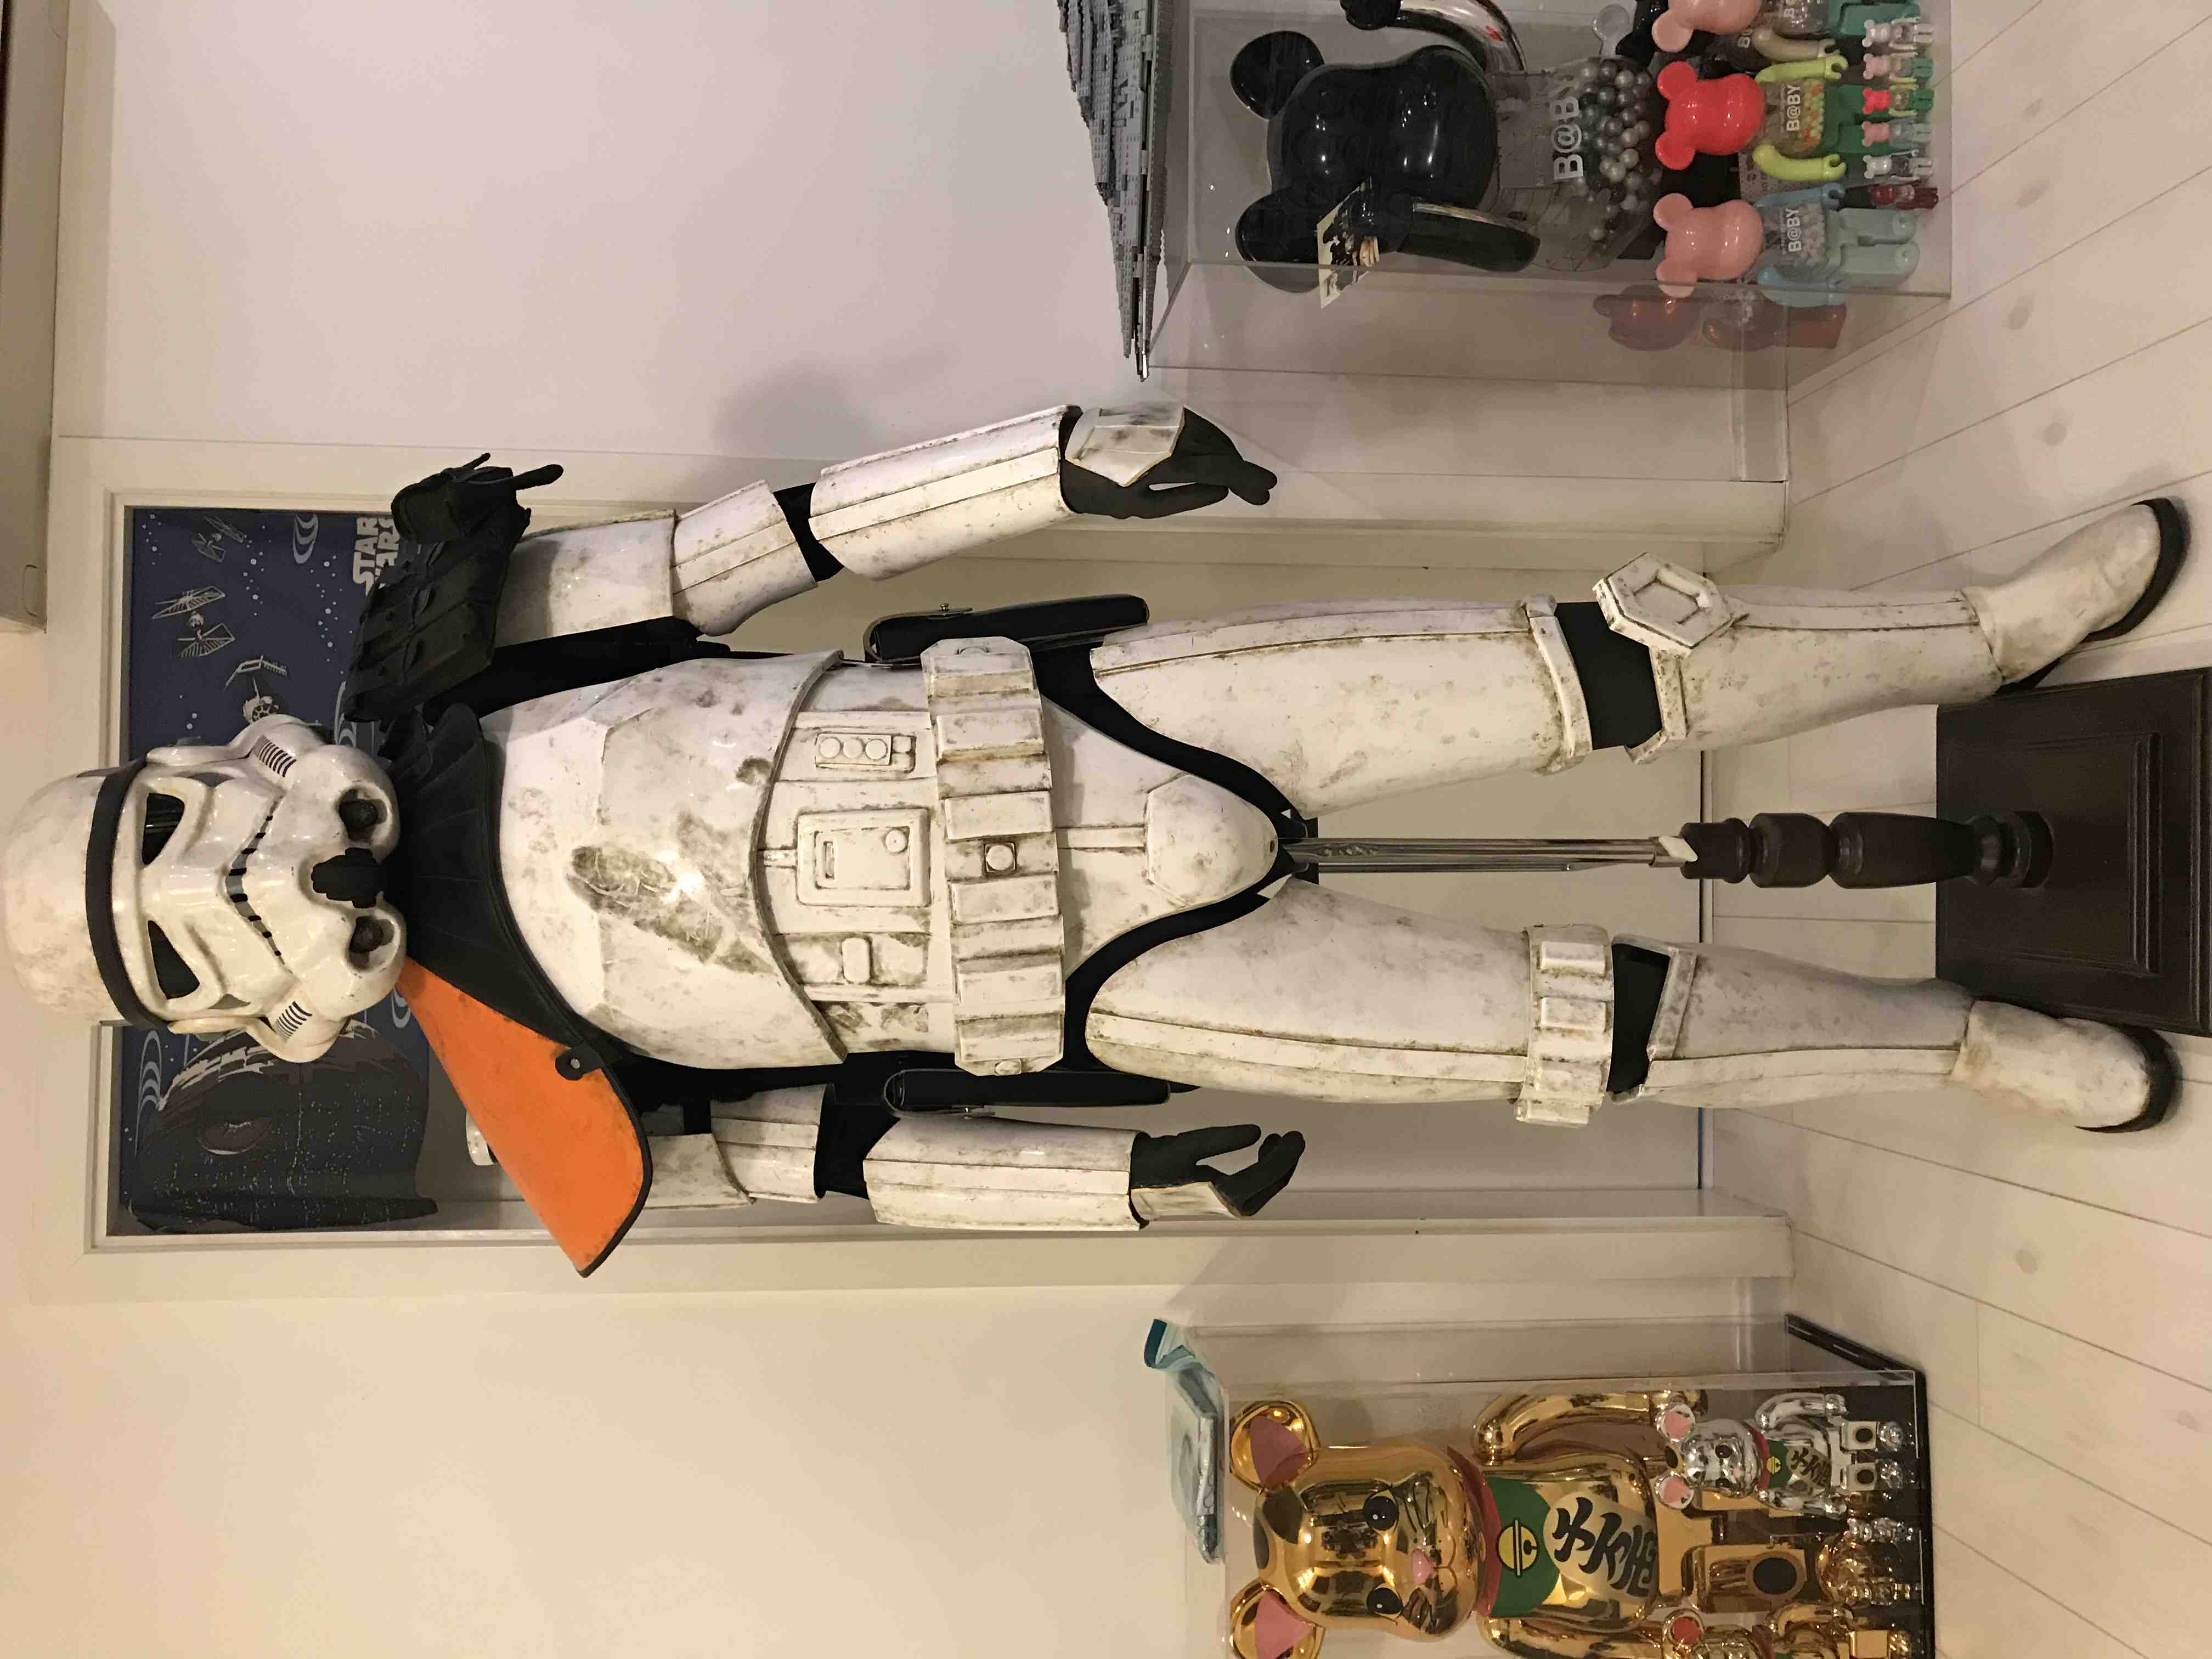
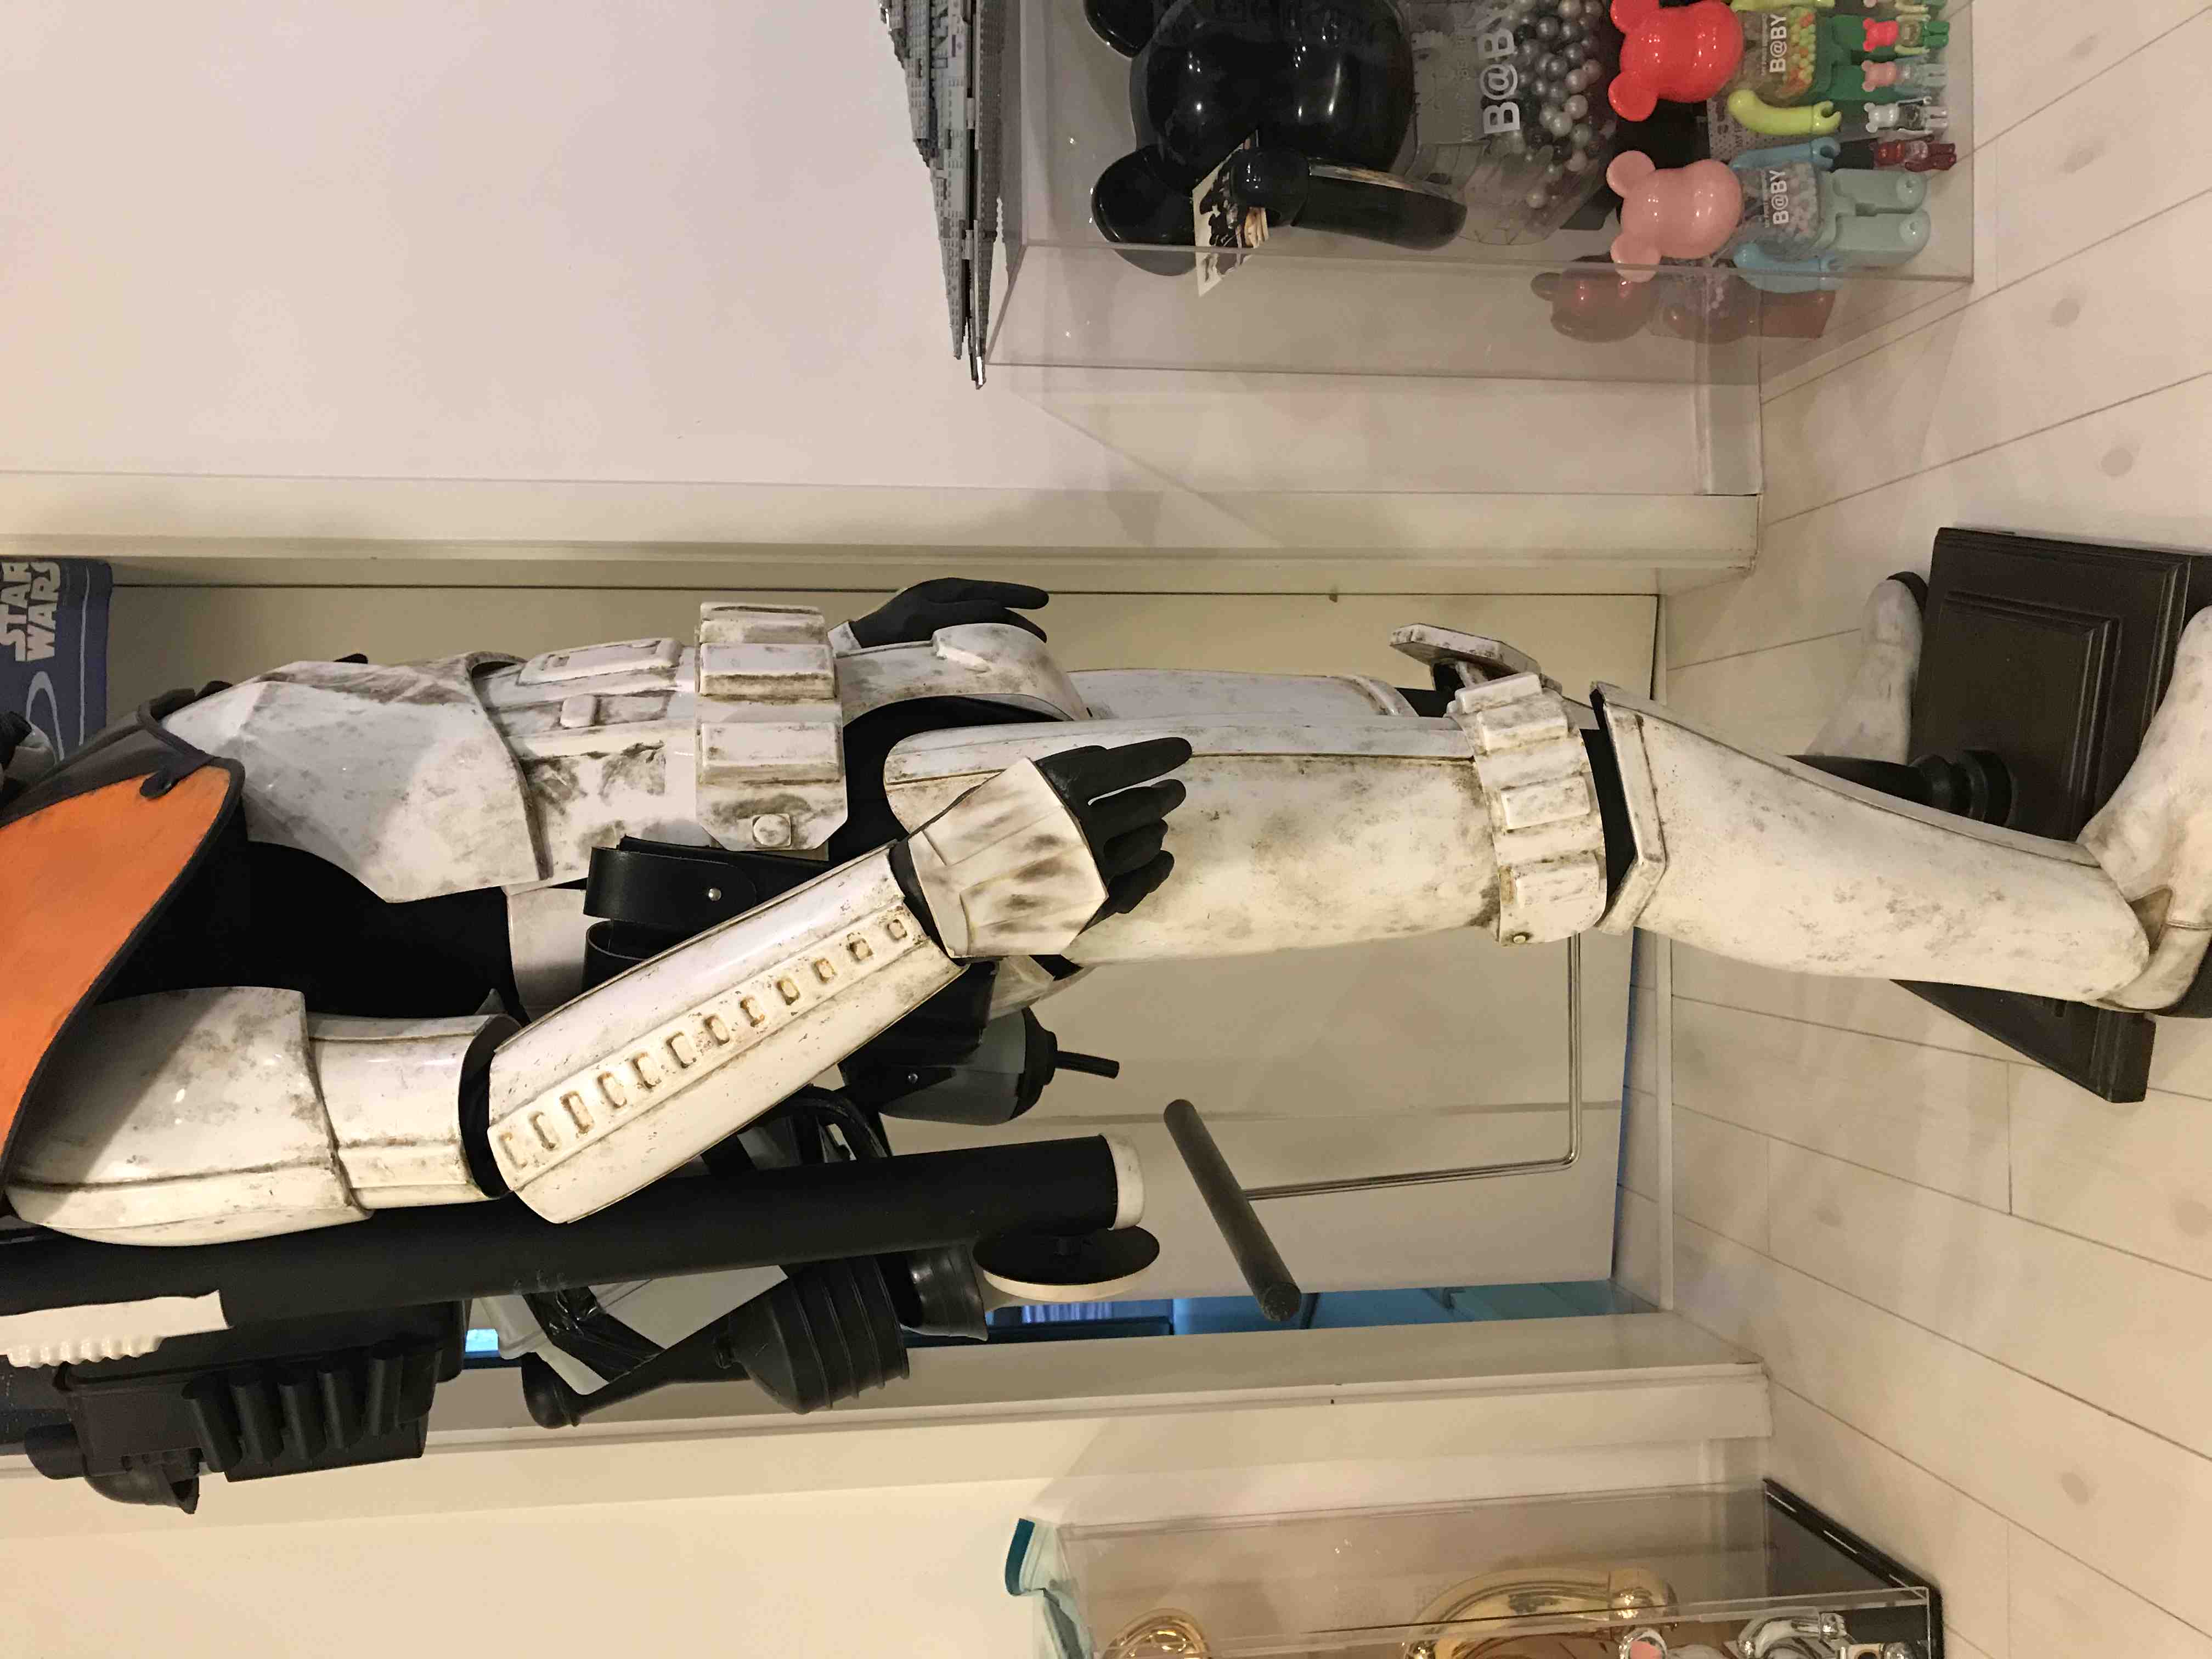
Hi Bigwam! Thank you for your advices and encouragement. I started working at once, here are my new pics。
Armor completely dressed:

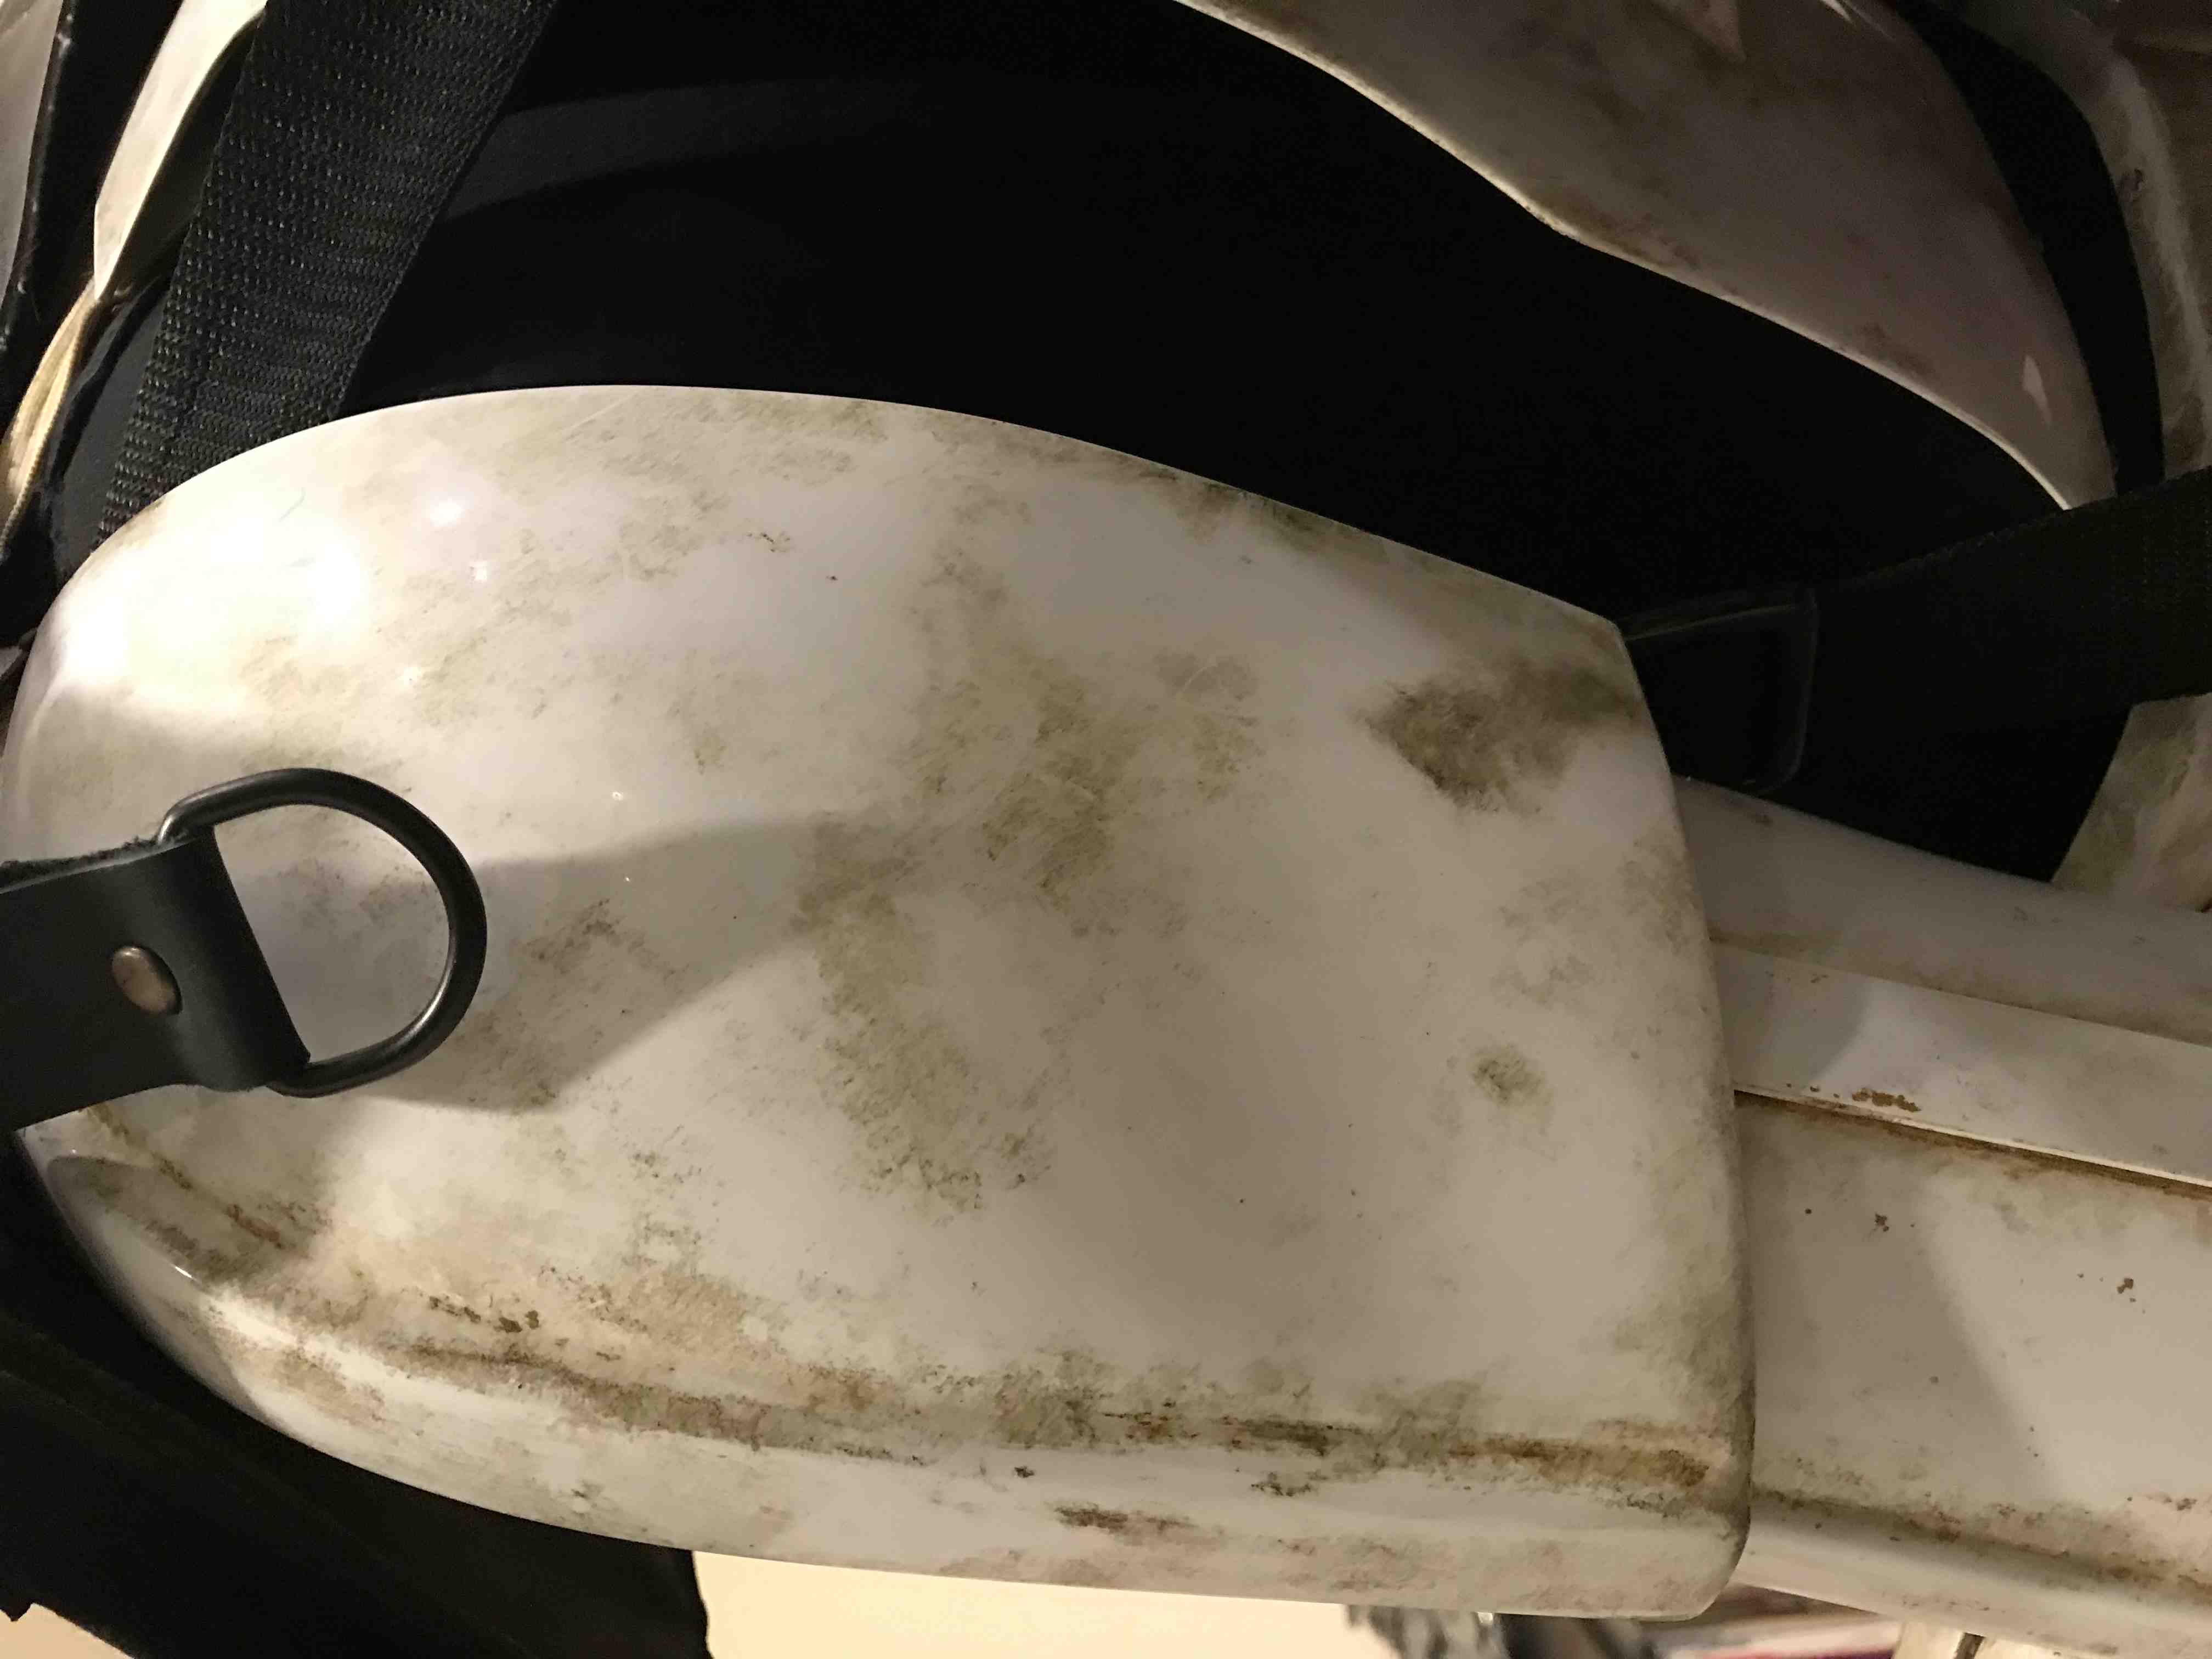
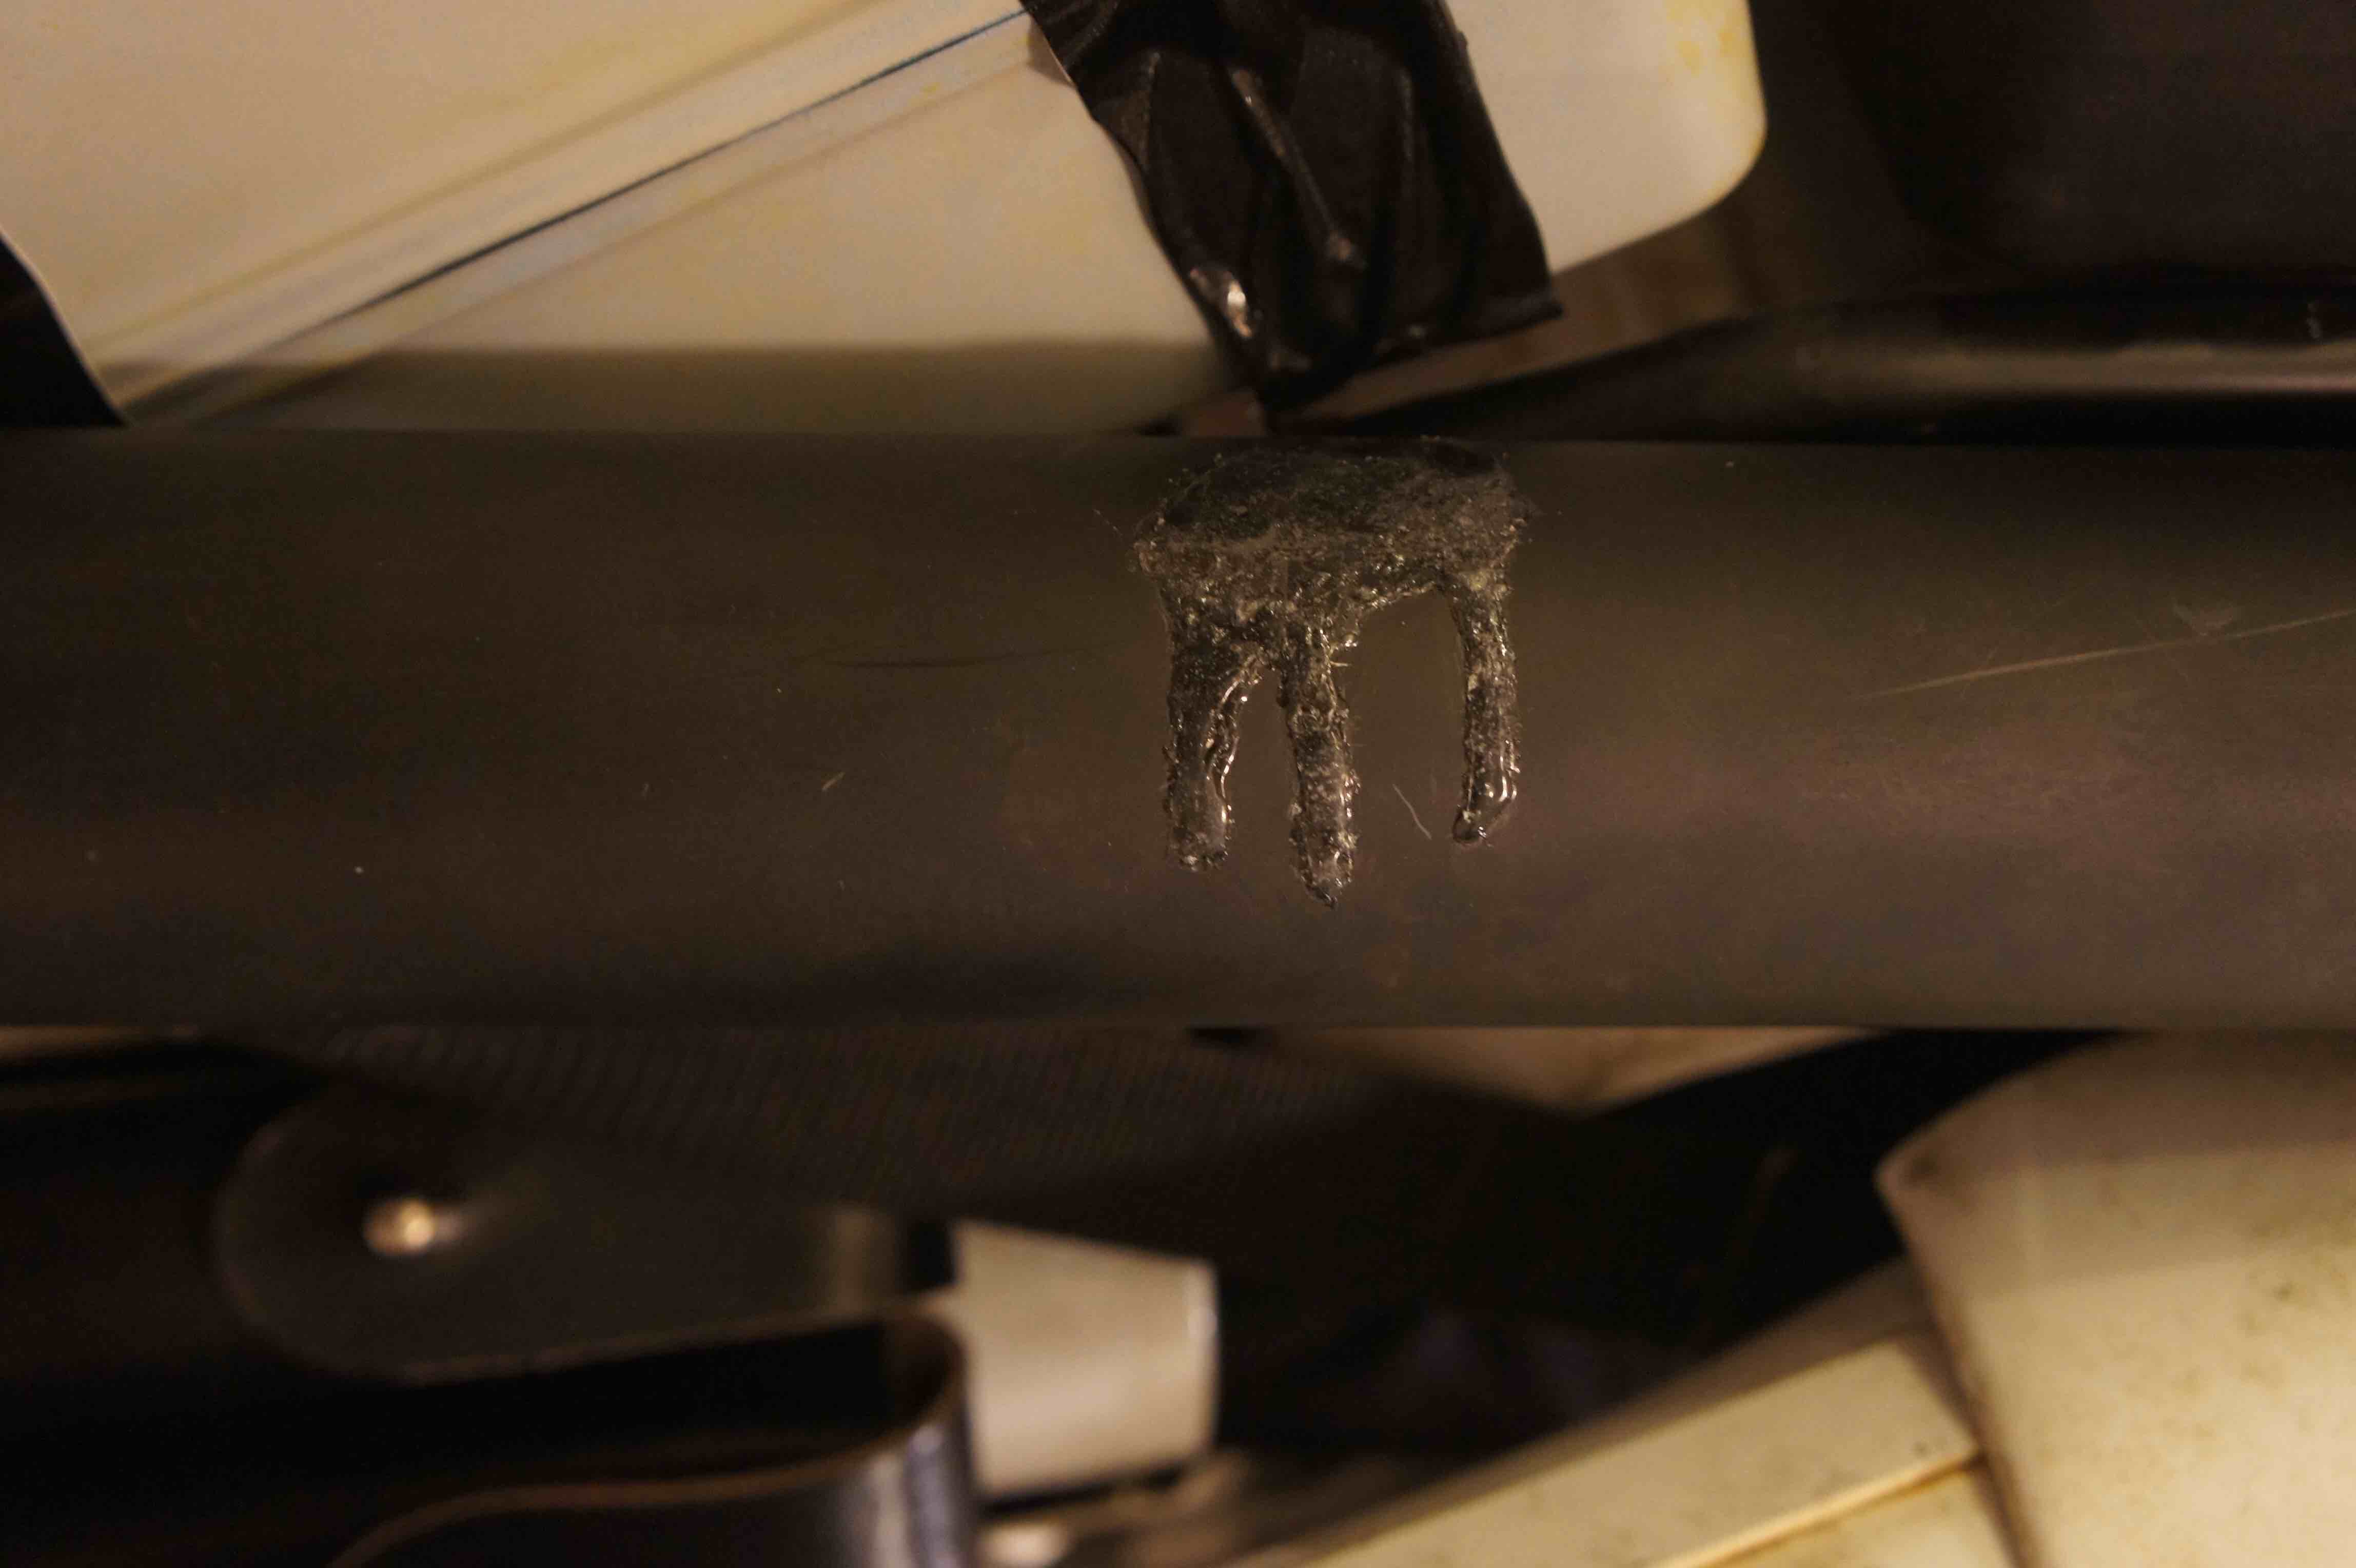
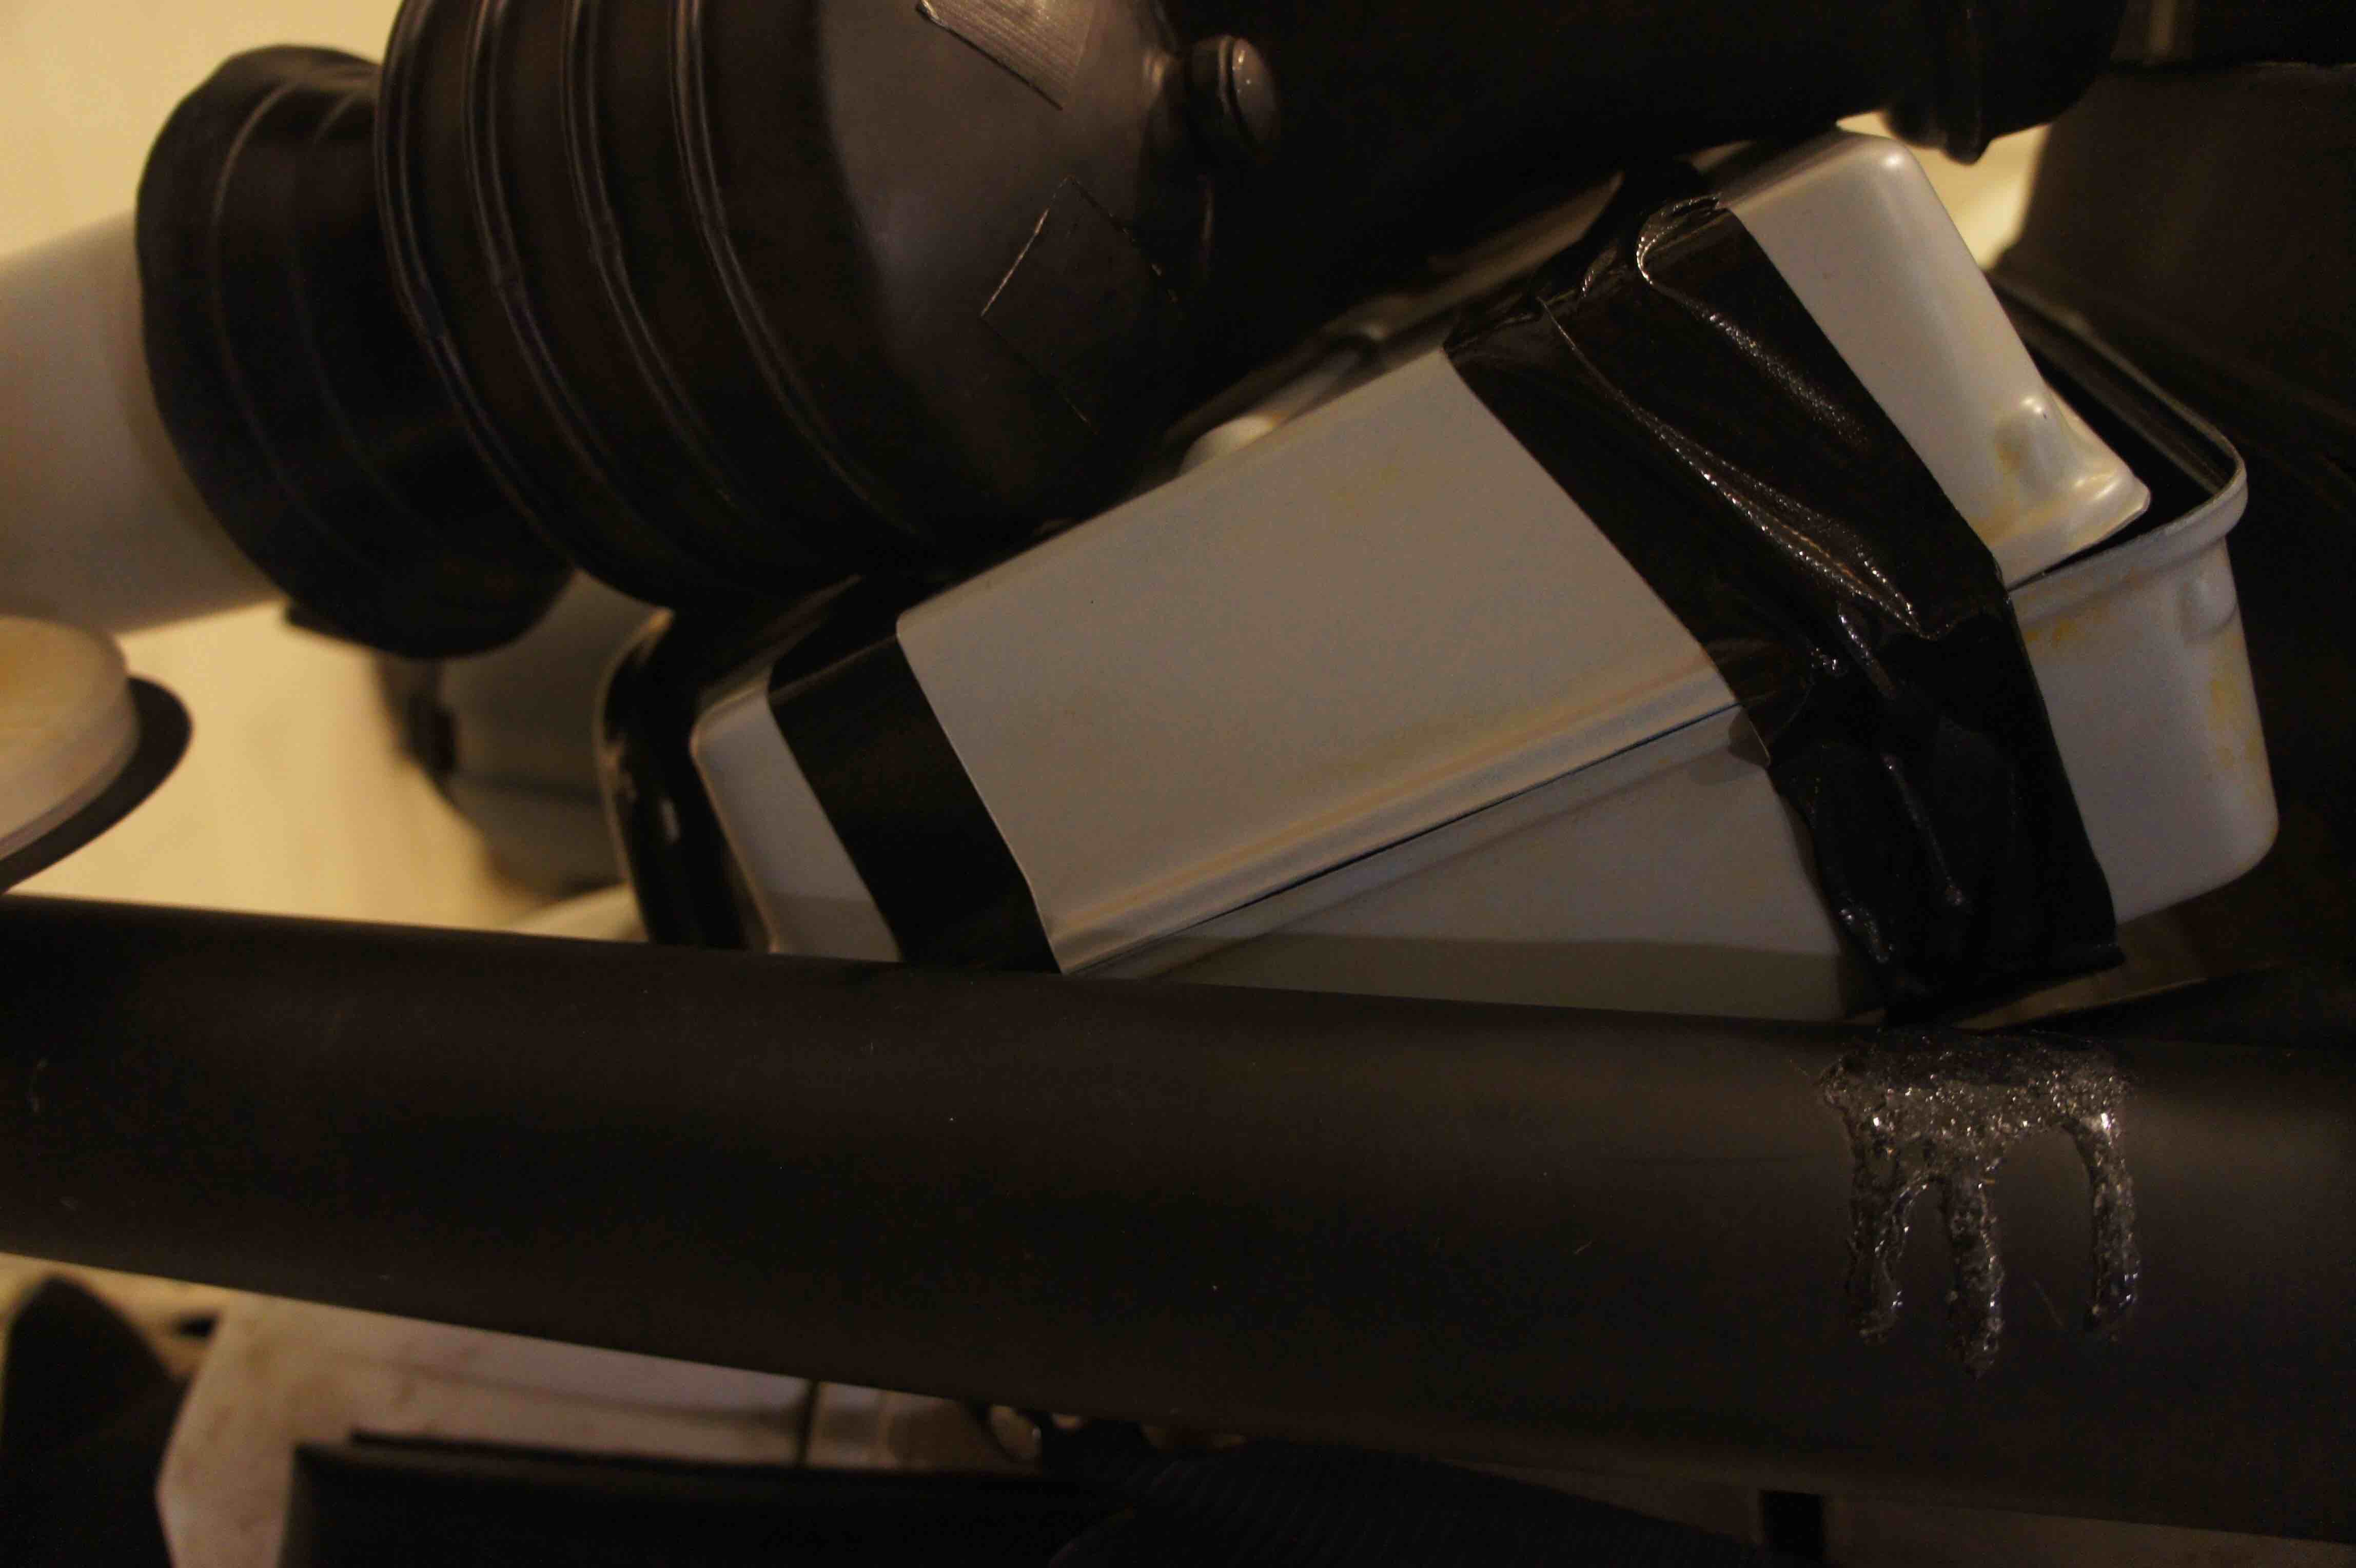
Adding dirt spots:
1. ab plate
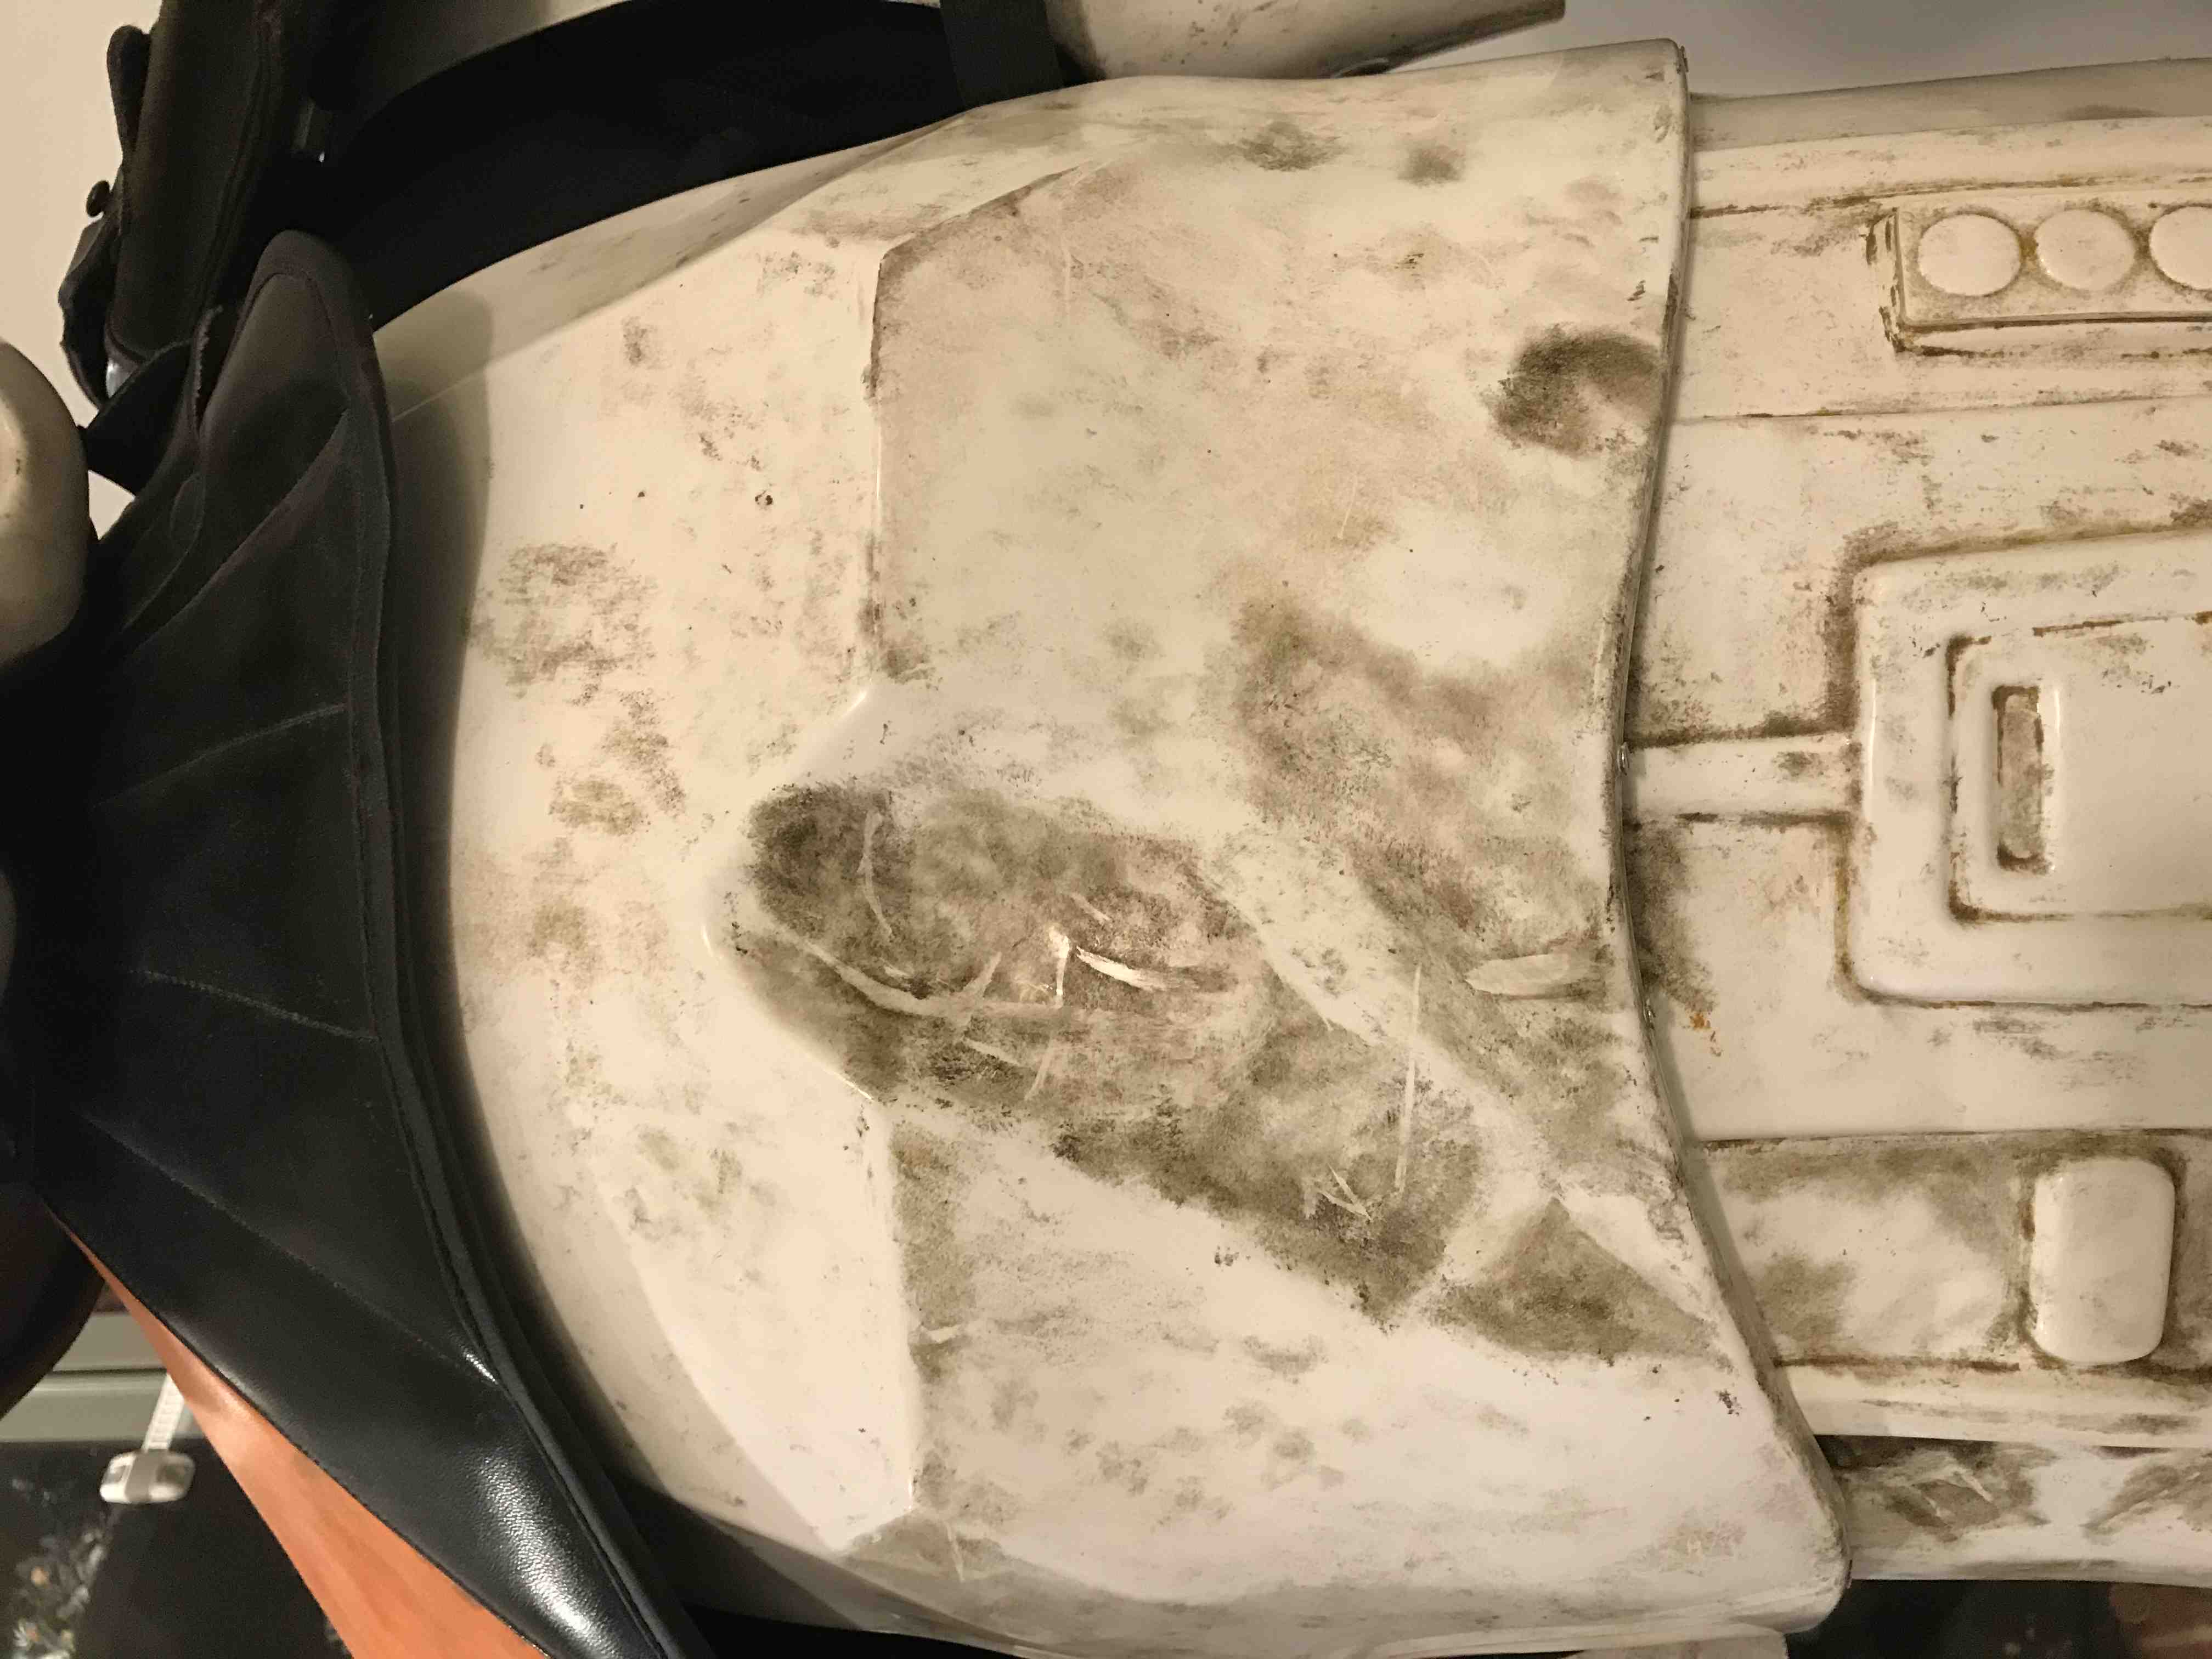
2. backside of the thigh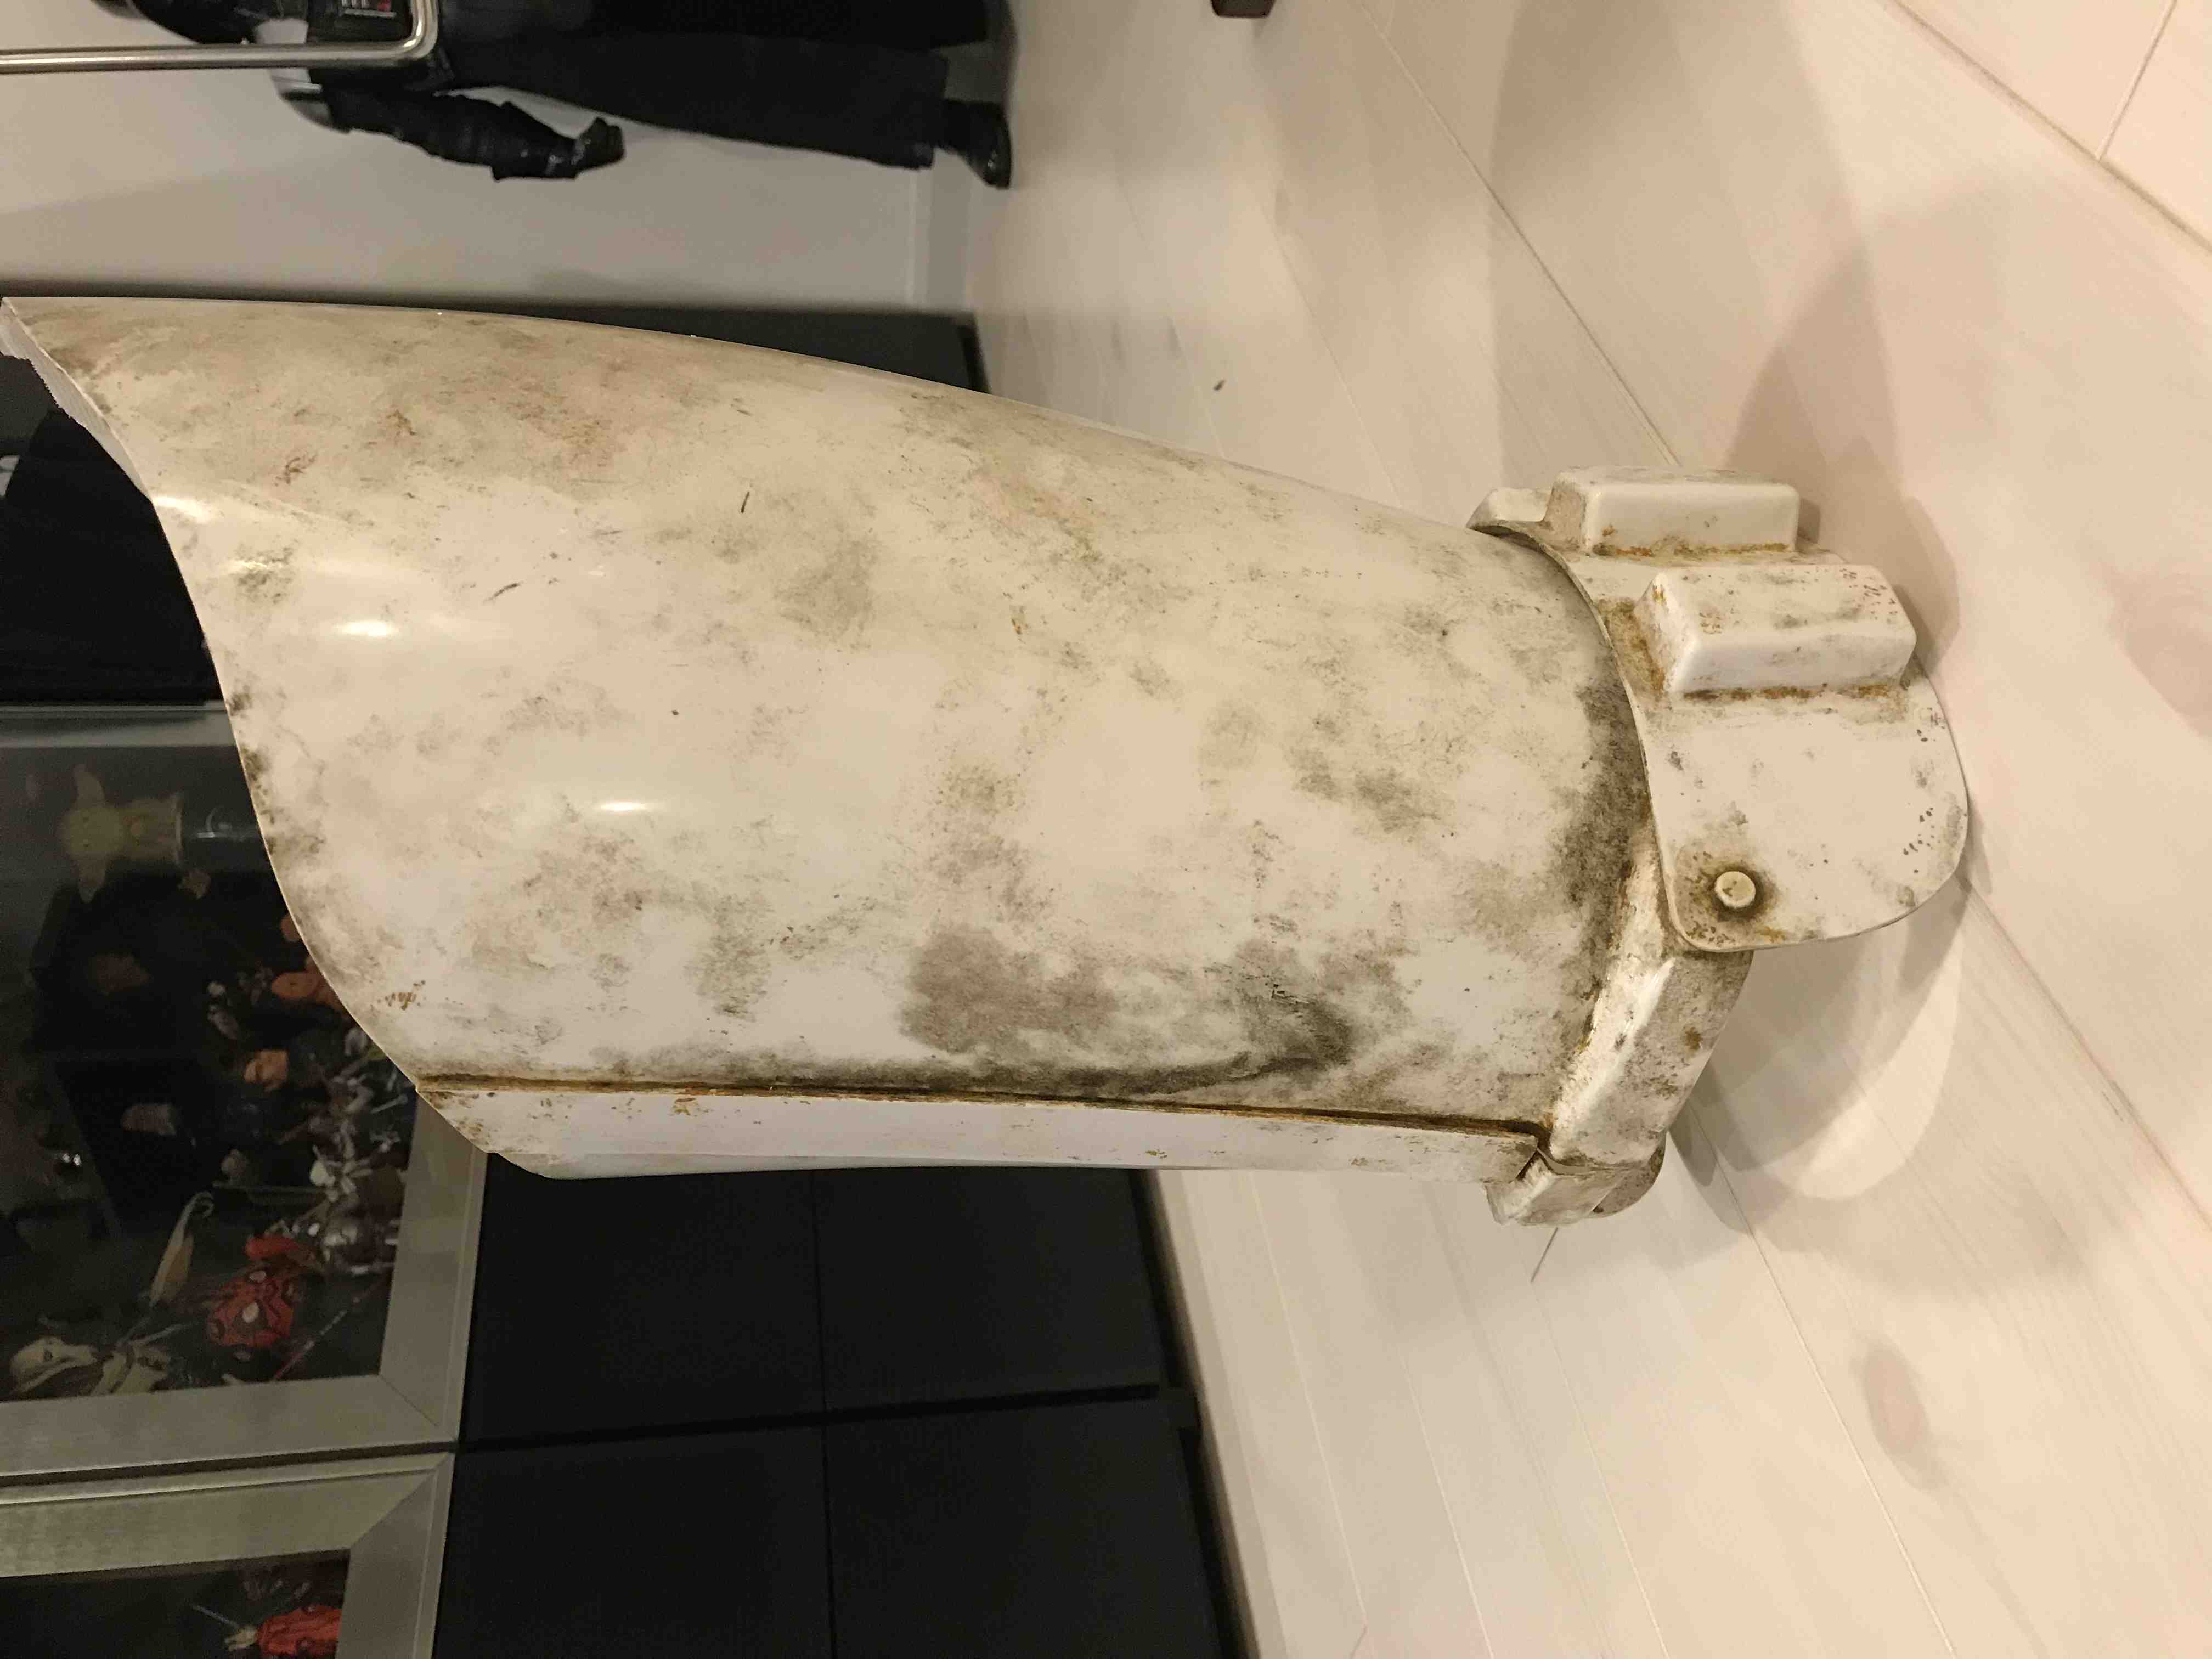
3. right shoulder bell
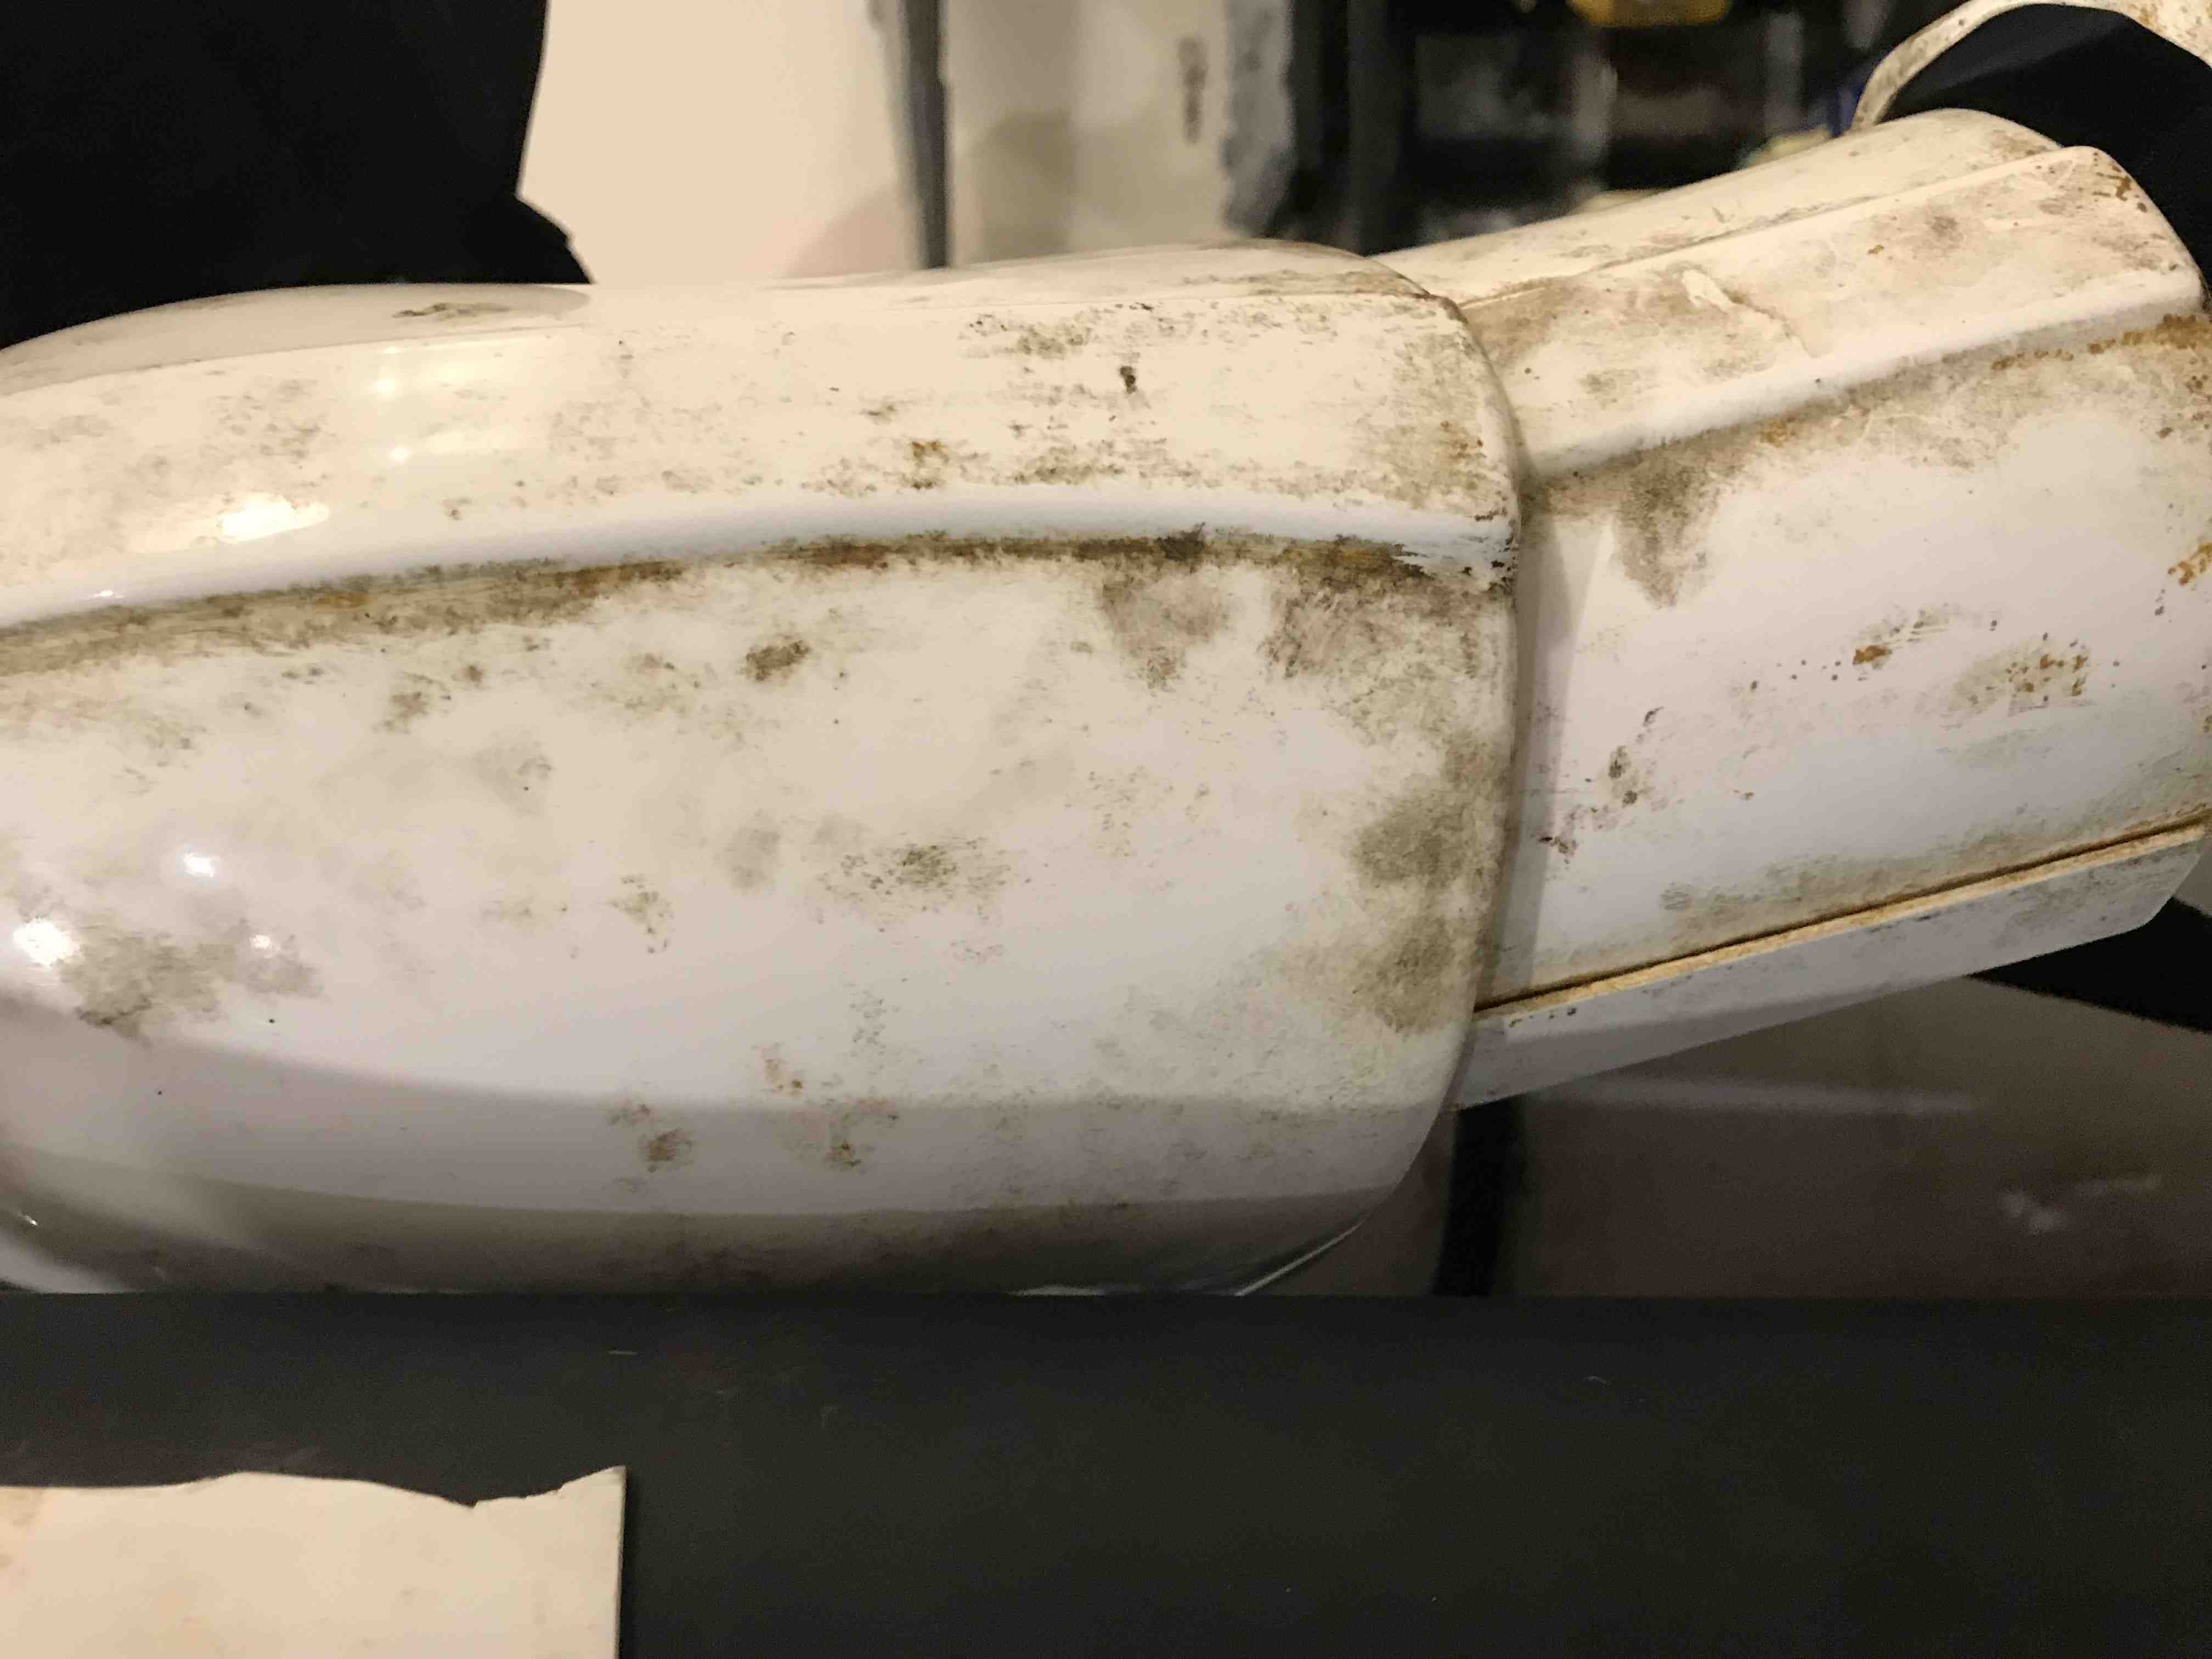
4. letf shoulder bell
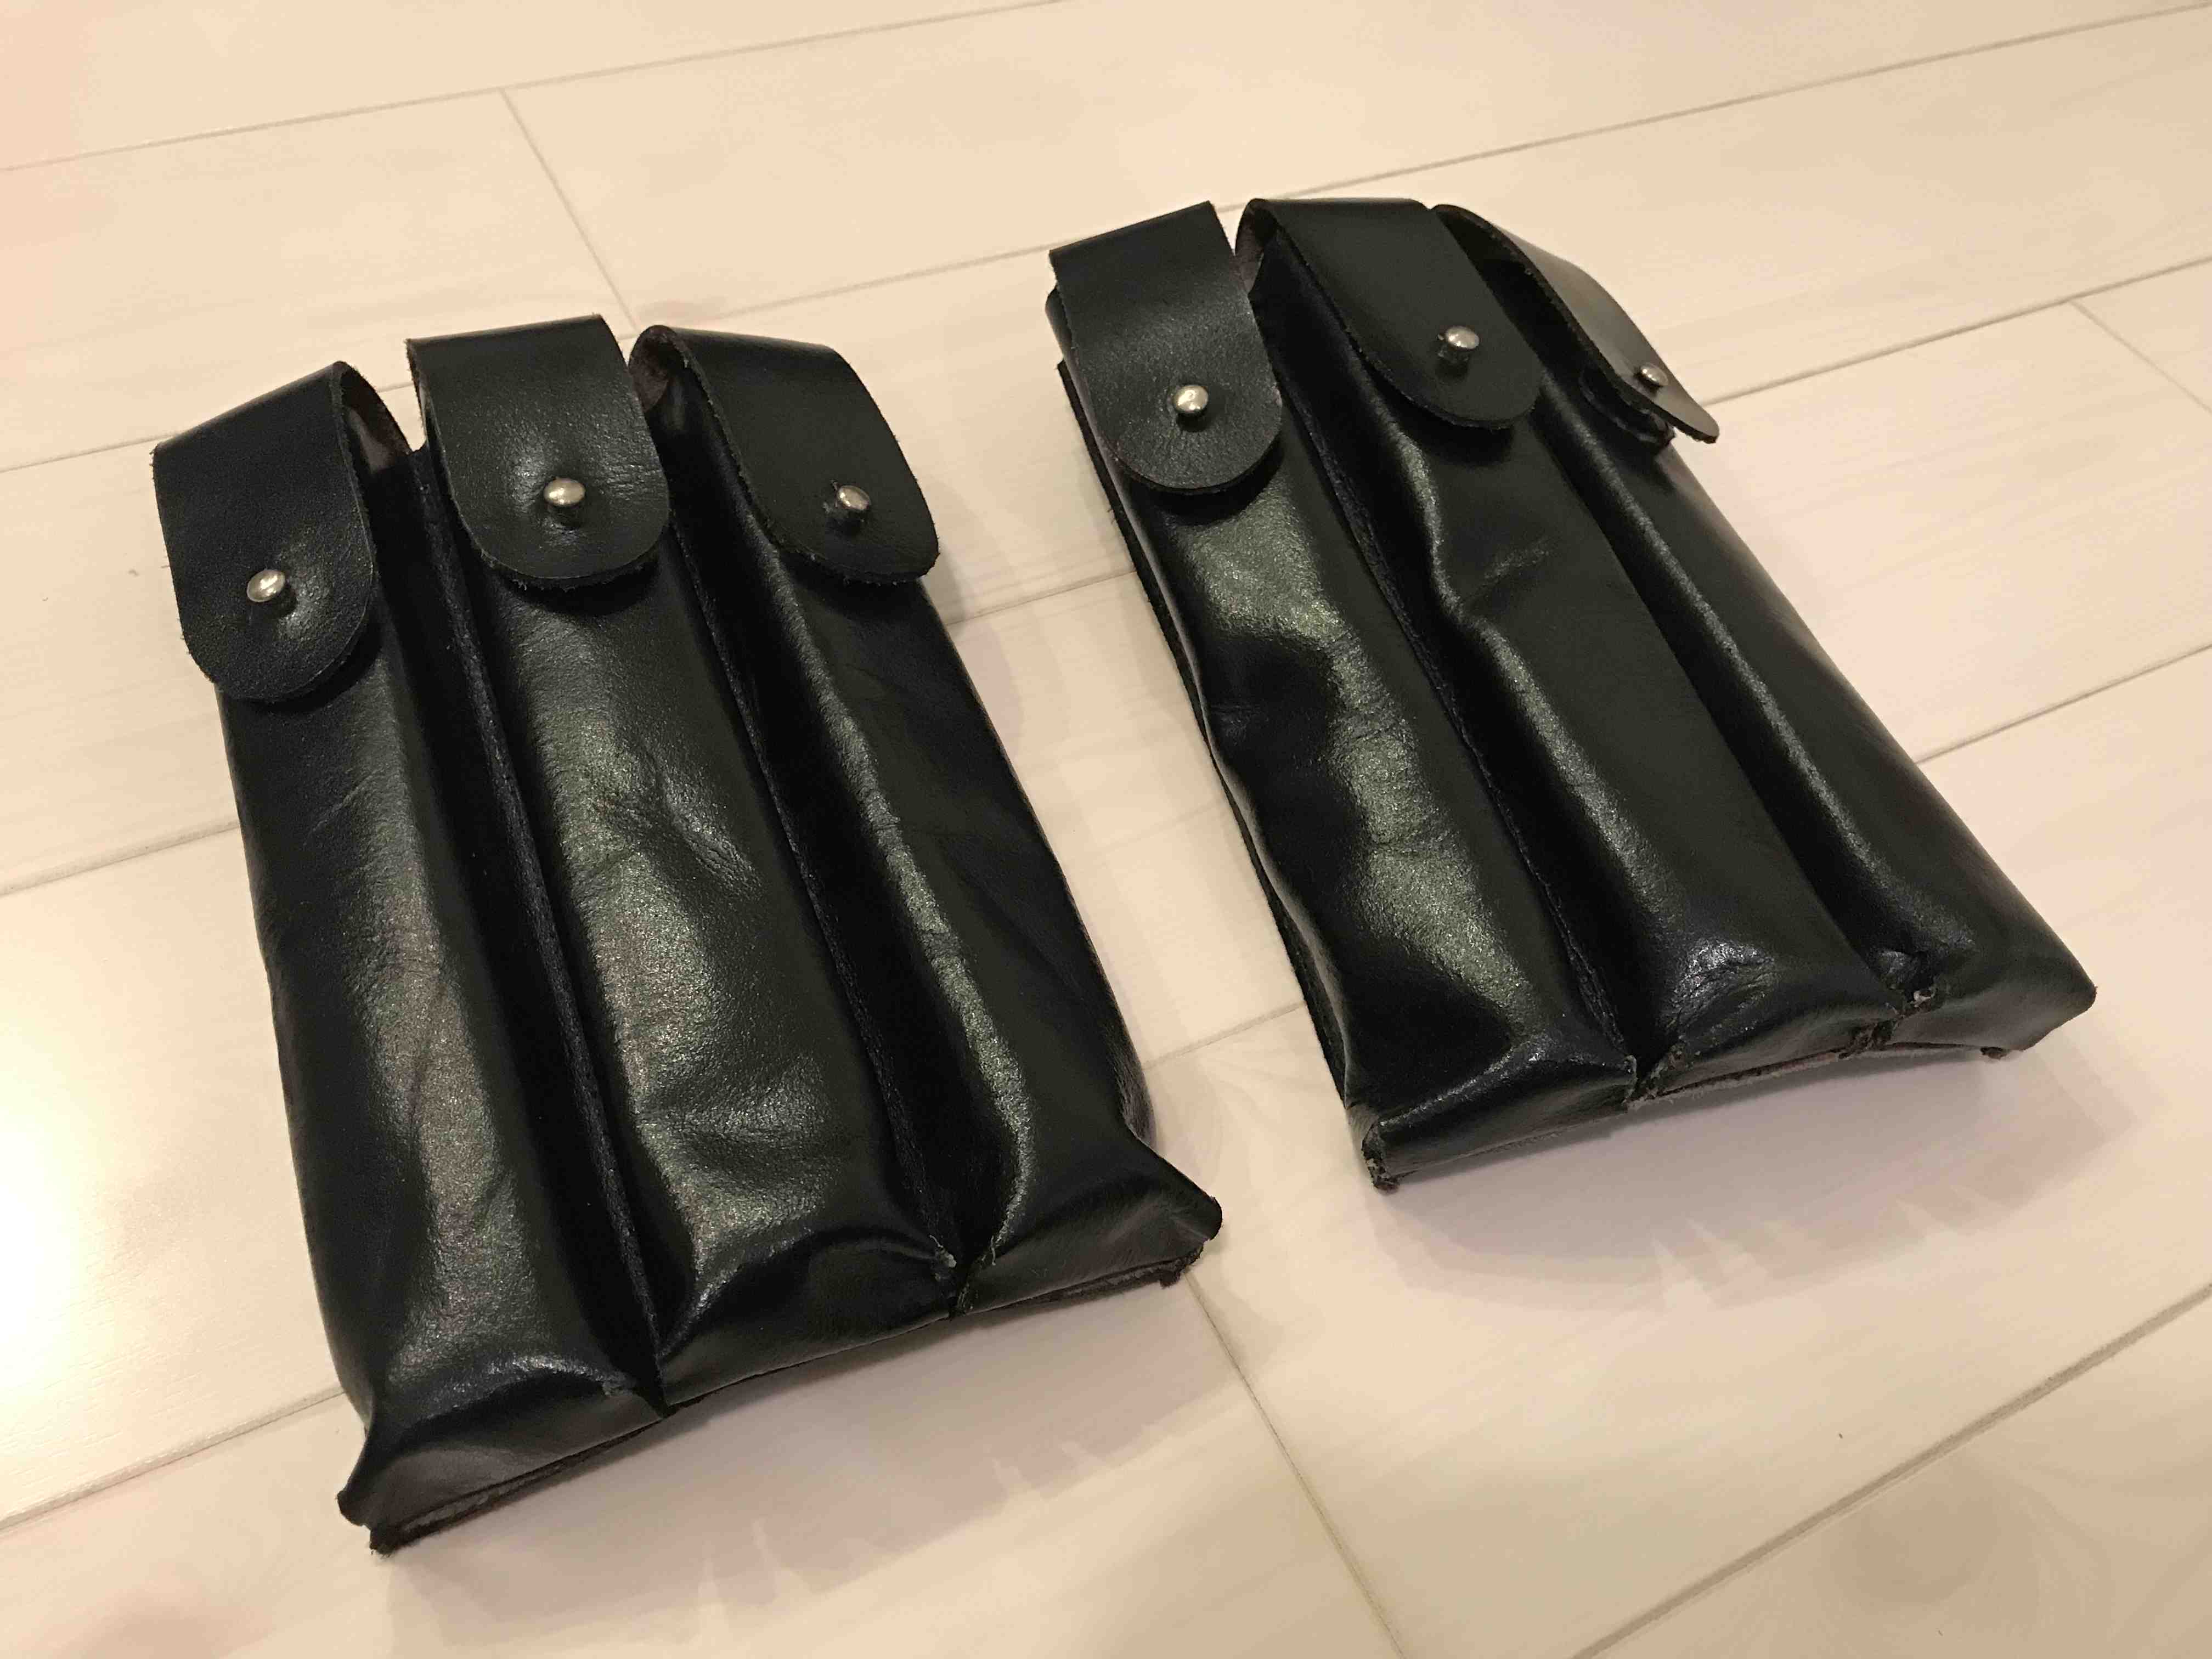
Pouches:
1.blacken the cut edges
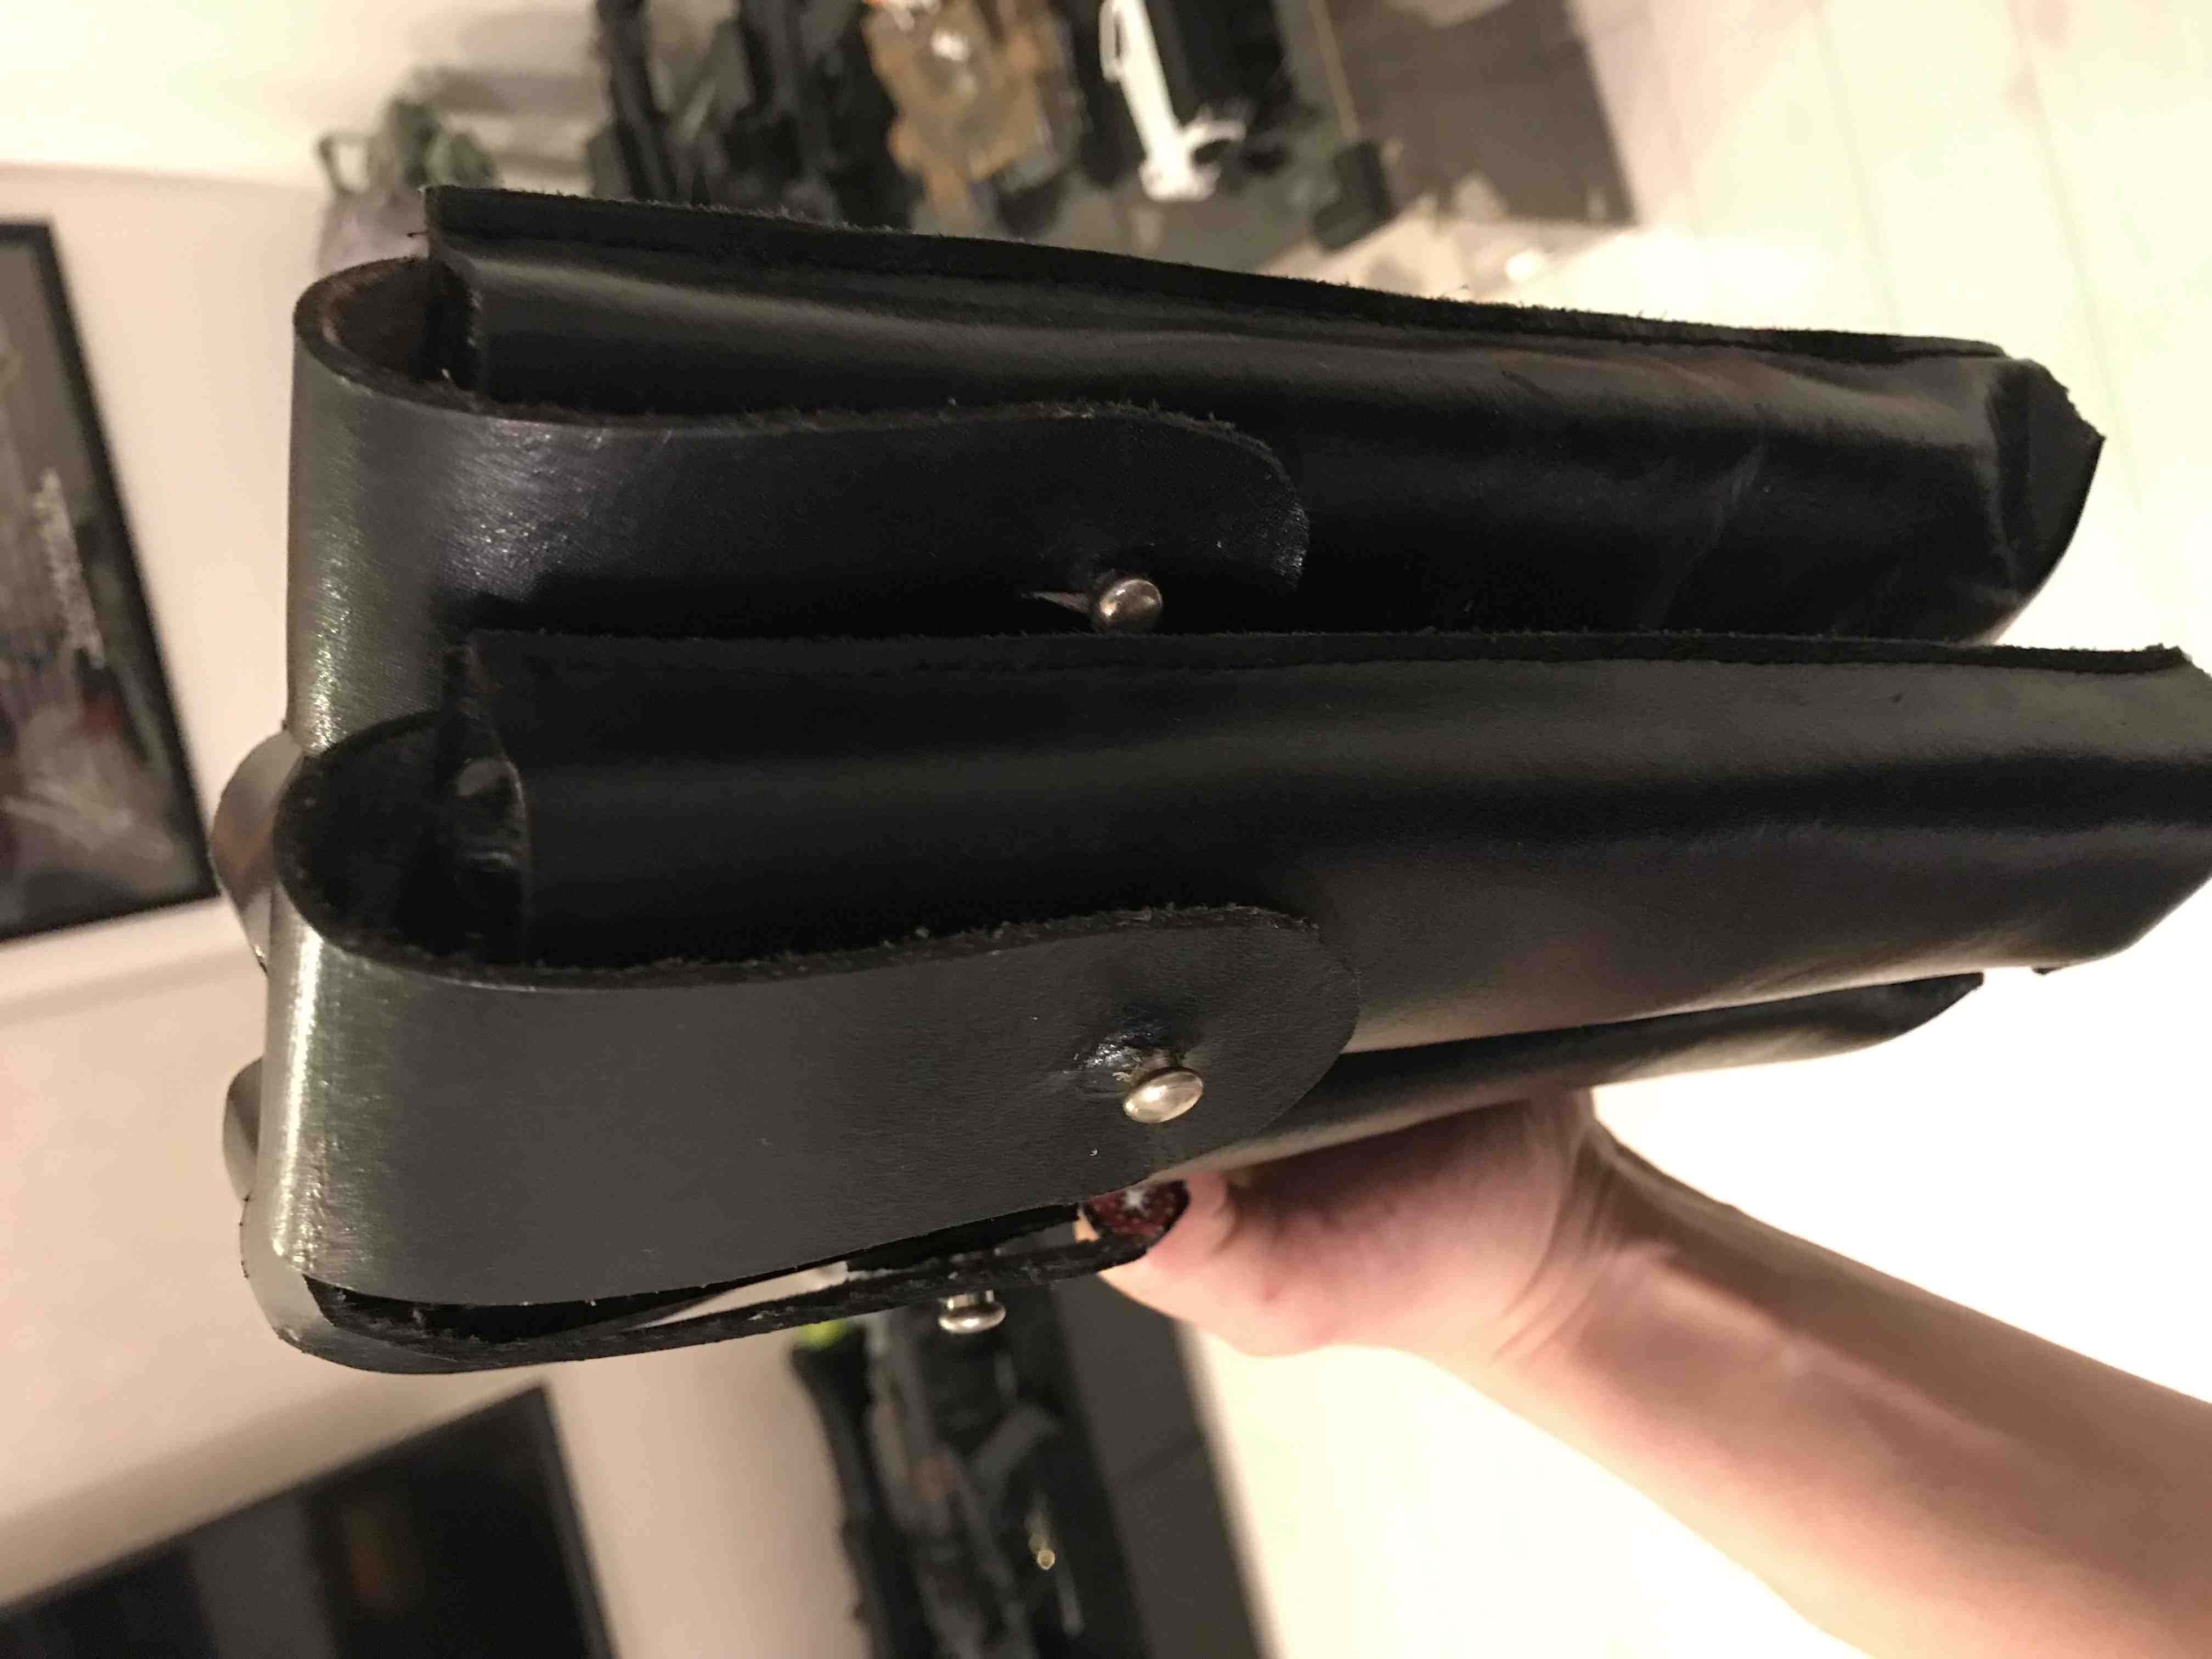
2. crumpled surface
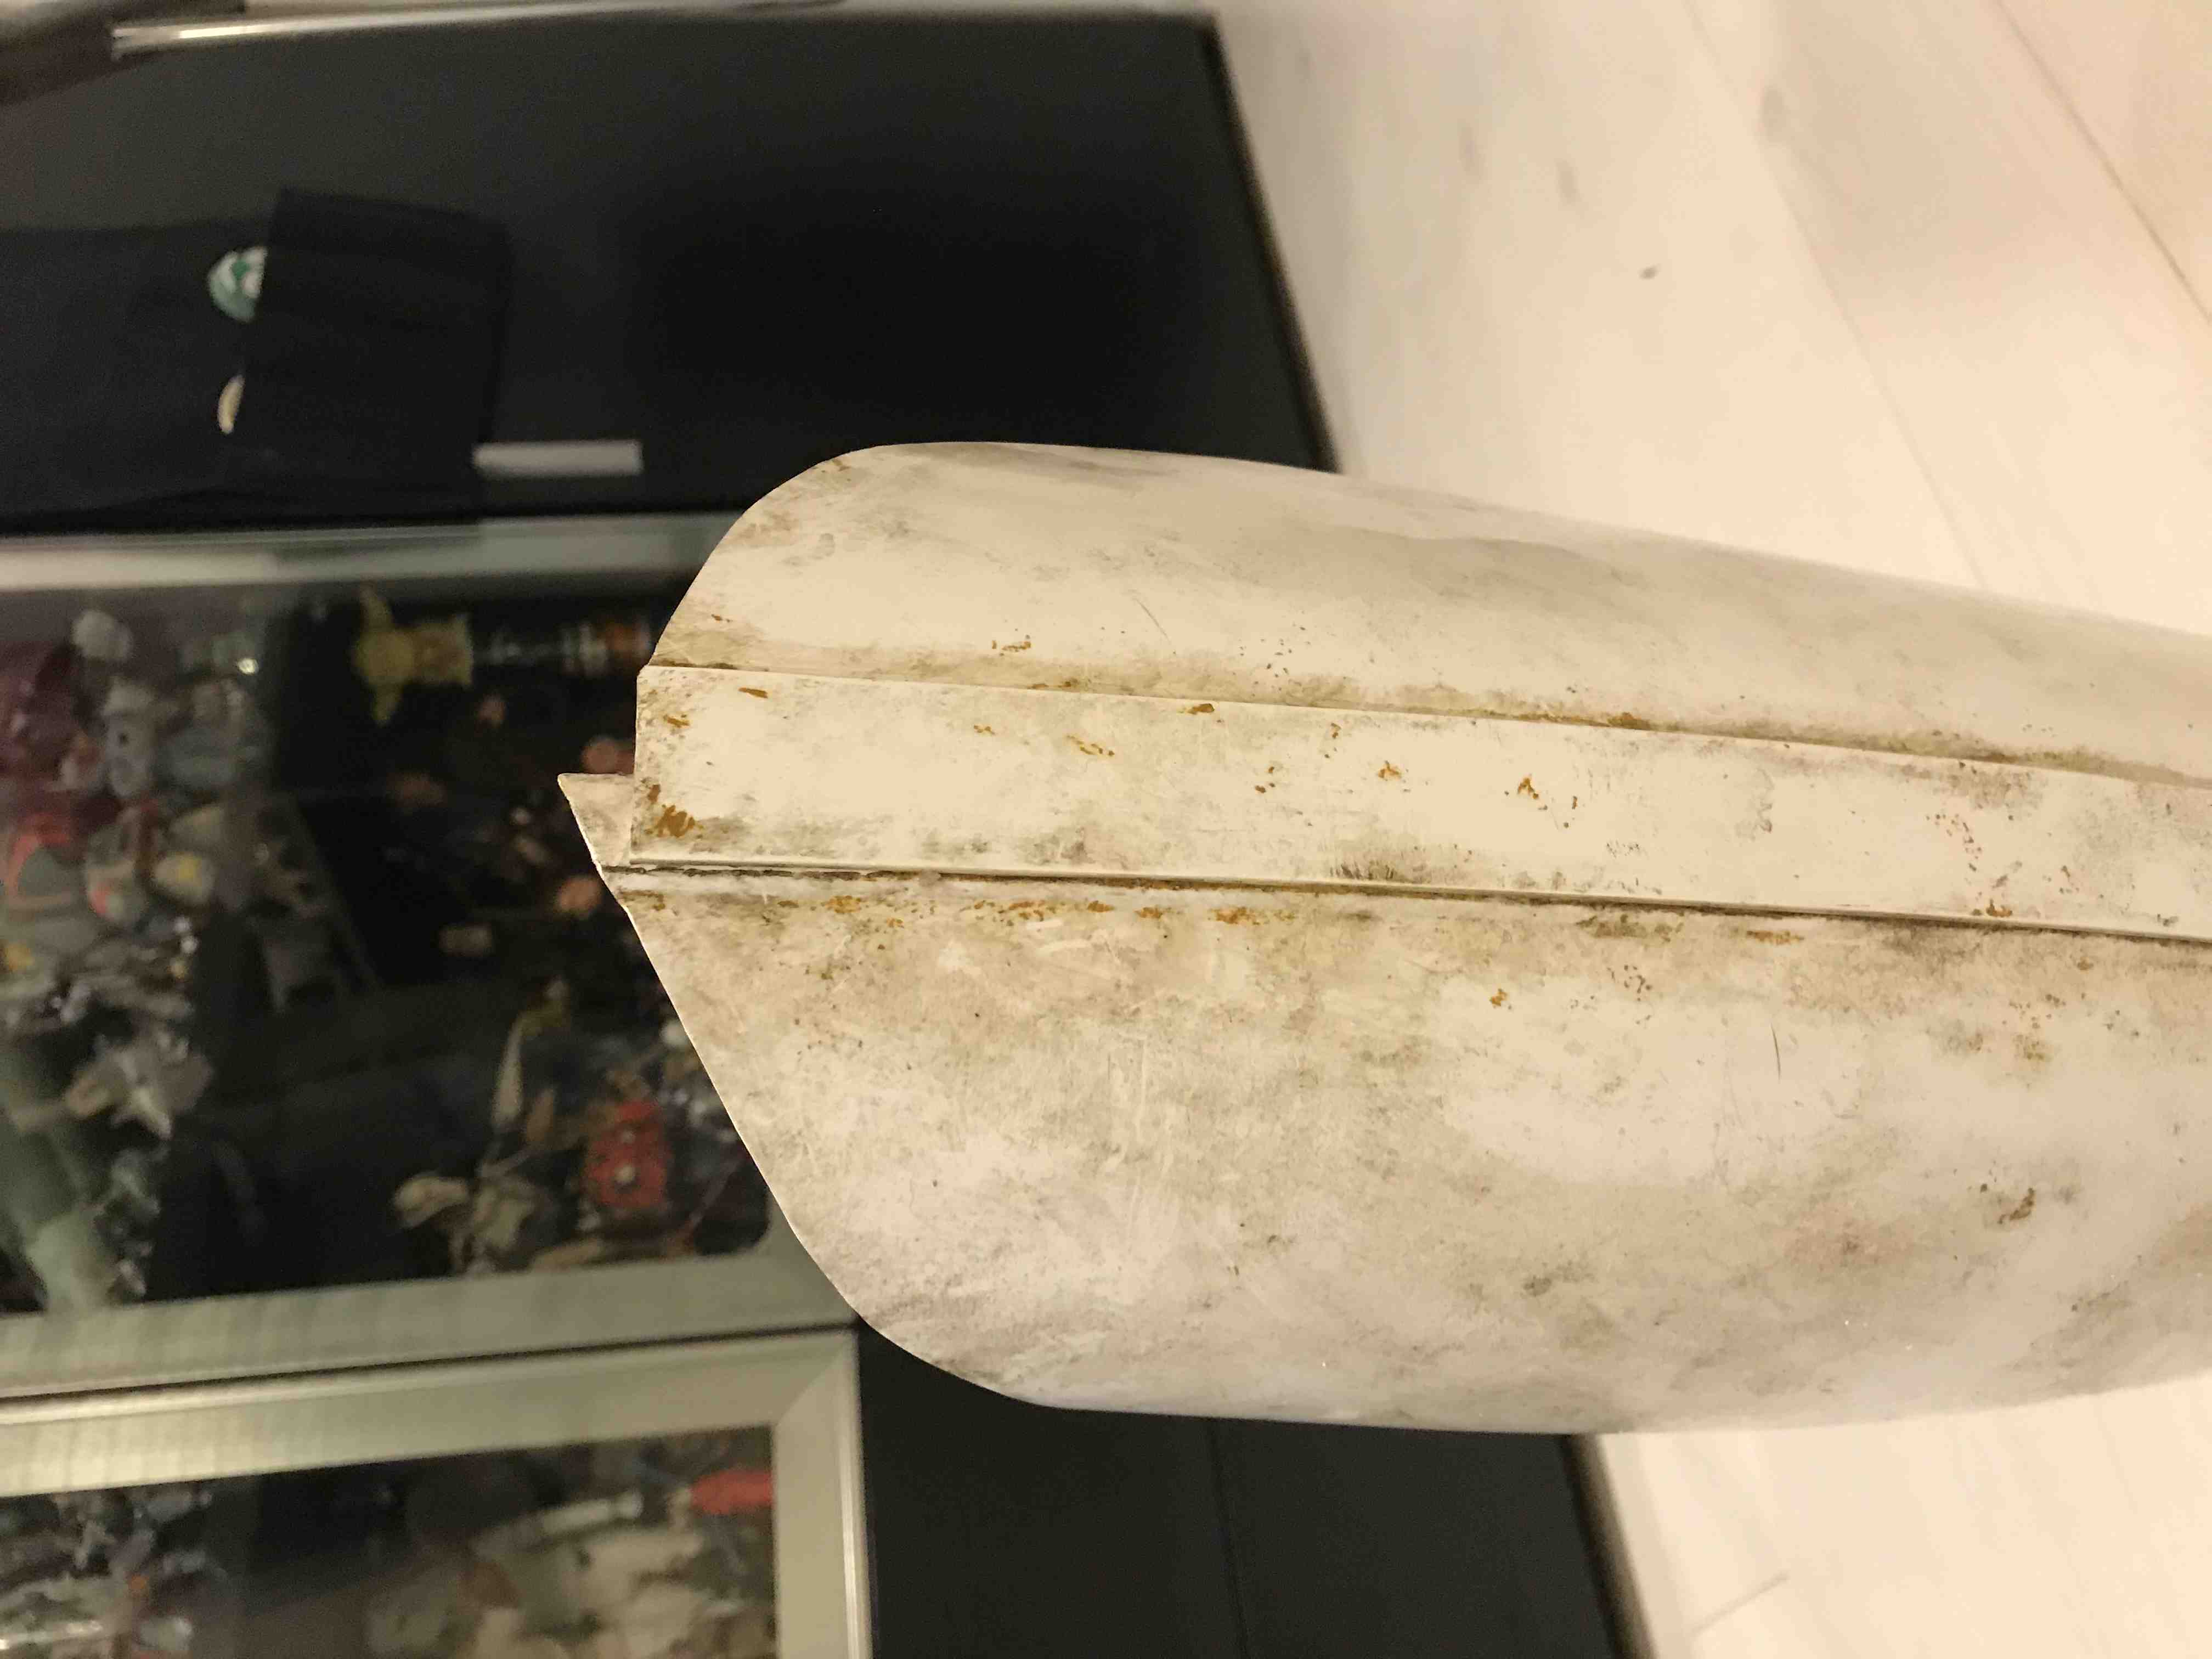
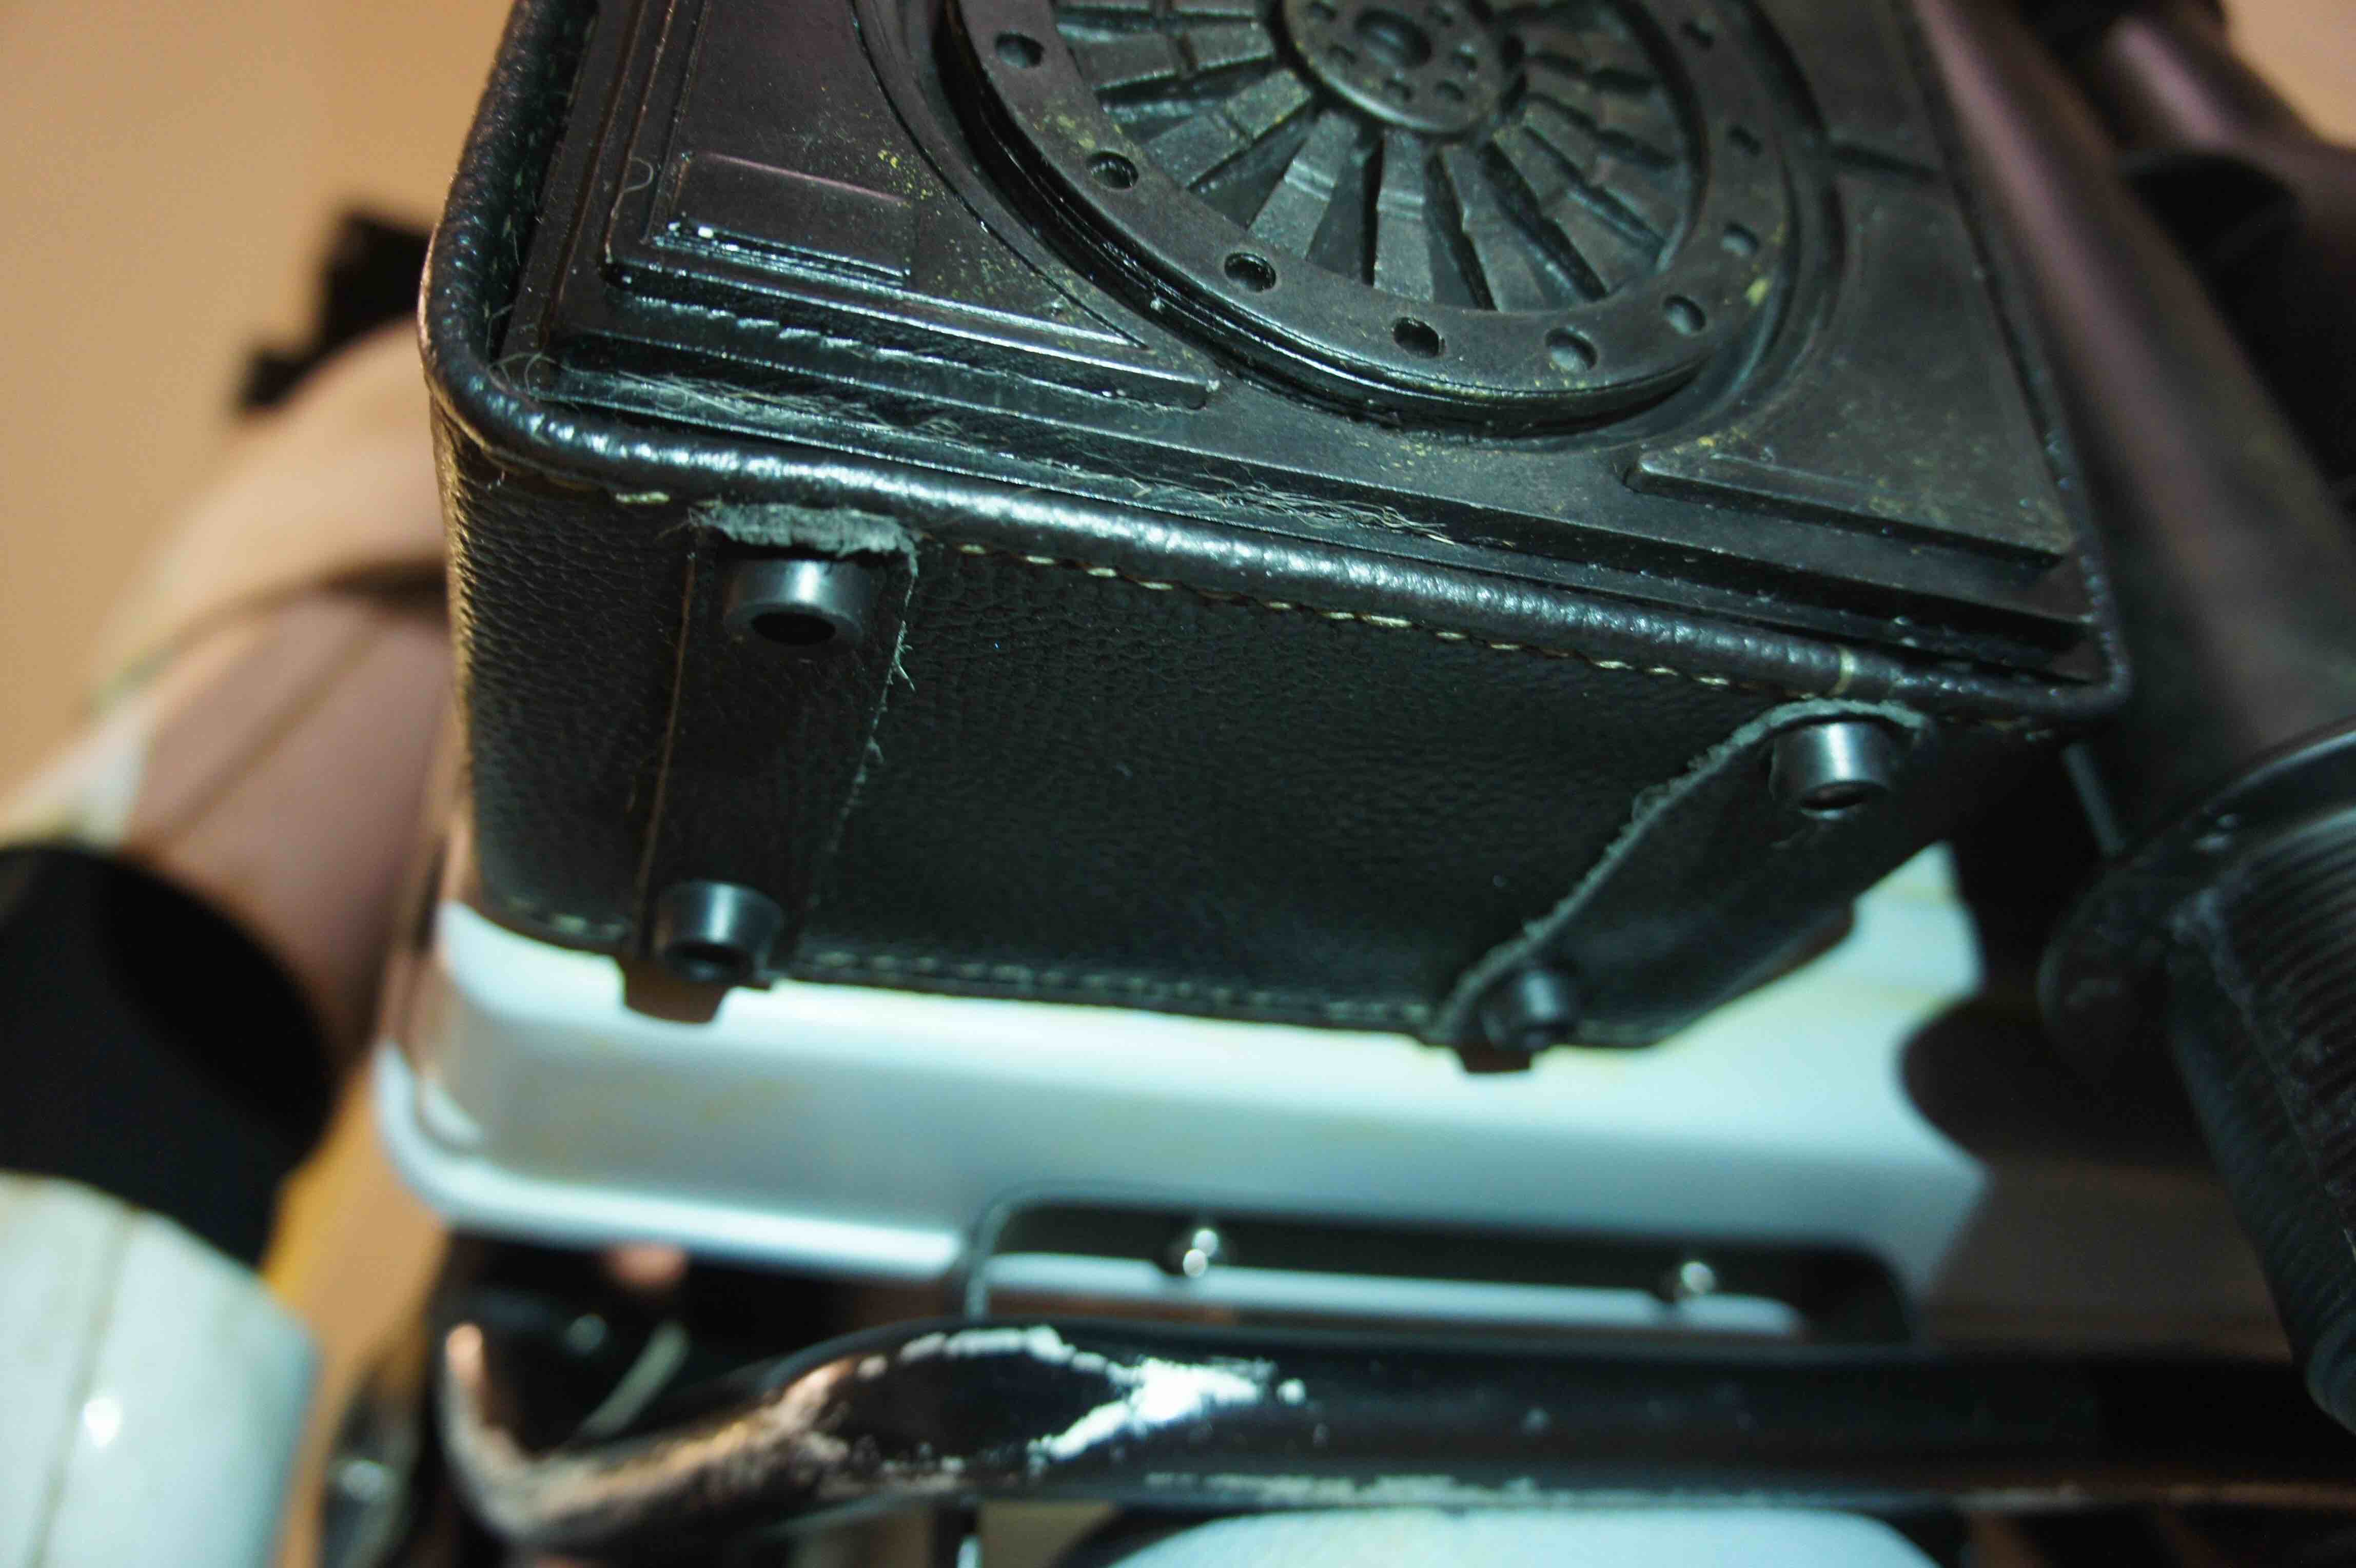
Restoring the detail on the top of the right thigh:
Please let me know what else I can do to improve. Thanks again!
")
-
1
-
-
Thank you Hausi! That's really helpful!
-
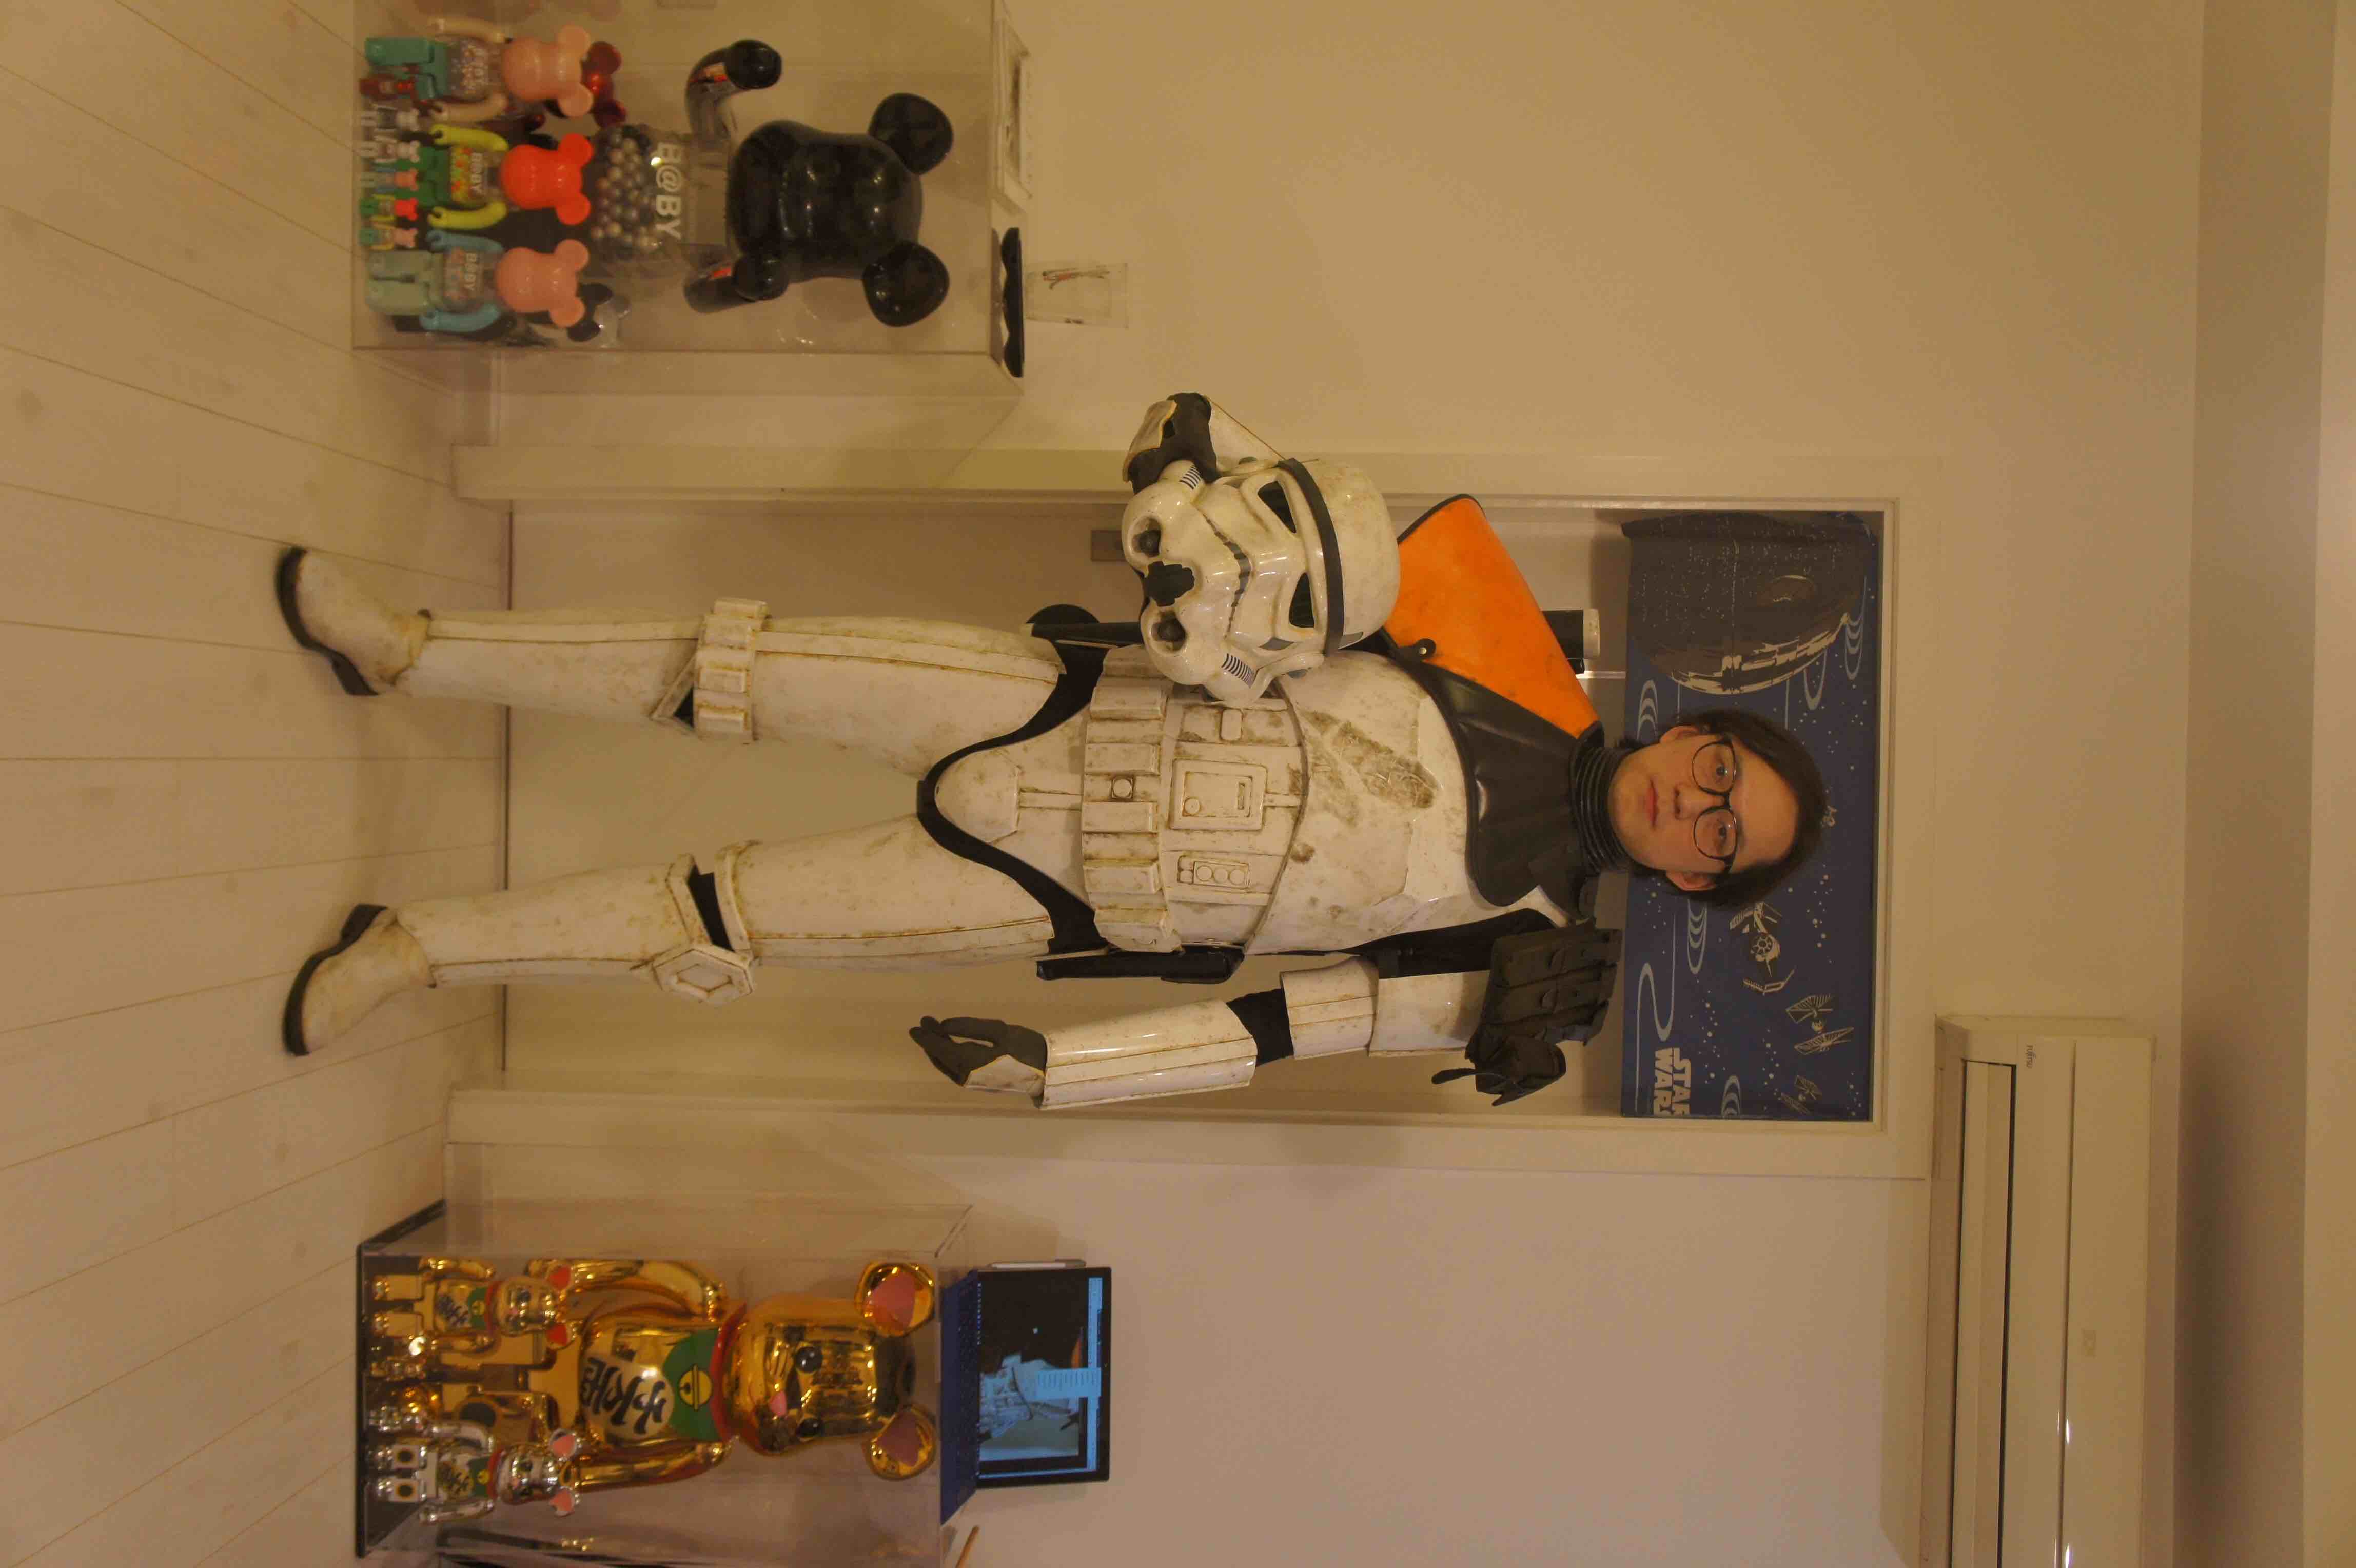
Thomas, thank you for your previous suggestions, now I have done my armor weathering work.
Here are some new pics for you to review:Front:
Left:
Right:
Chest armor close up
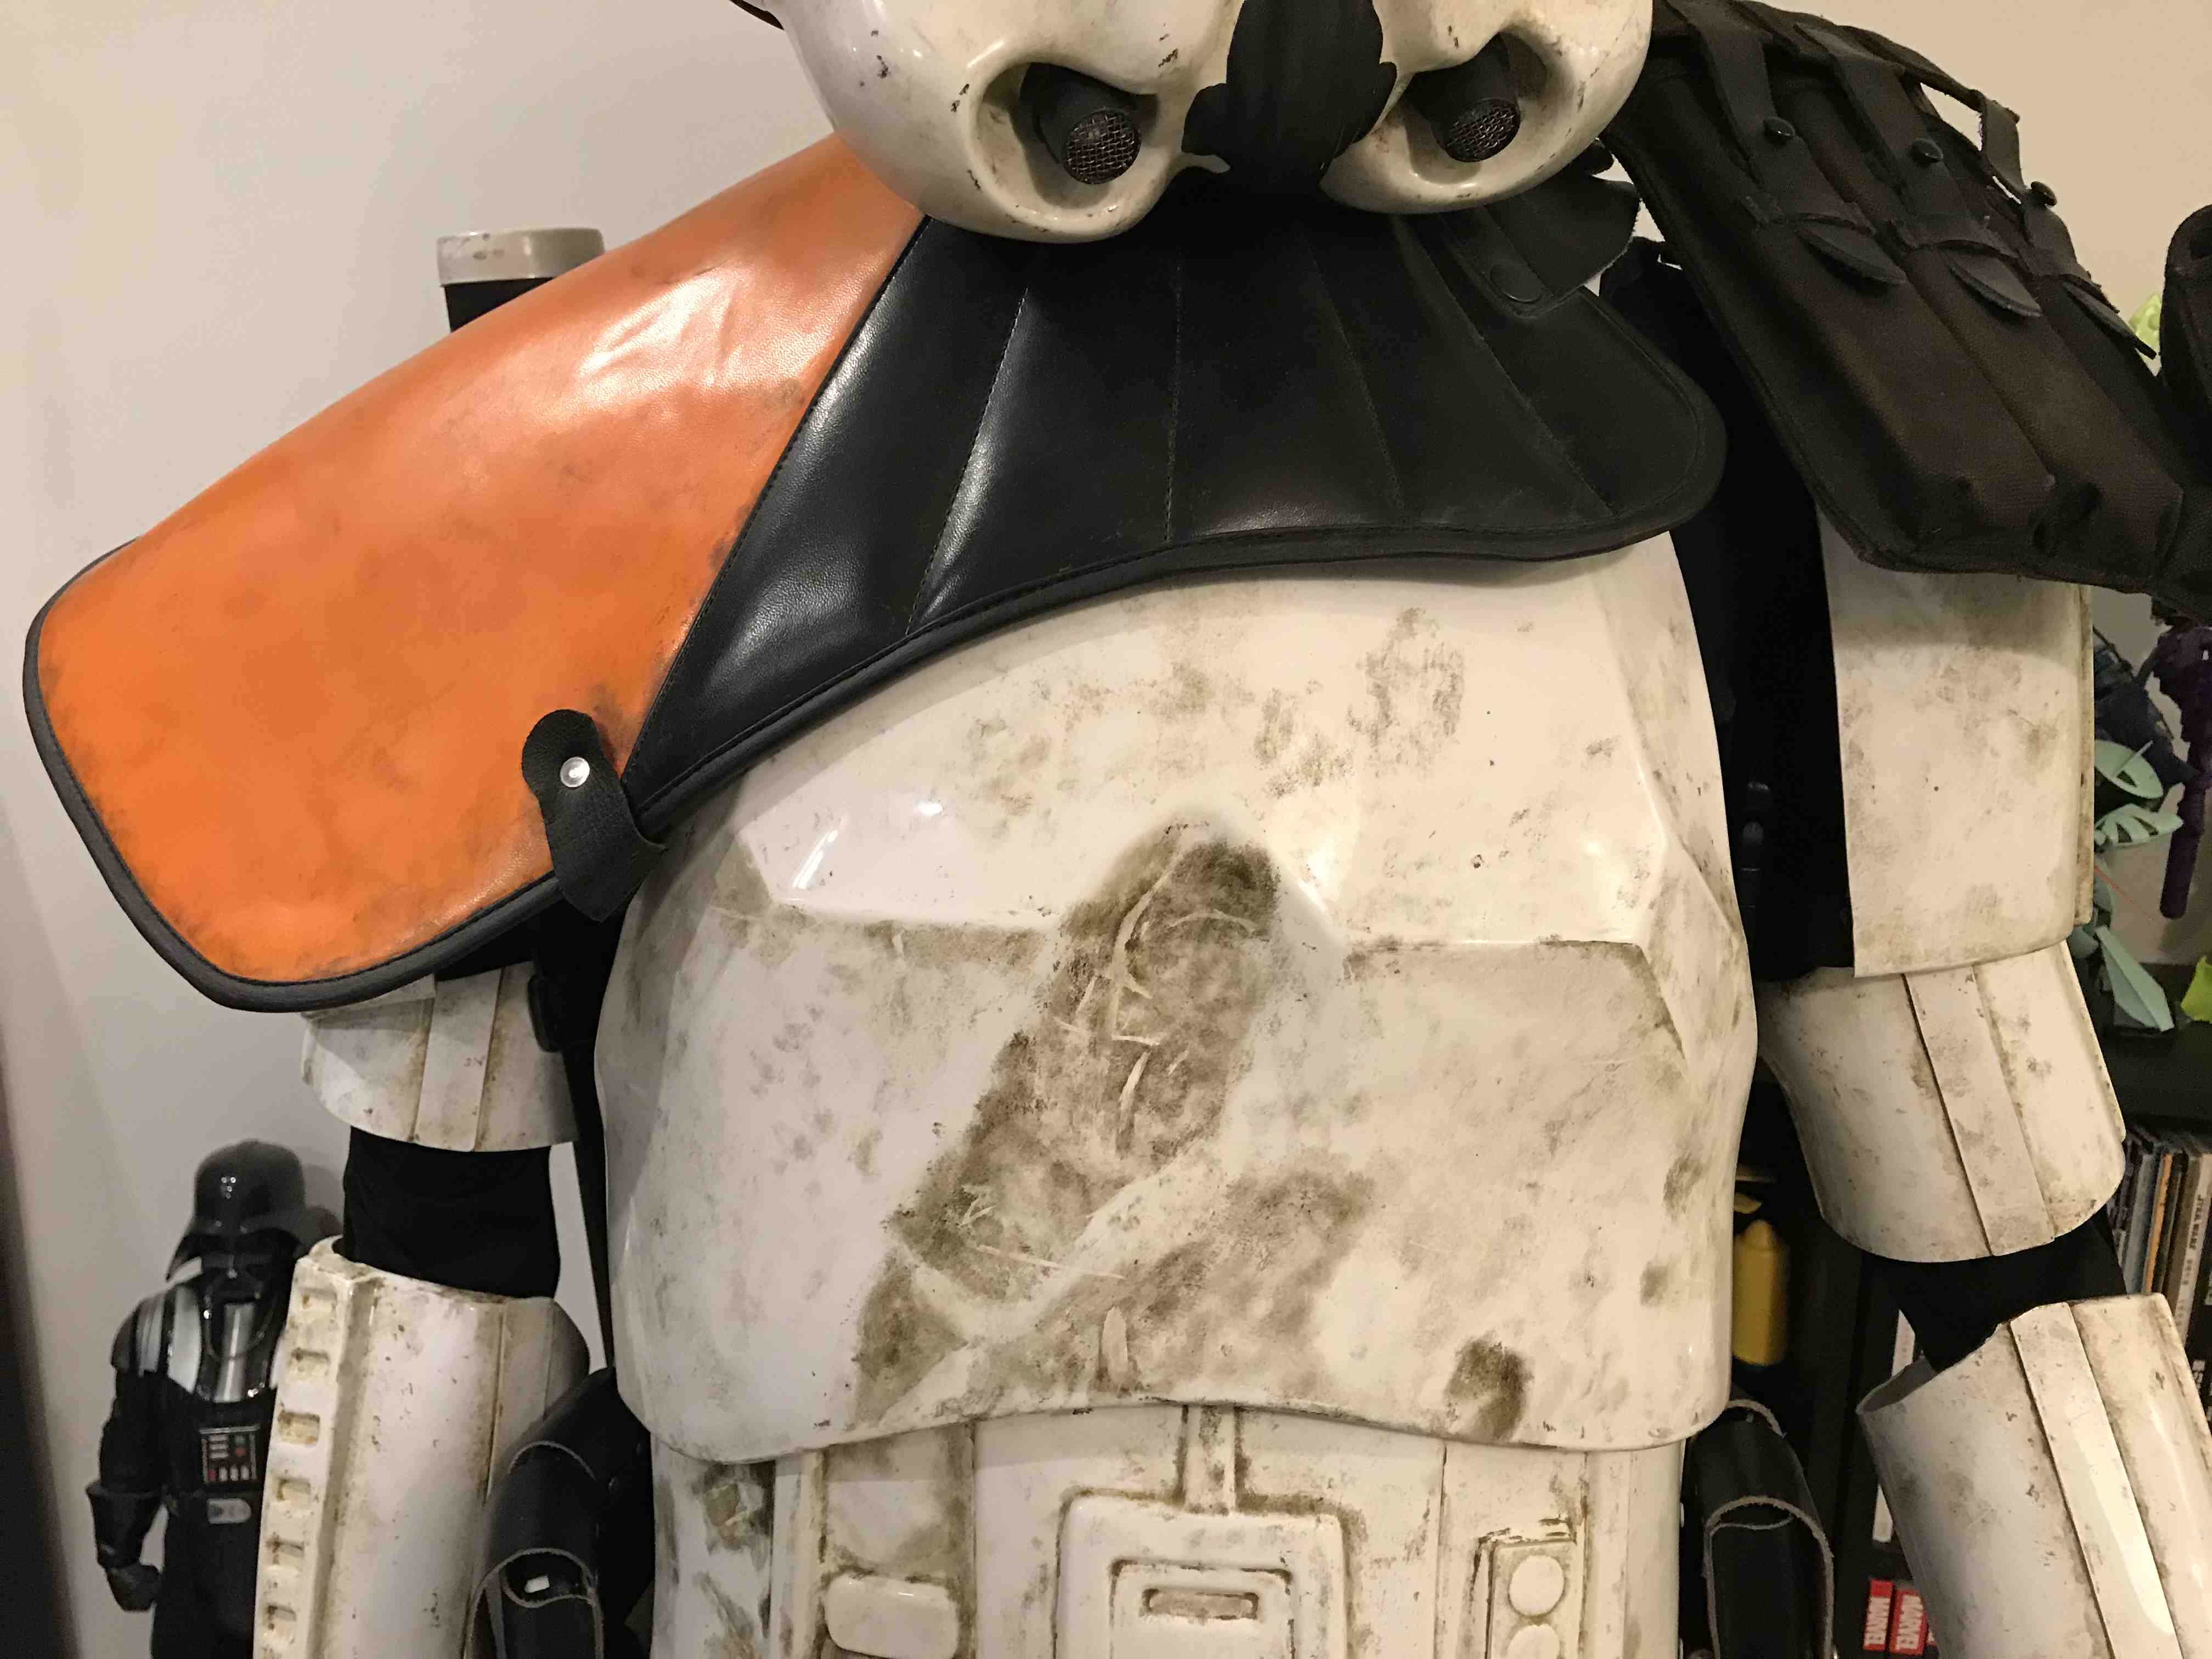
Ab plate close up
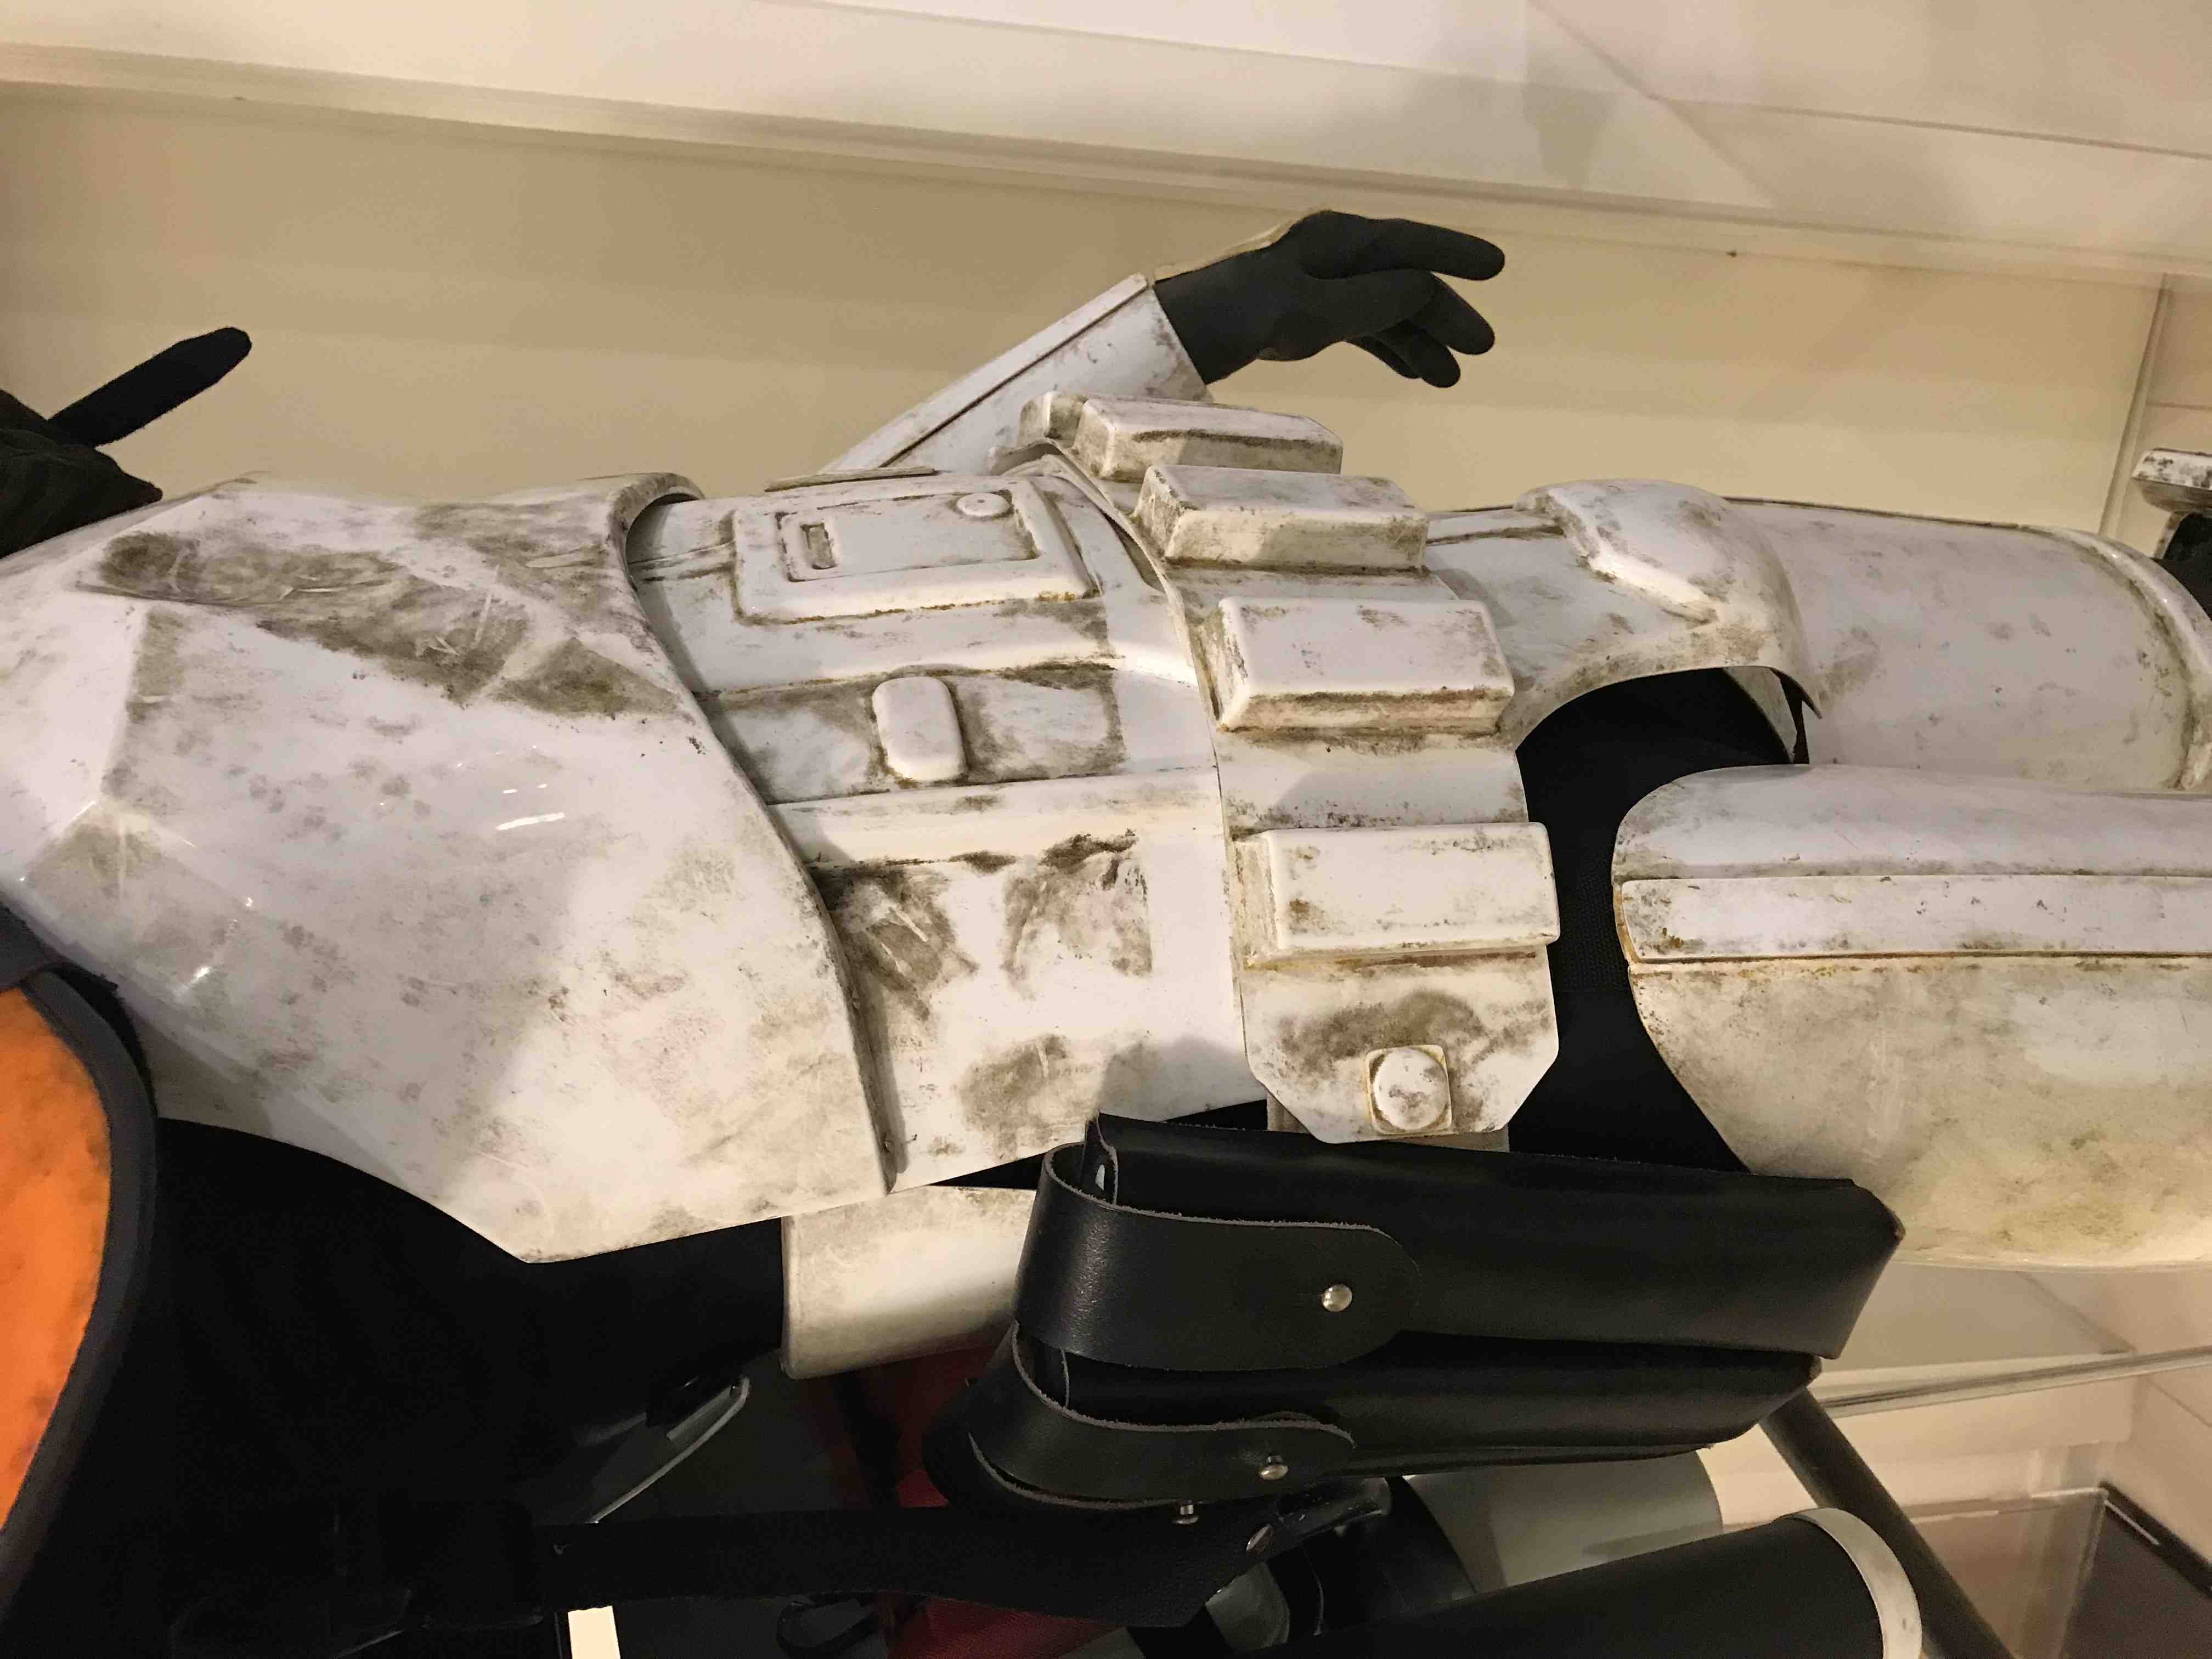
Right side of right thigh close up
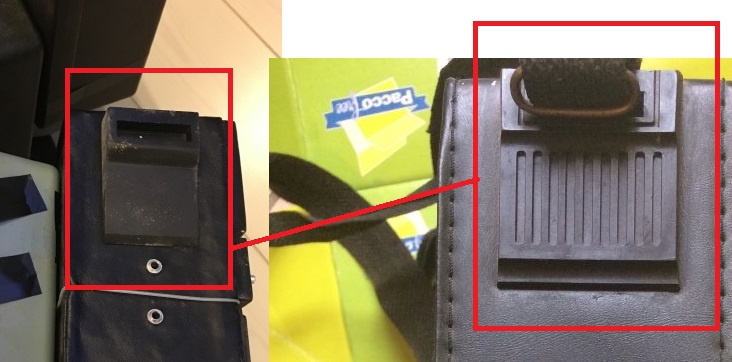
Belt close up, adjusting the button position
(But I found no photo for the button on the other side, so I have it unchanged. Wonder if anyone have more reference pics?)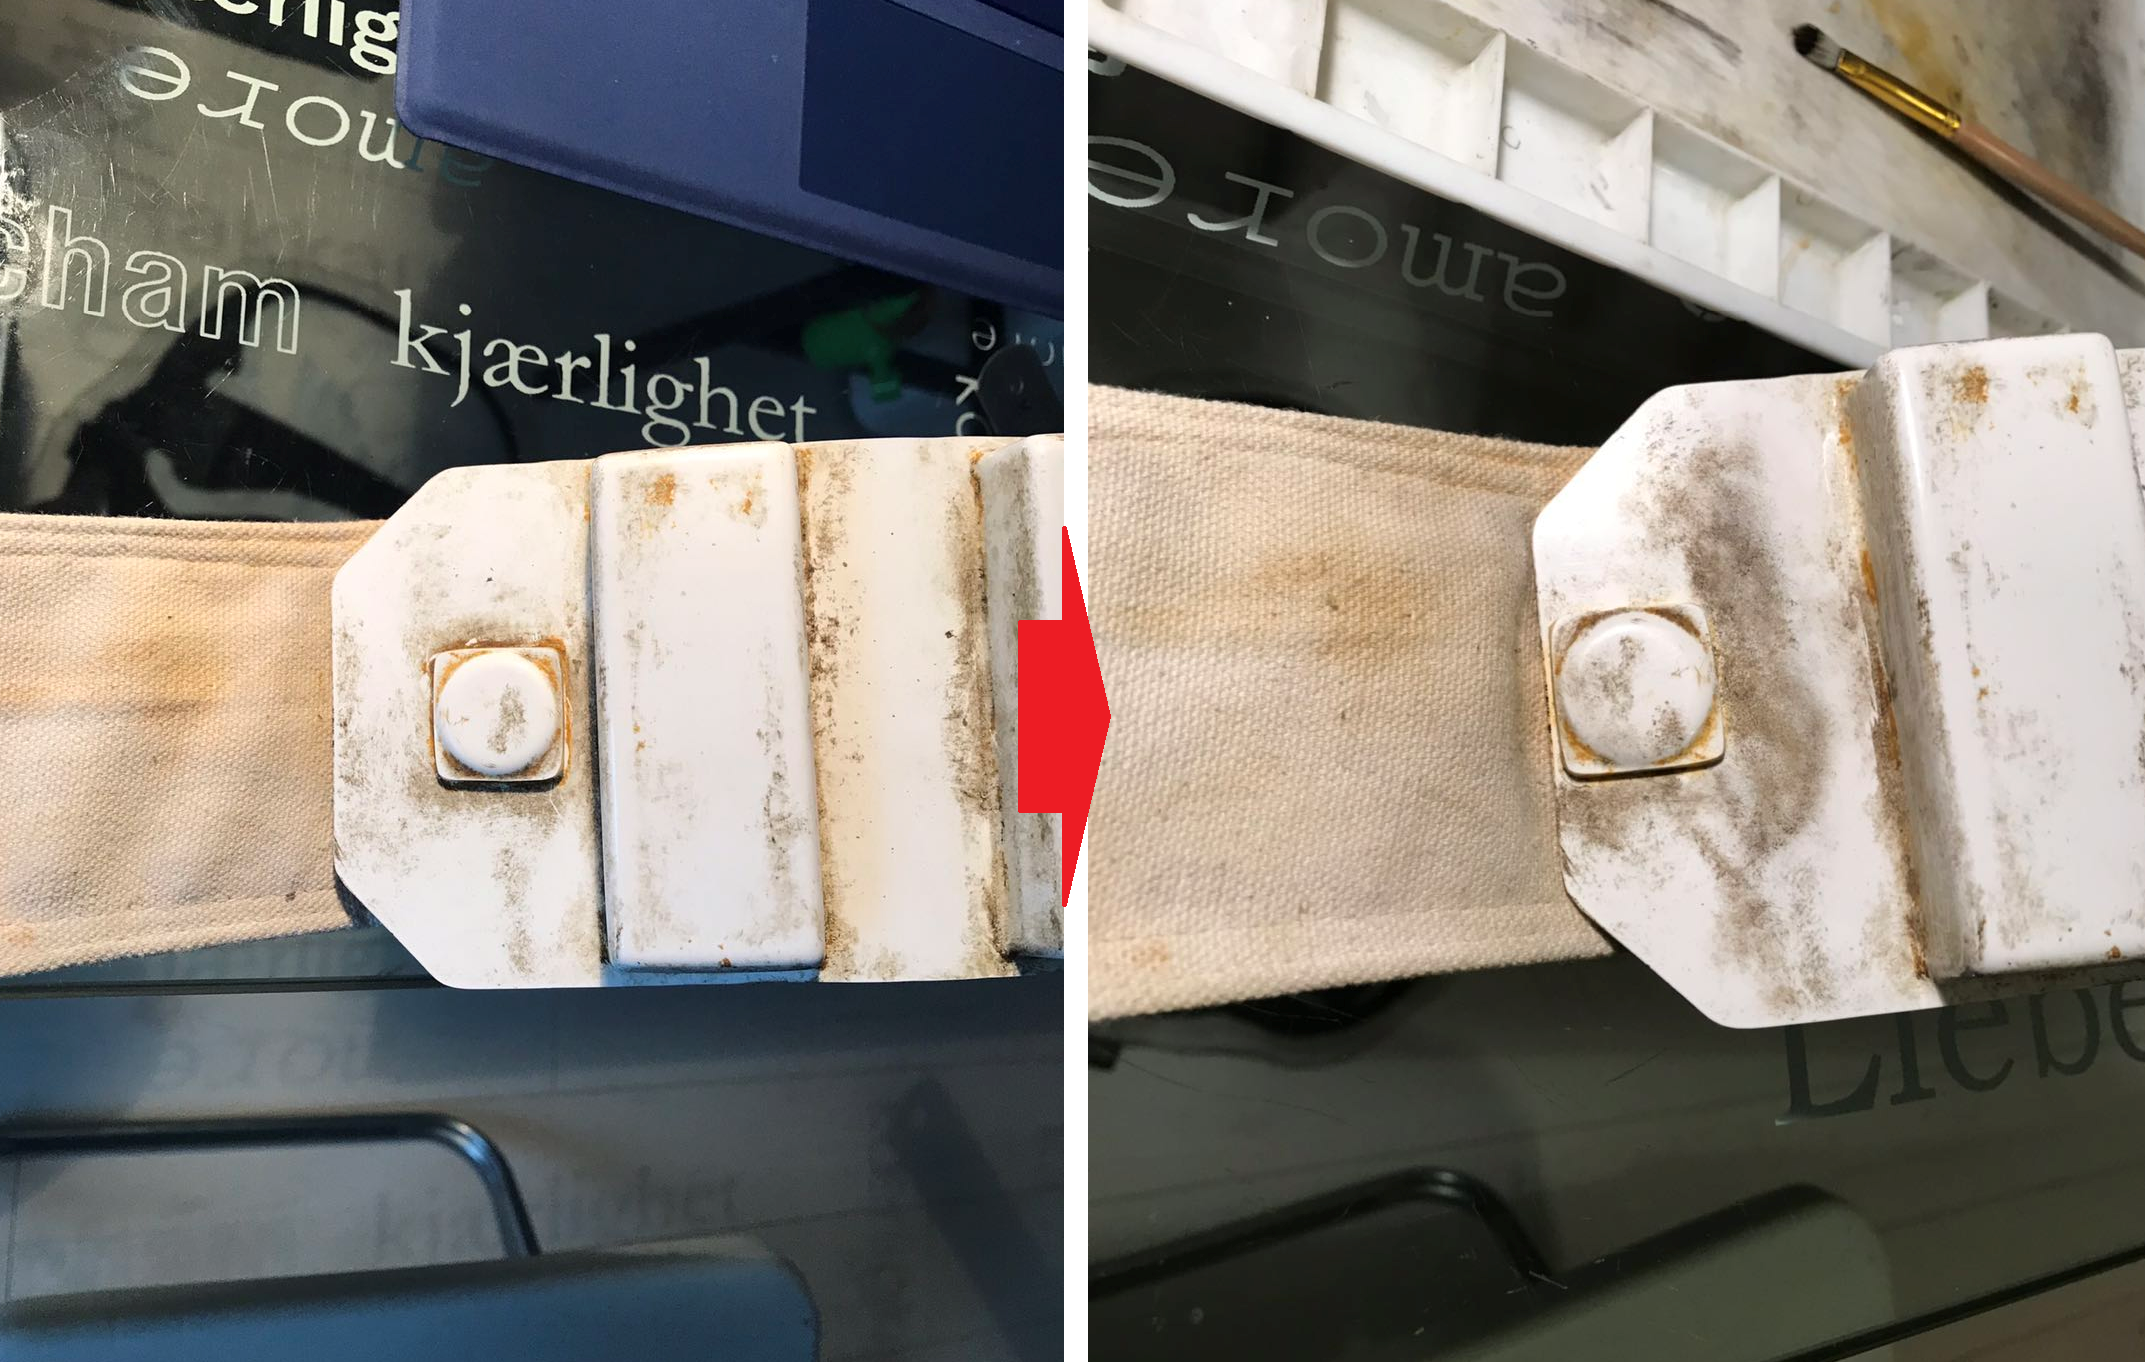
After studied all the reference pics you provided, I have some questions:
There were two versions roadblock cpt:
Ver 1:
1. Right shoulder bell attached tightly, fitting the actor's shoulder
2. Equiped with MP40 leather pouches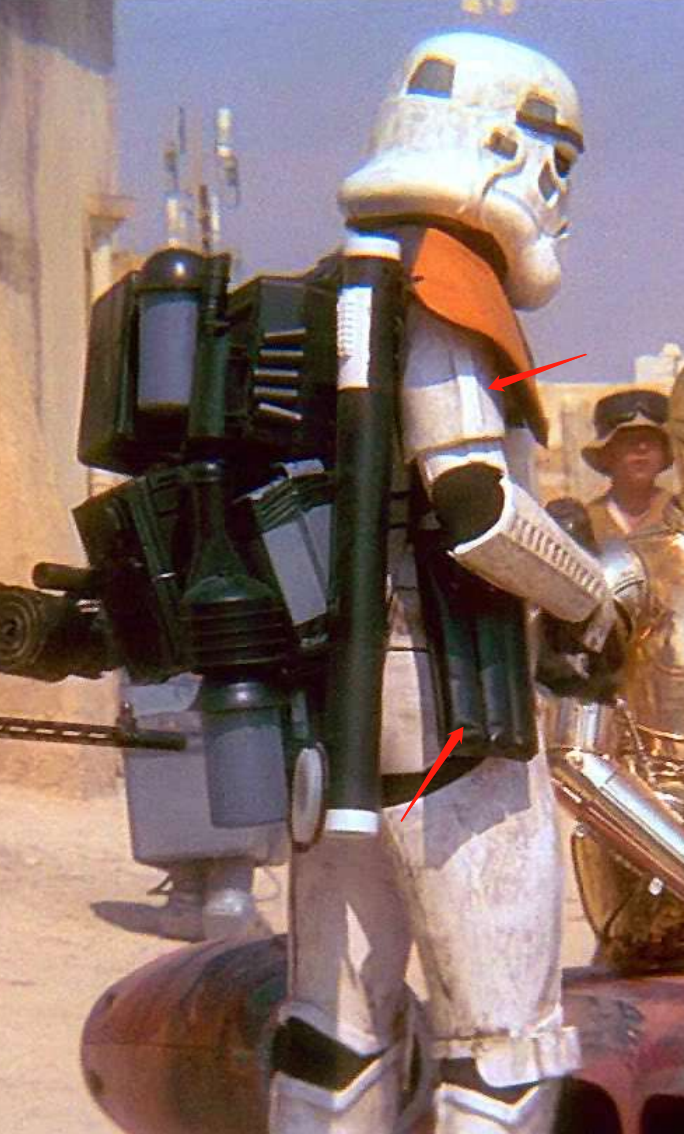
Ver 2:
1、Right shouler bell slipped down to the elbow and fixed by a black tape
2、Equiped with a medium Spanish pouch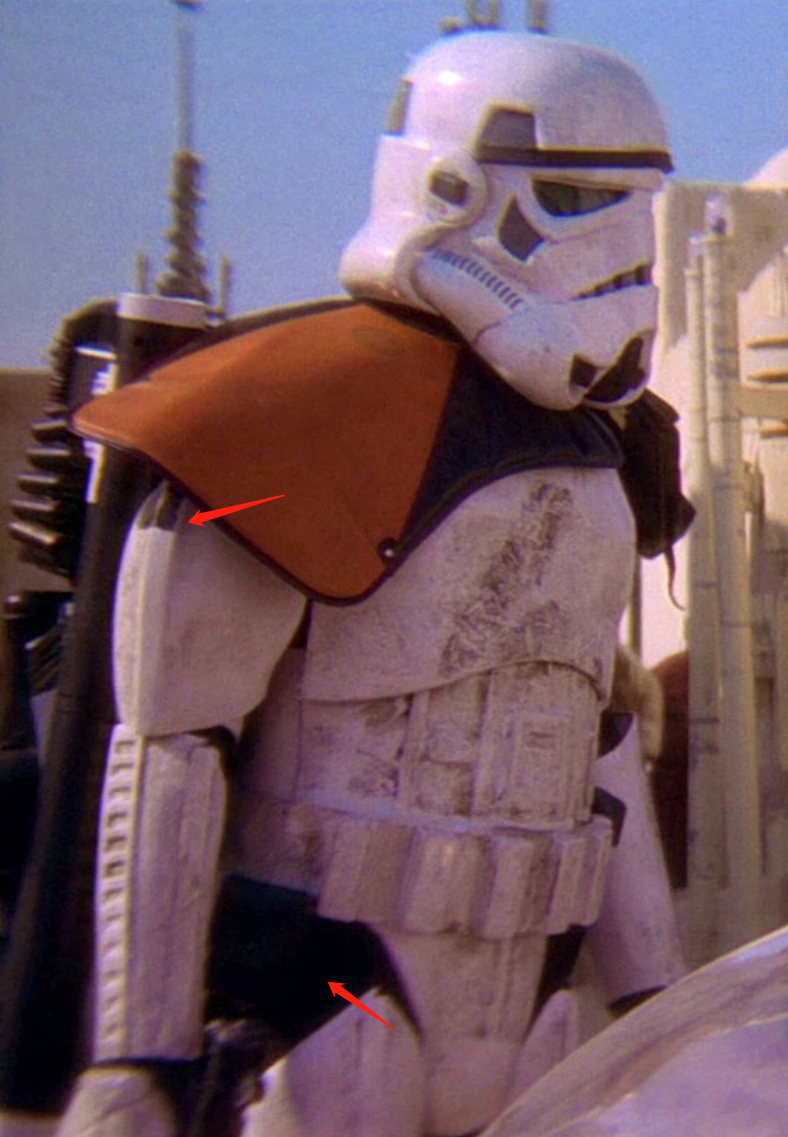

My armor now is ver 1, do I have to make both versions for SWAT?
If so I can make my shoulder bell adjustable and get myself a new pouch.
(Not sure if there are more differences between these two versions, please point it out if I missed something. Thanks again!-
1
-
-
Great! Thank you Thomas!
I will proceed to the armor weathering part asap!
-
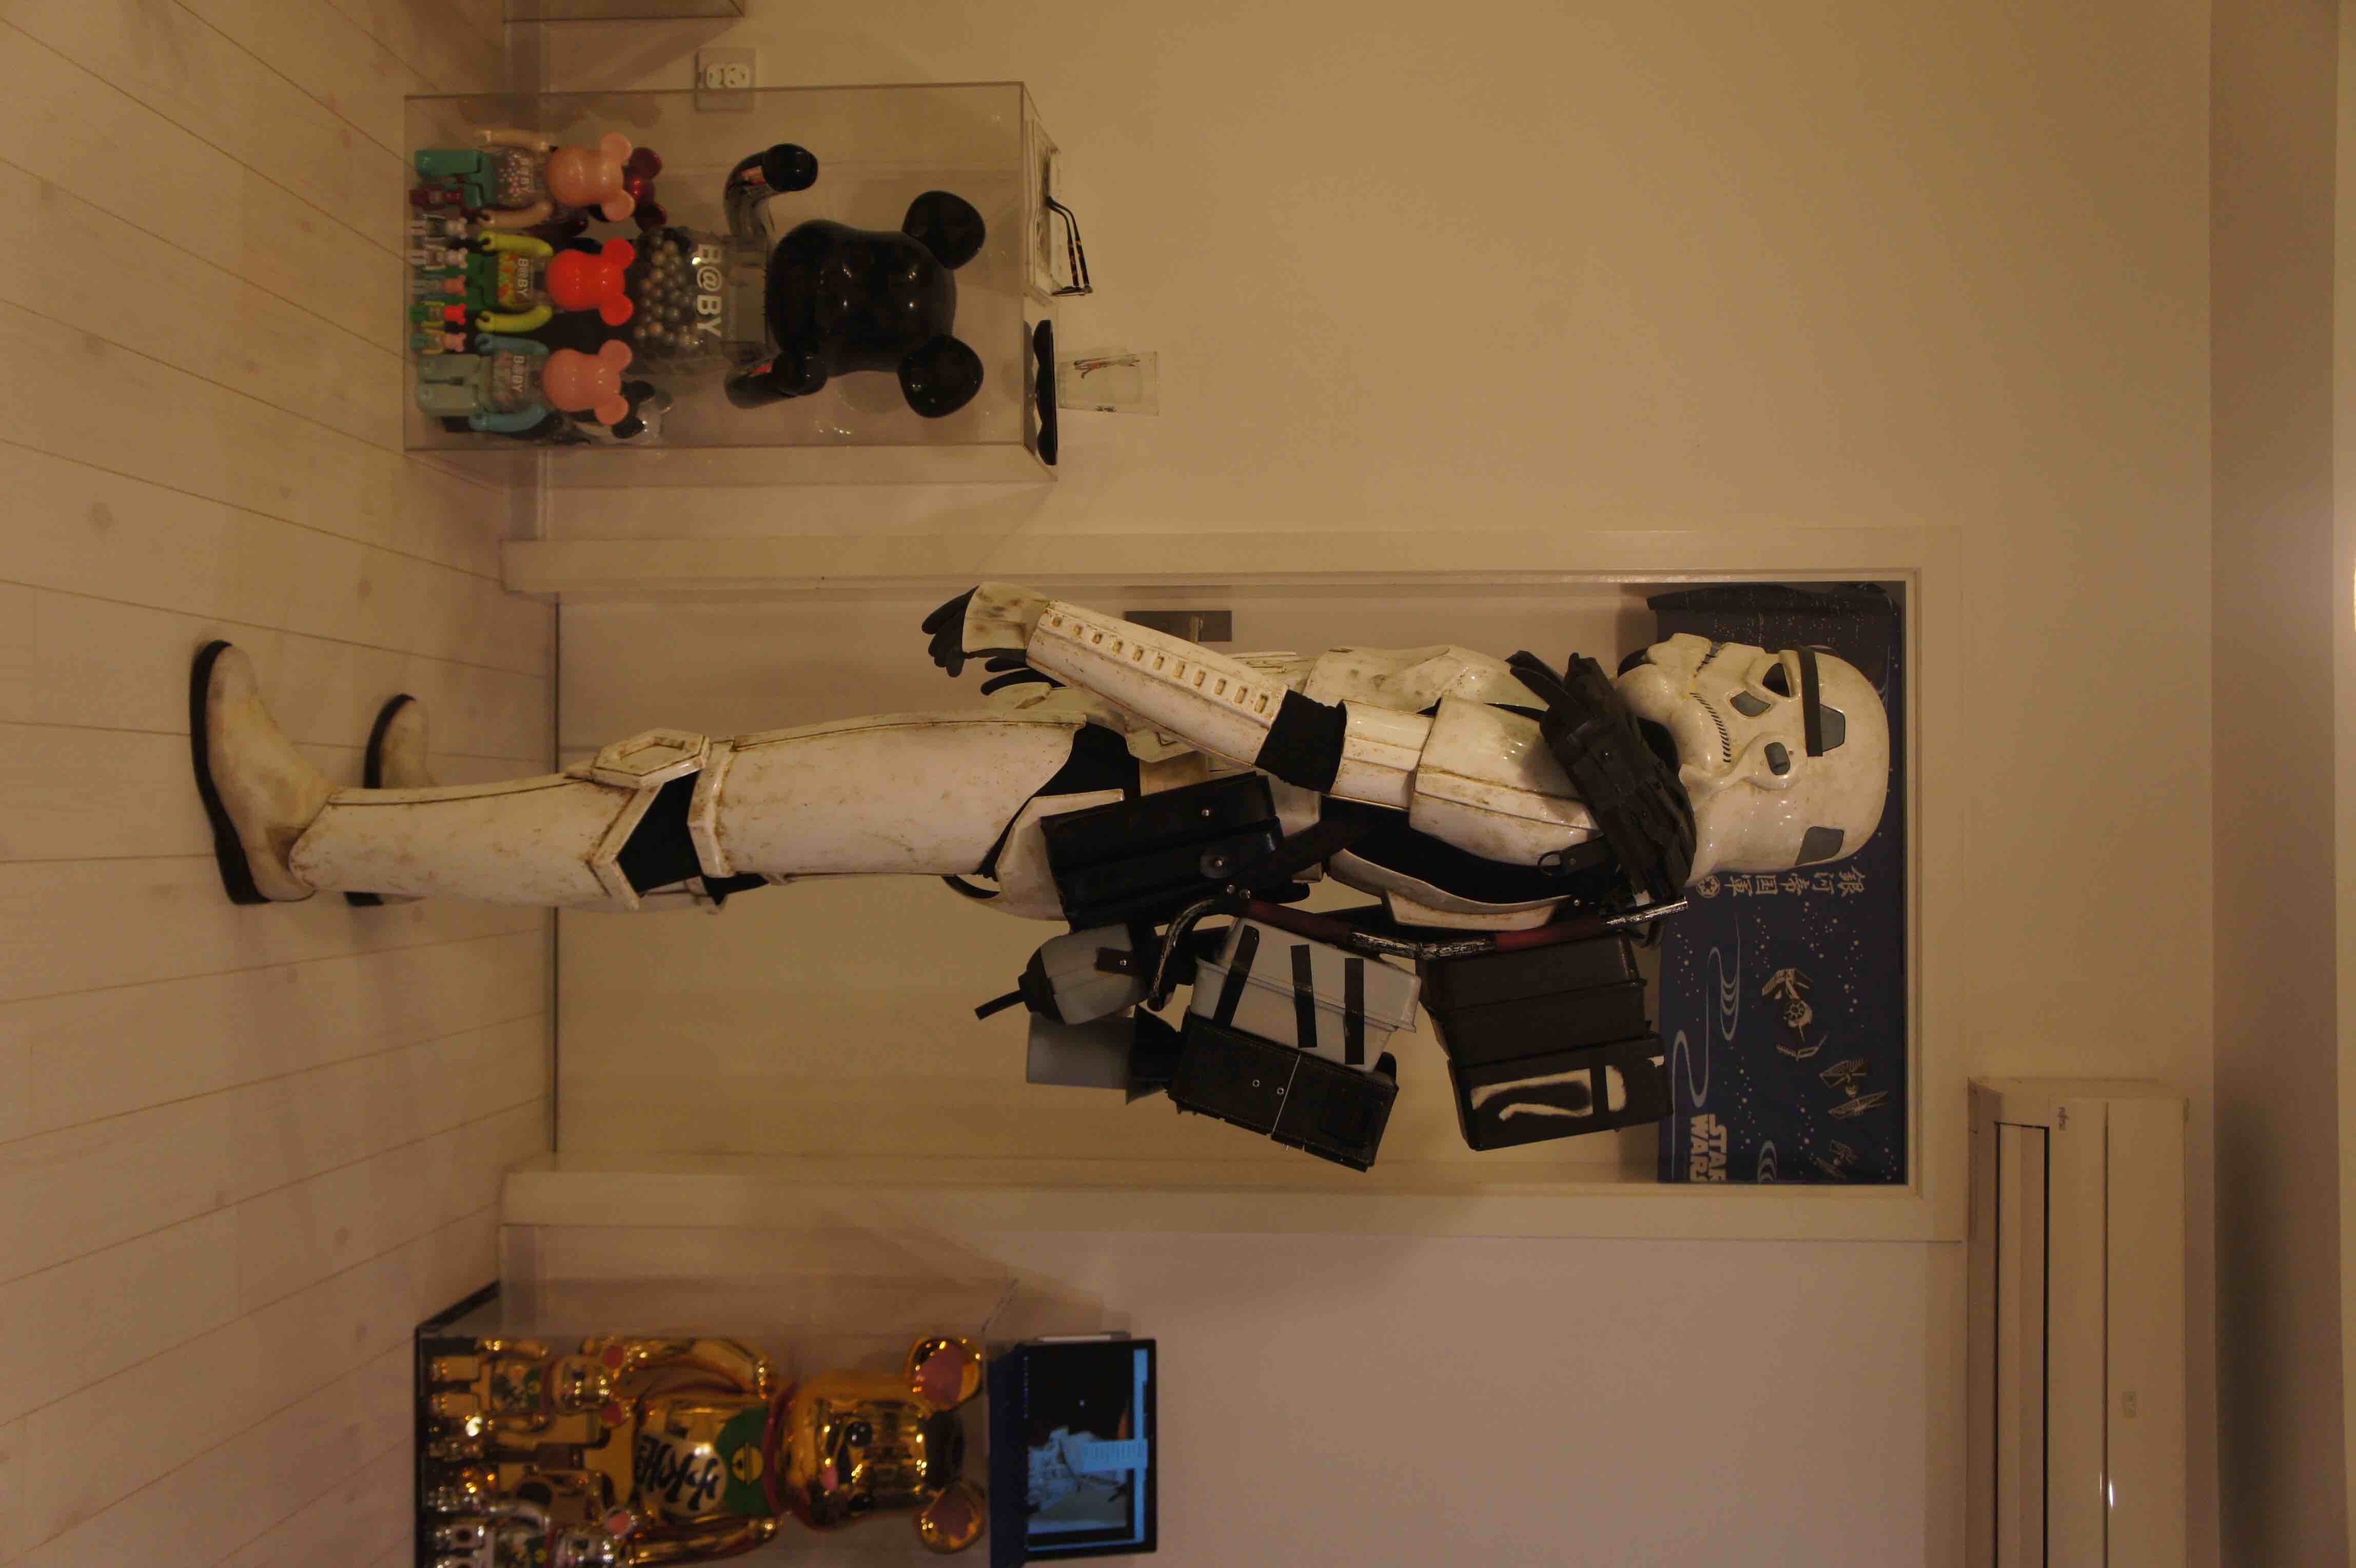
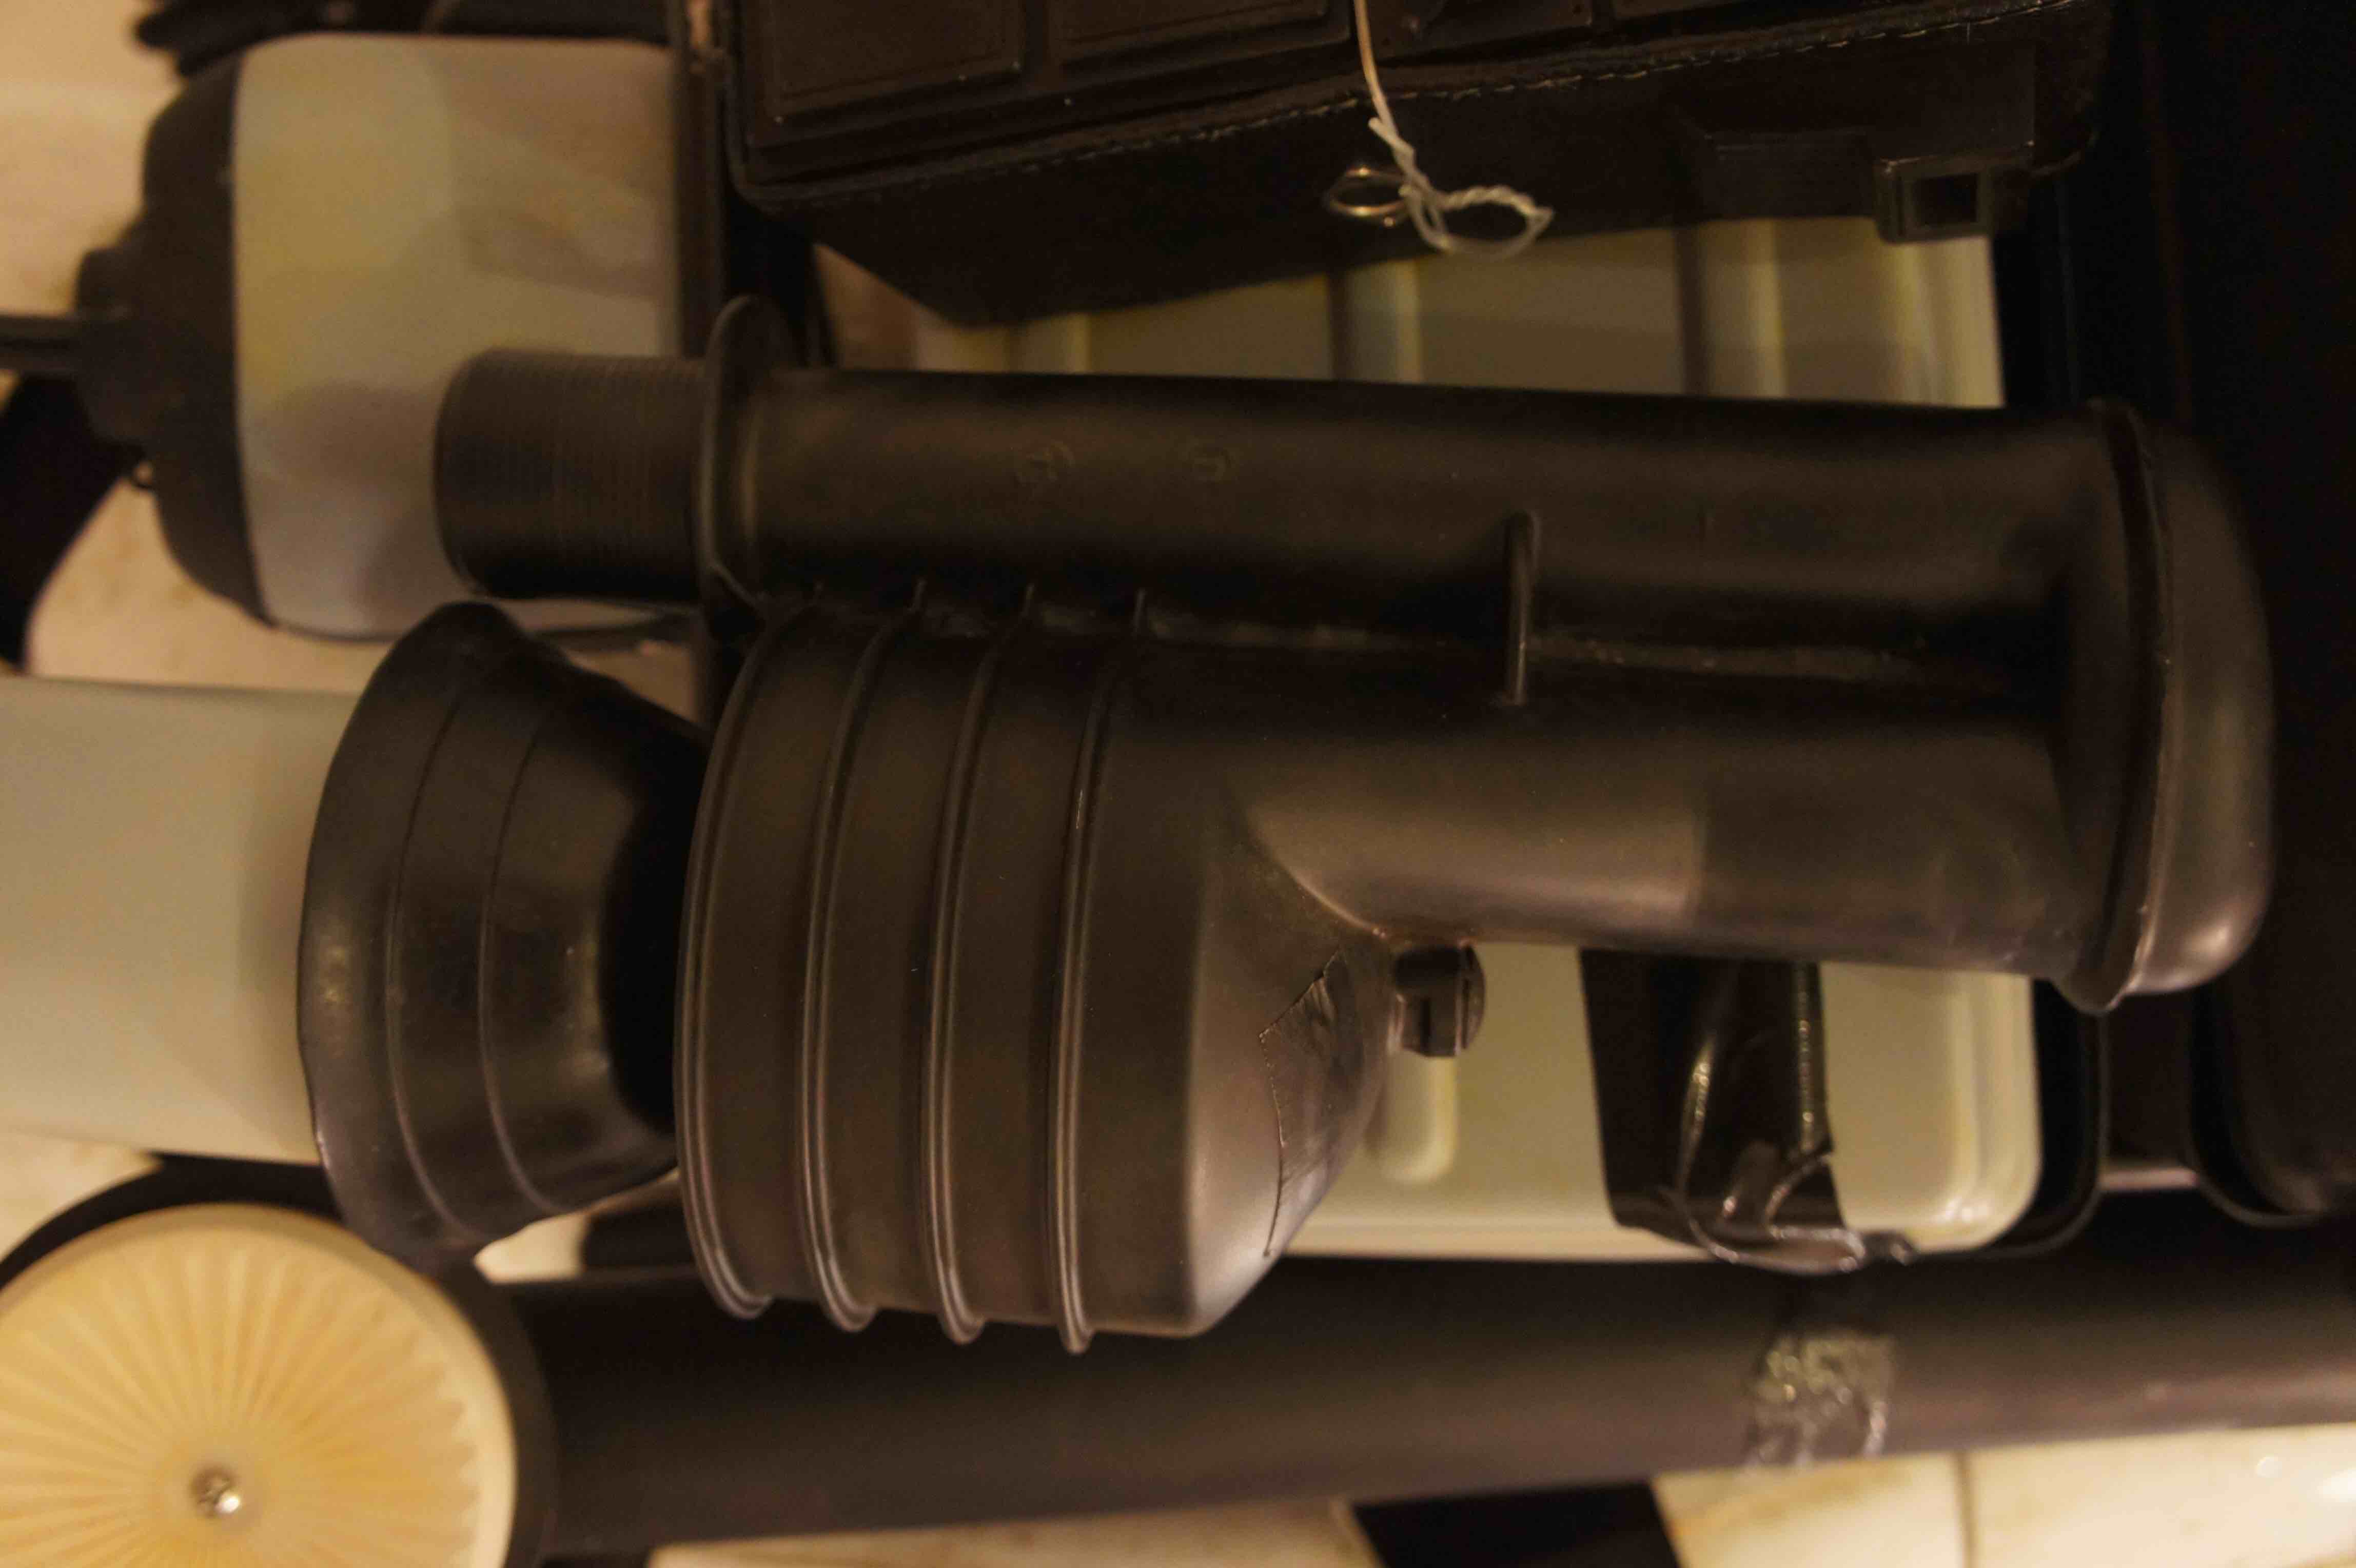
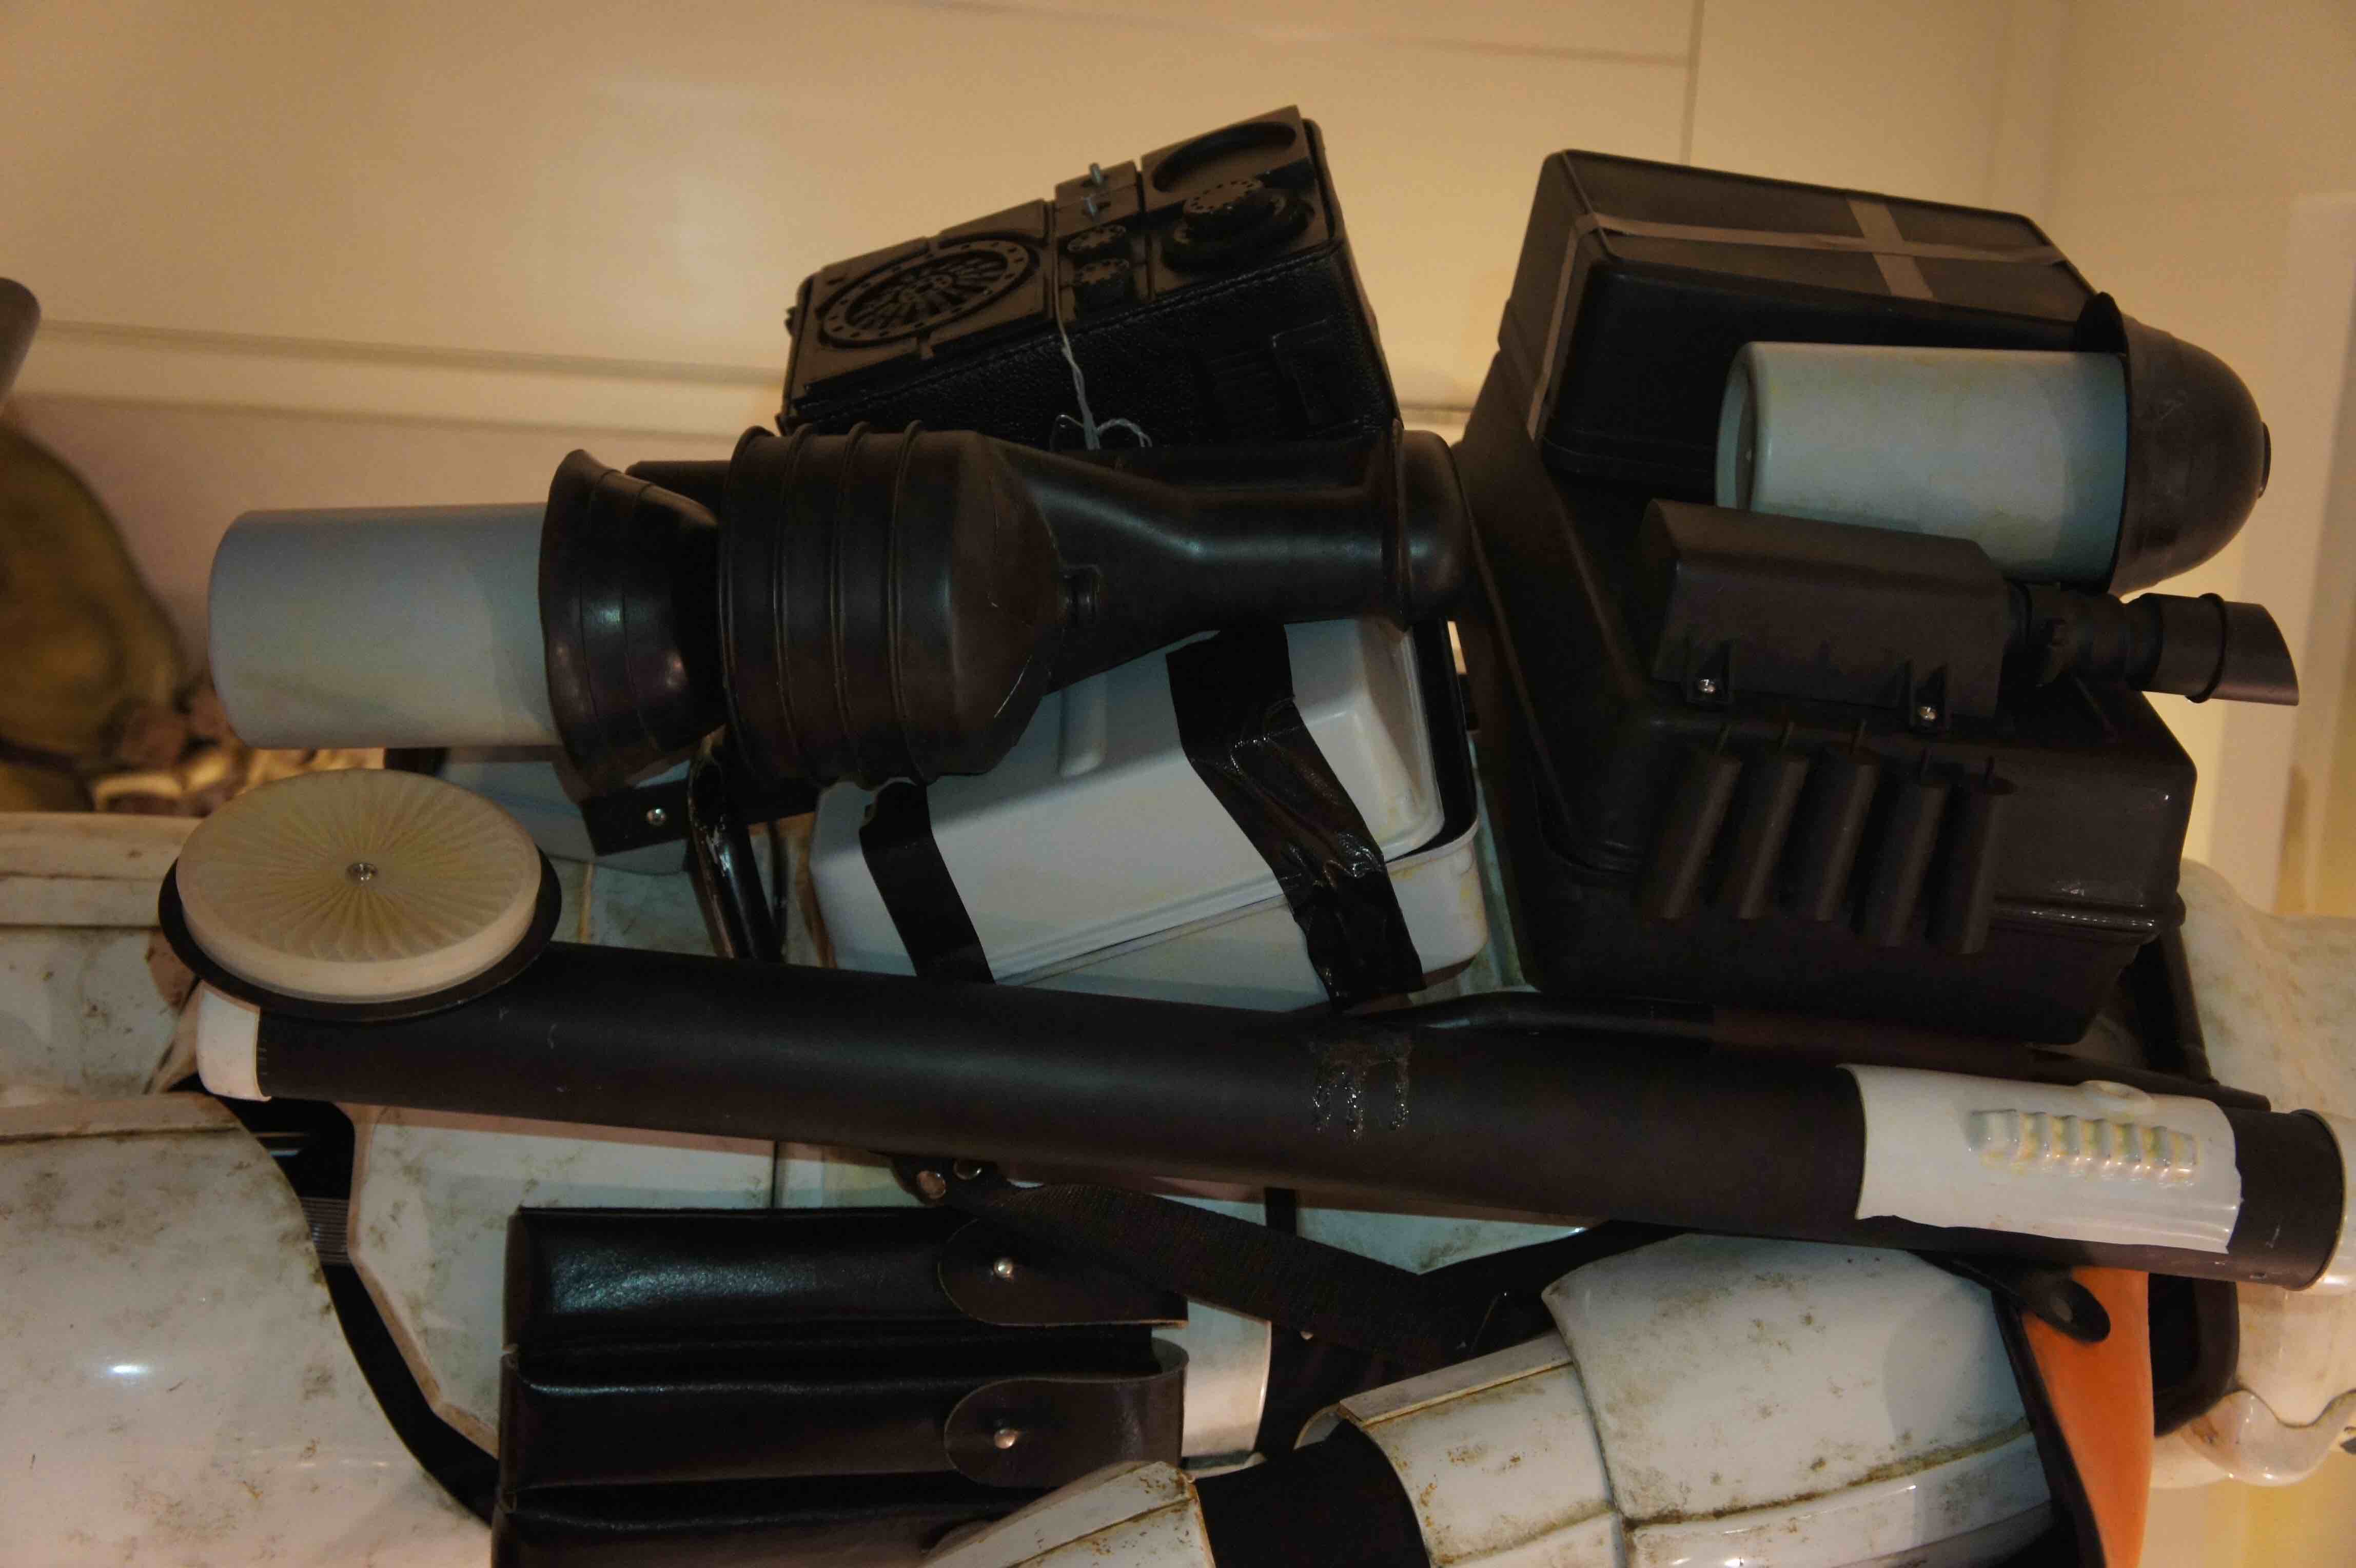
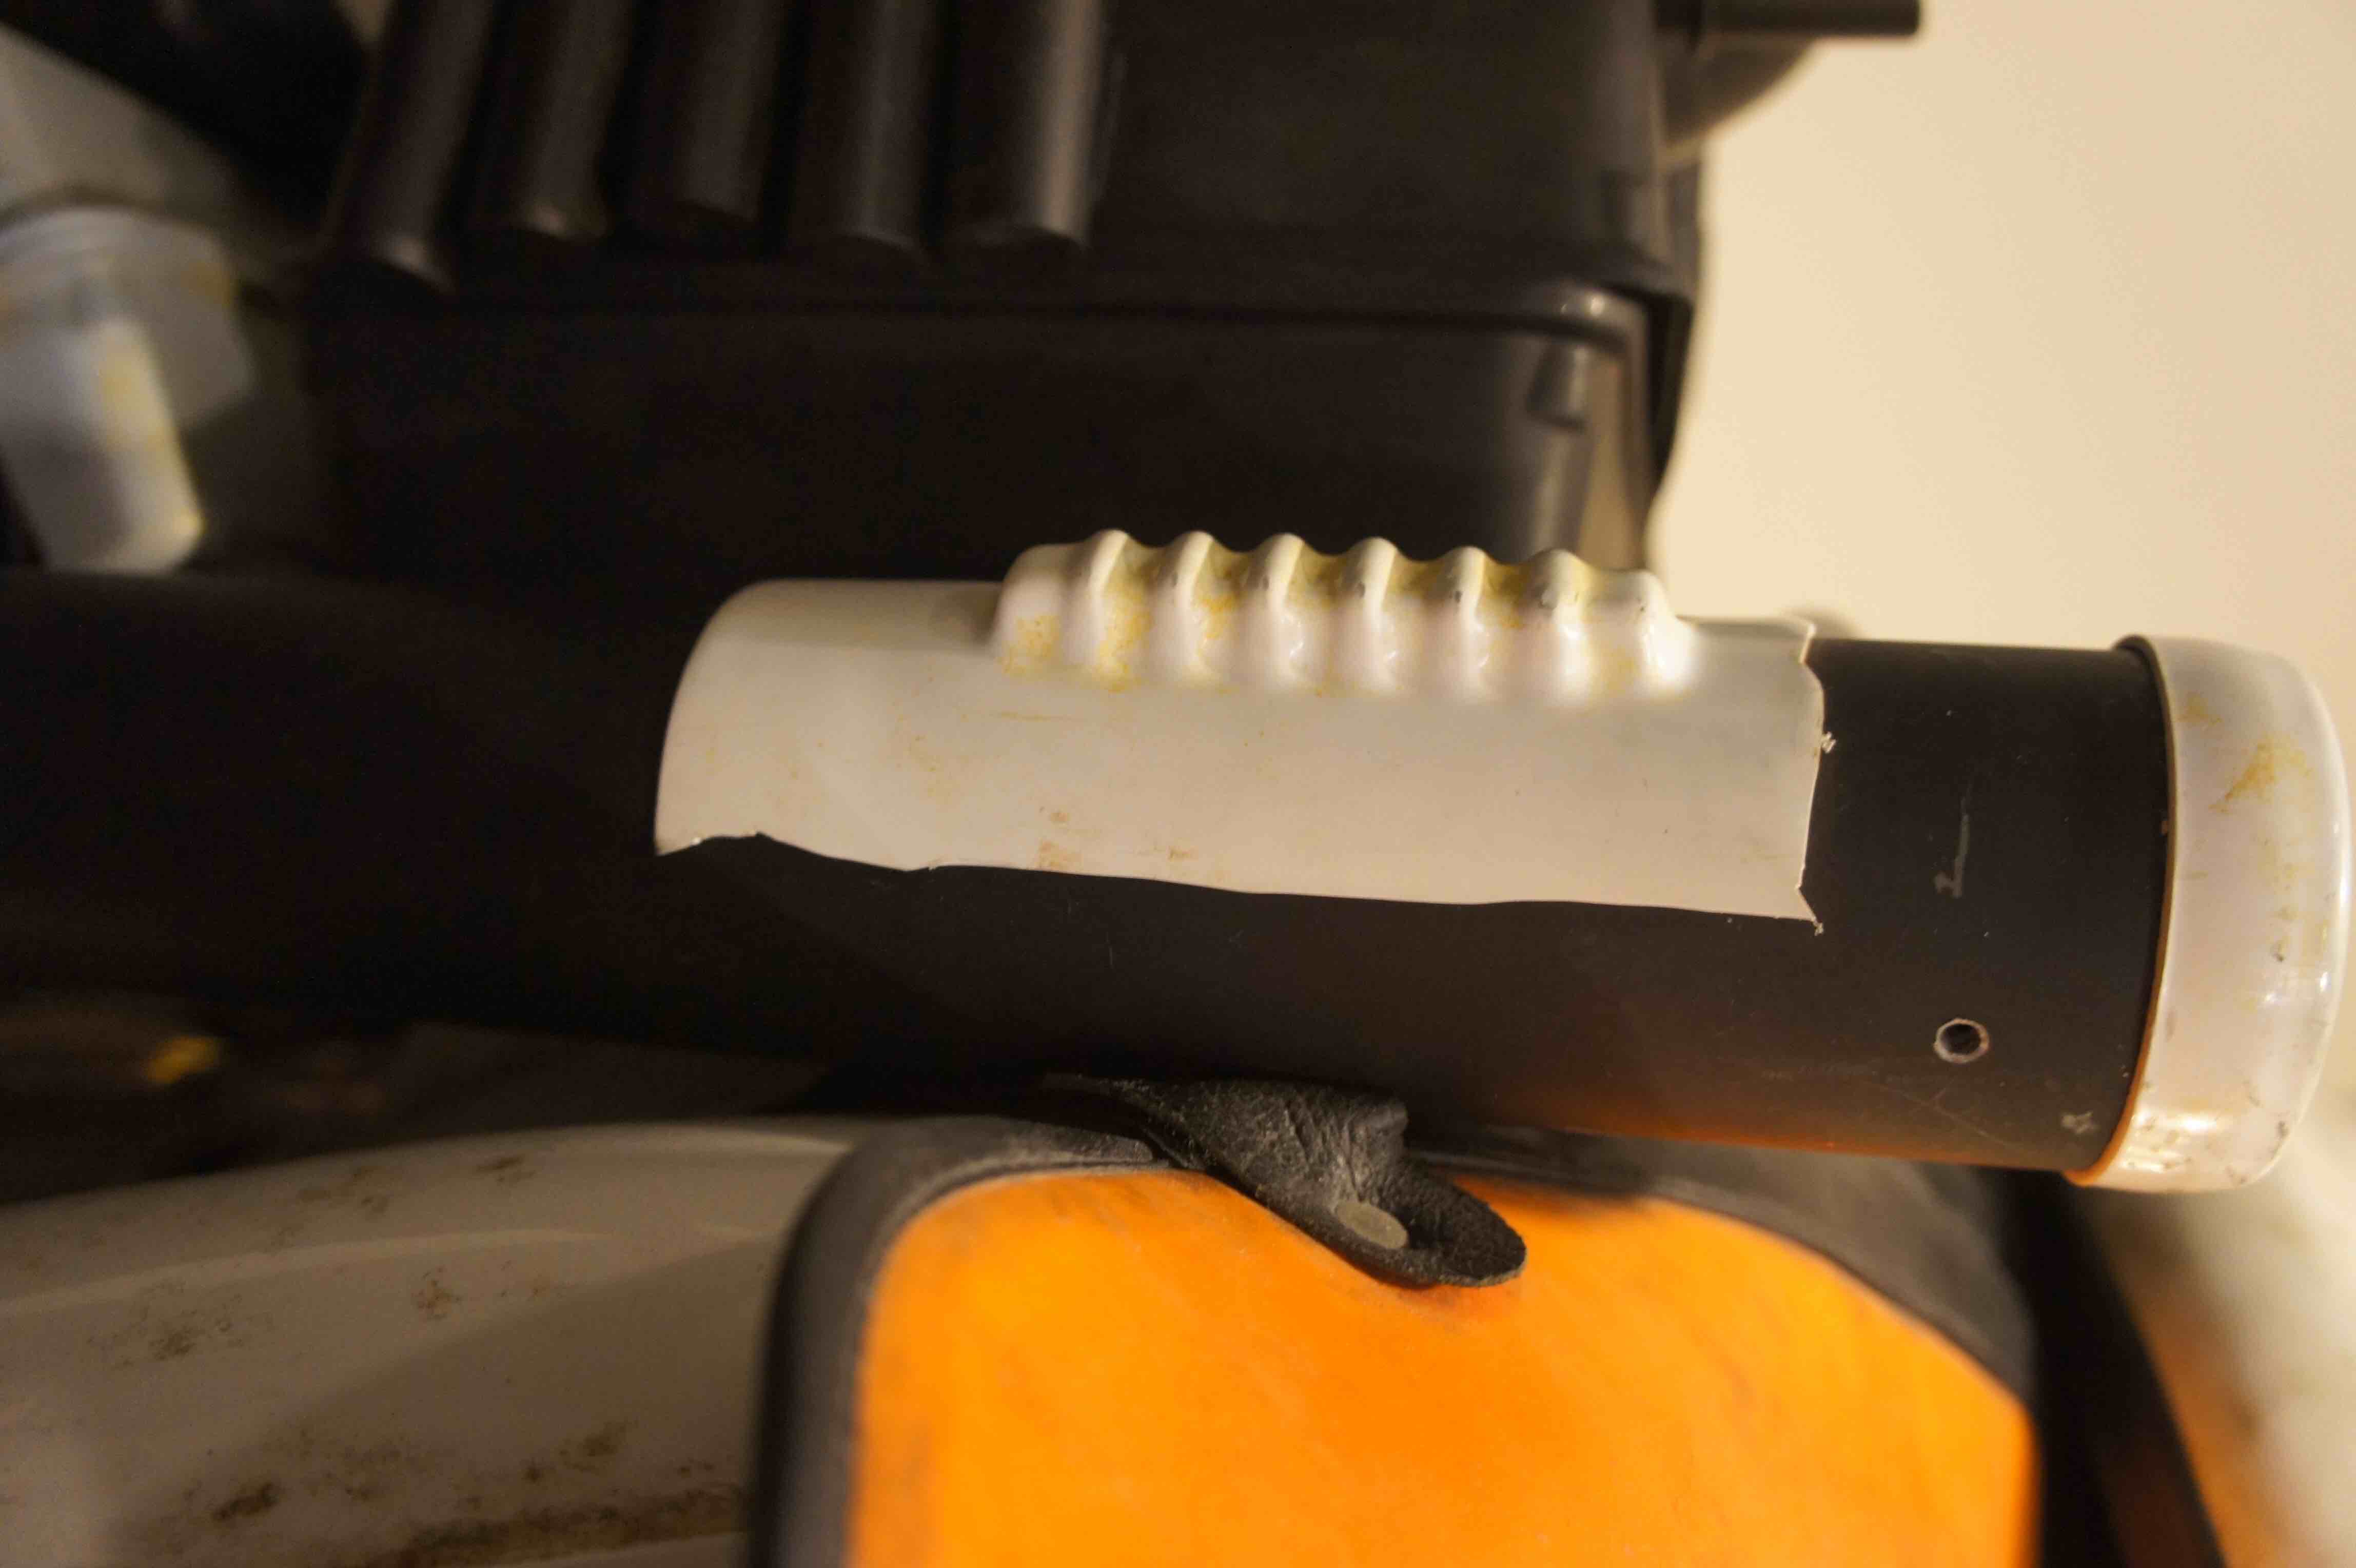
Hi Thomas I'm back! Sorry for the long absence... it has been a really busy and tough year, and I finally made some time to proceed my work.
Here we go...
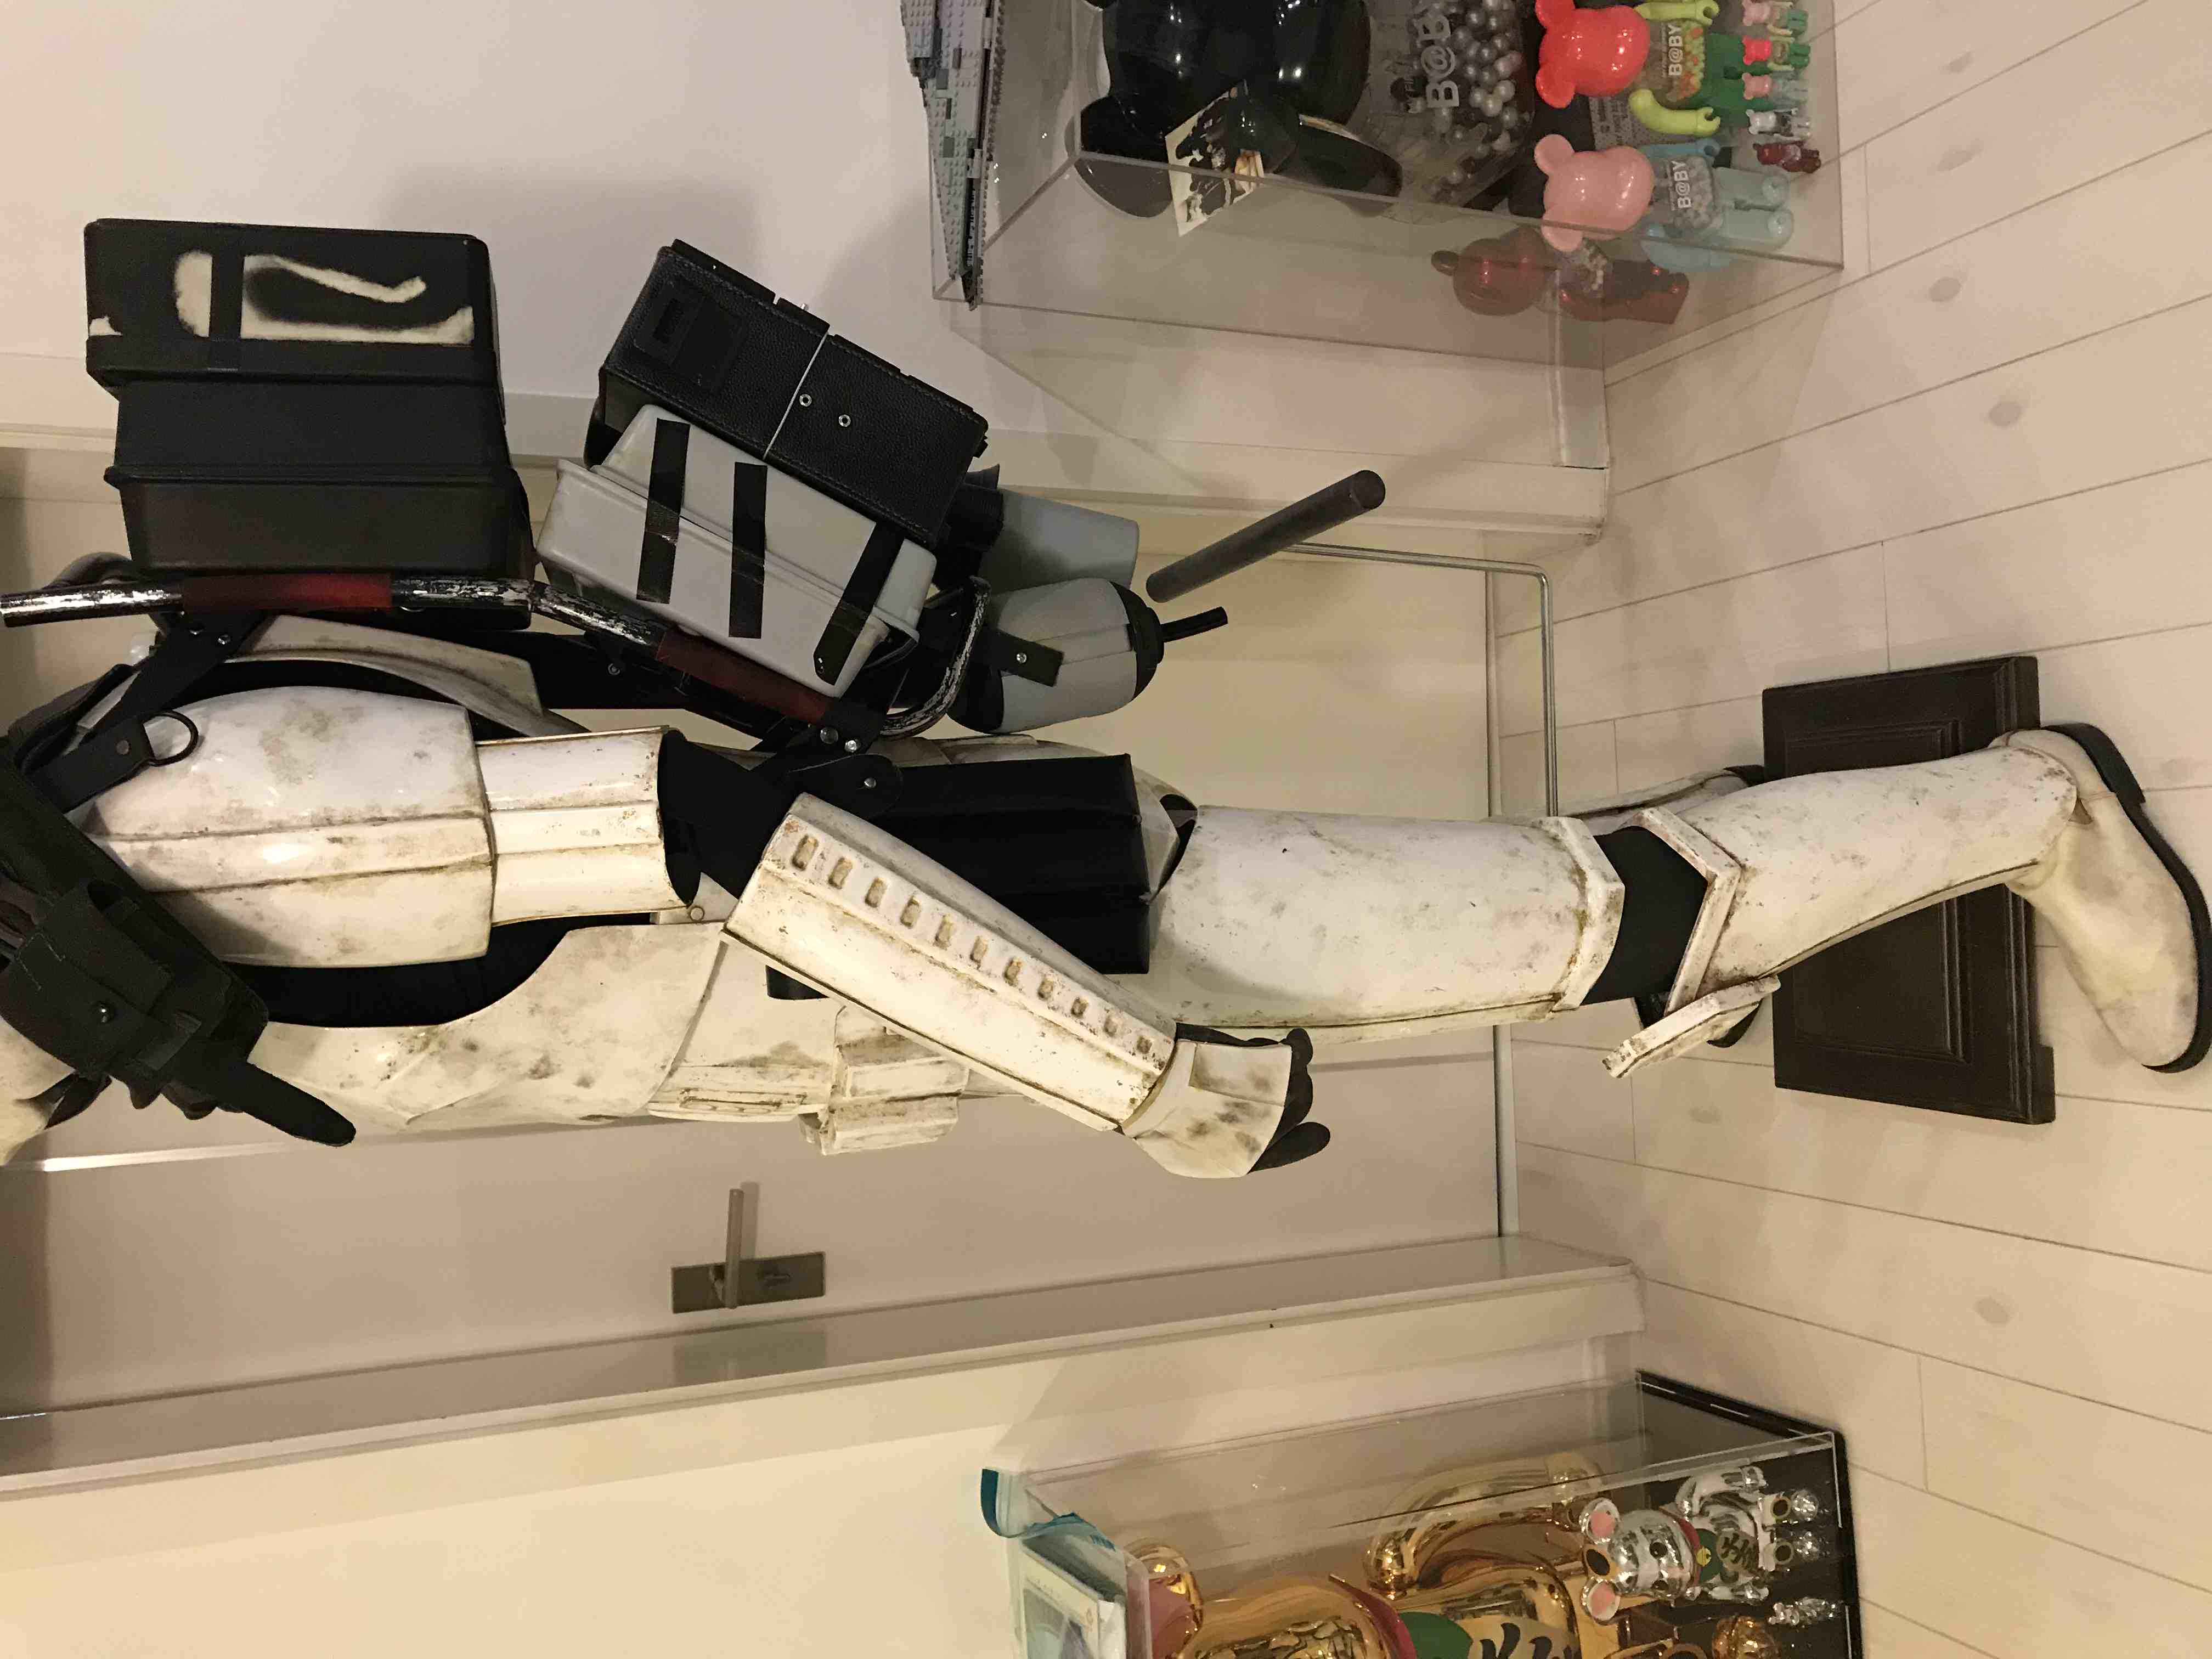
Whole view:
bottles shortened and position adjusted,
mushroom cups changed to rubber cups from toliet plungers: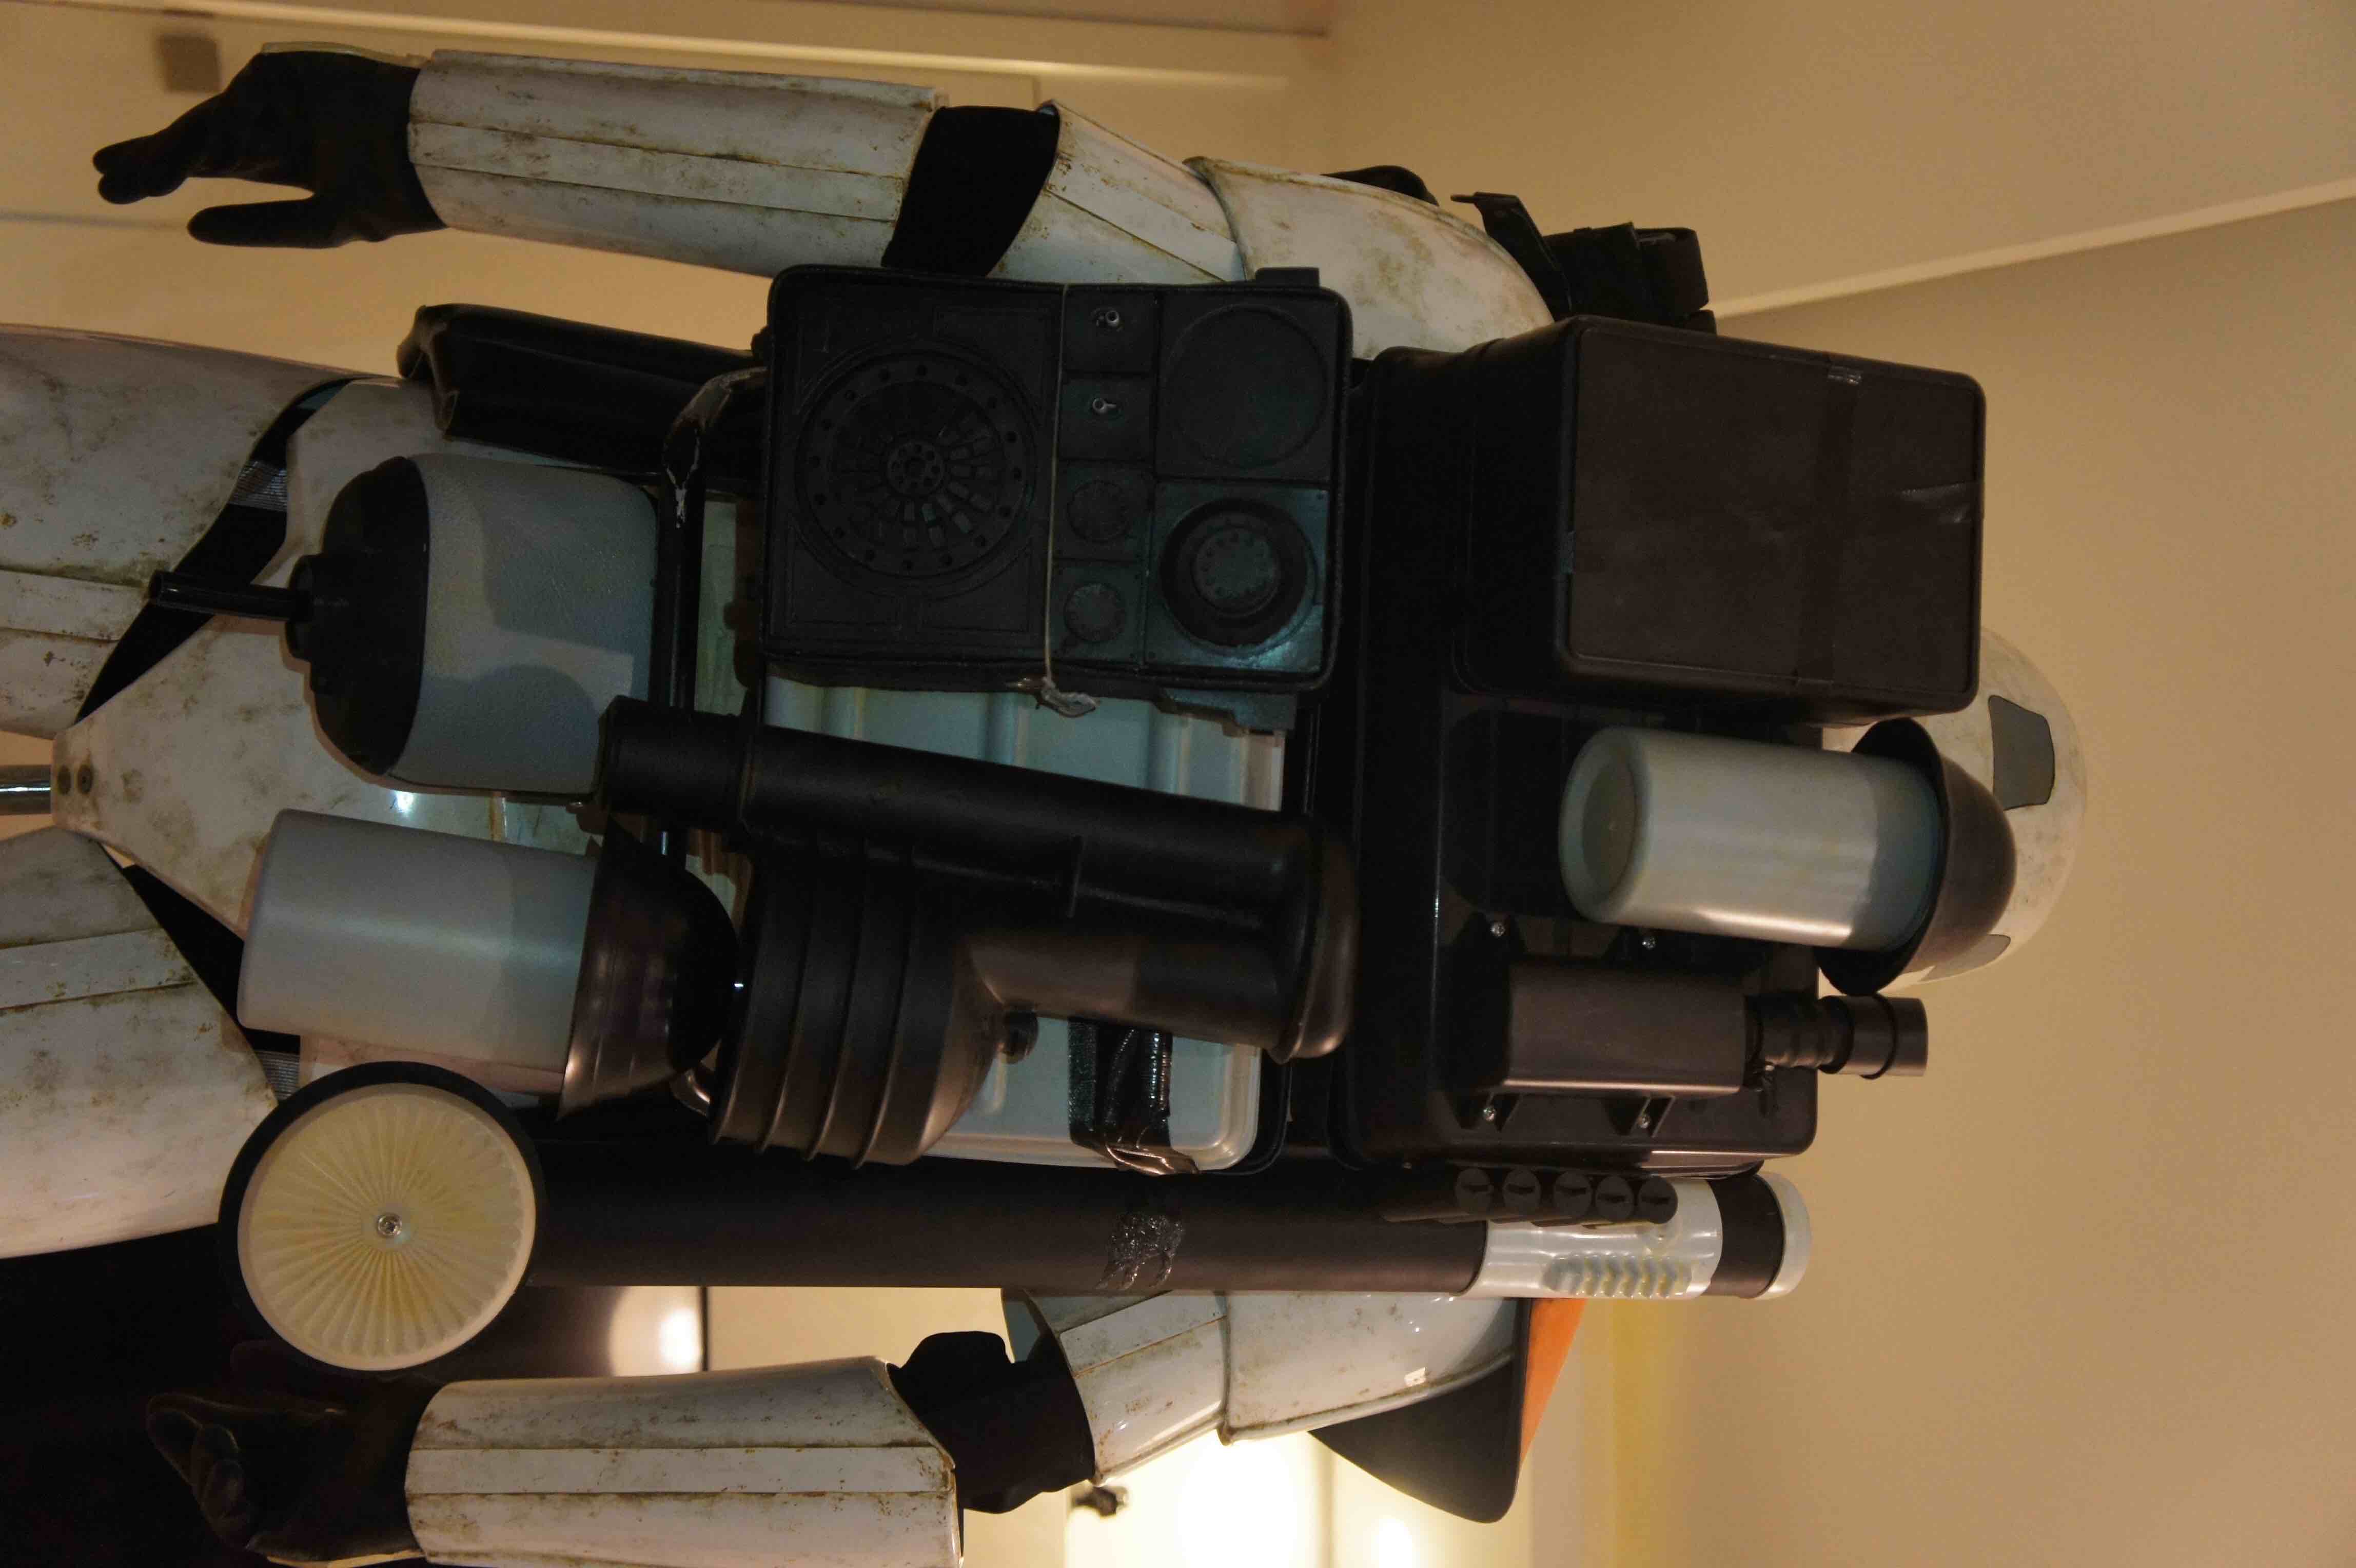
new syphon:
right side of the pack:
mortar tube face plate re-cut:
mortar tube glue spot added:
tape position adjusted:
bigger gap between the shotgun shells:
black Gio bottle holder:
Left side:
scratches on the frame,
bigger kink in the karrimor frame,
blue/grey colour on the brexton box,
red leftovers on the crossbelt of the karrimor frame,
radio position adjusted: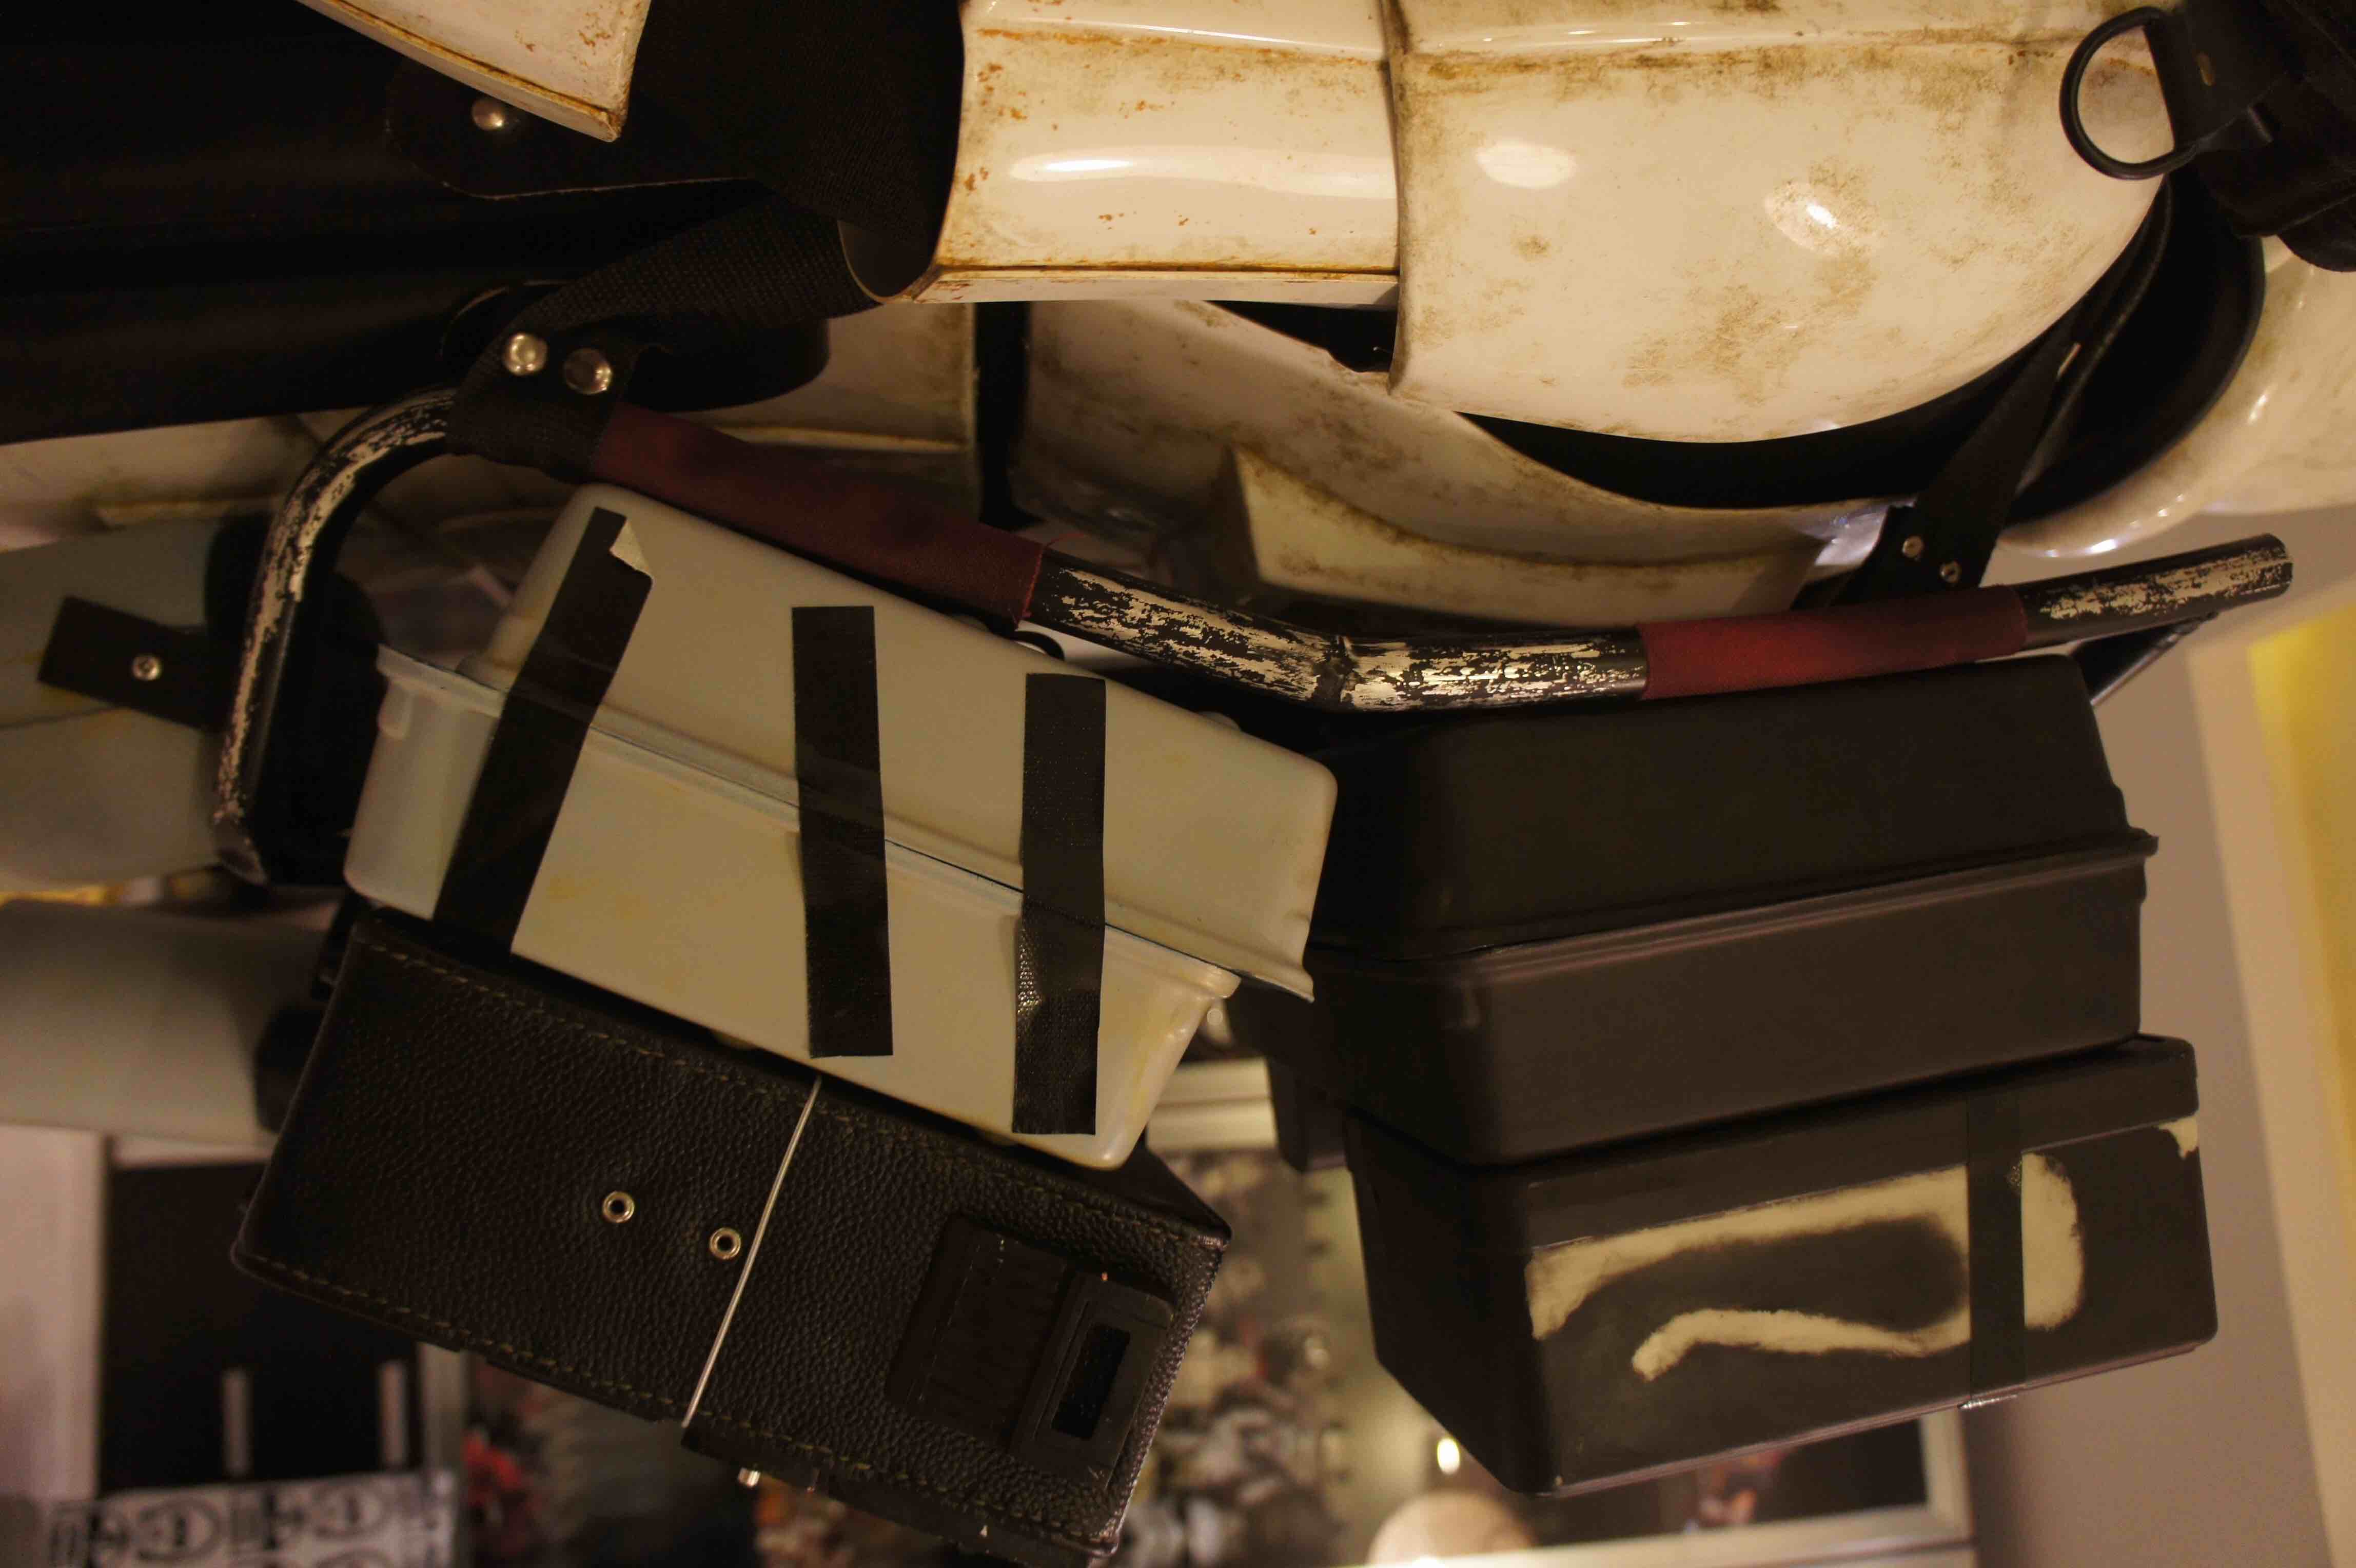
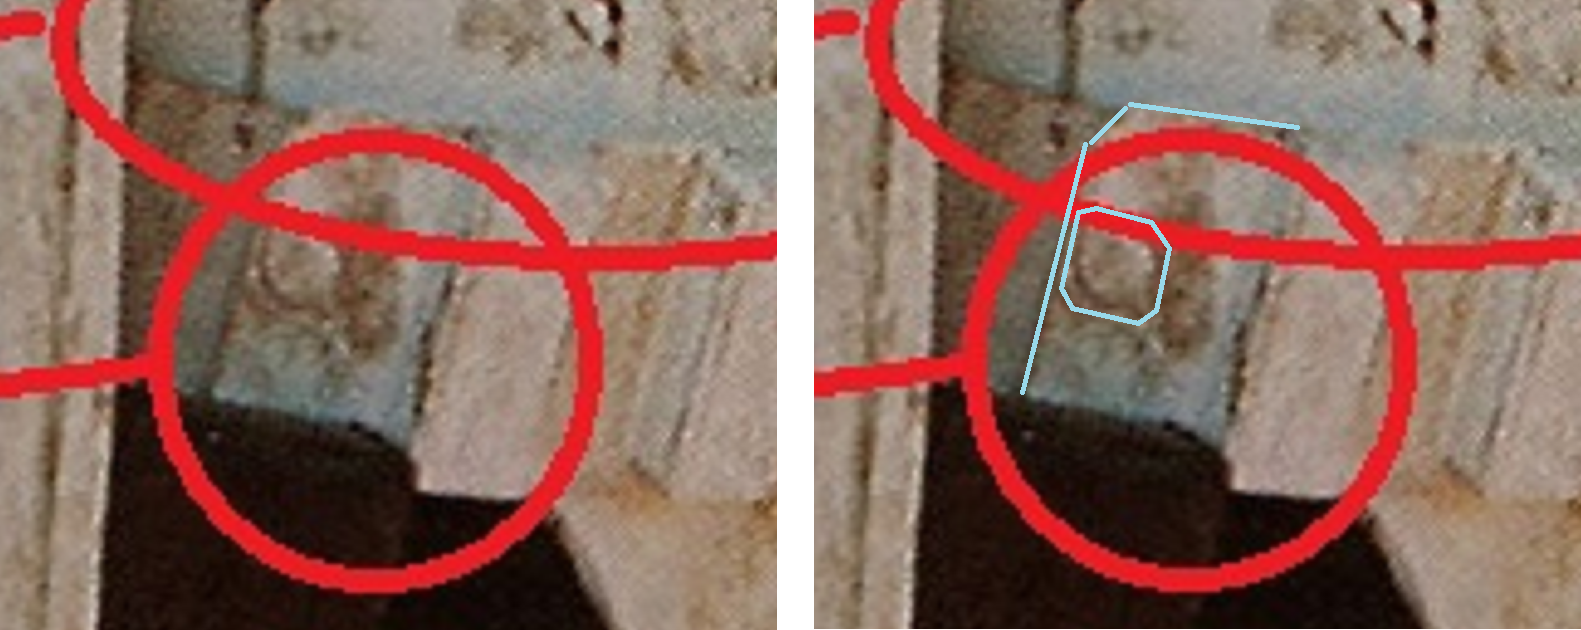
I know you have mentioned that there are only two tapes on the left side of the lower part. But after thinking it over, I believe there was a third tape like the pic below:
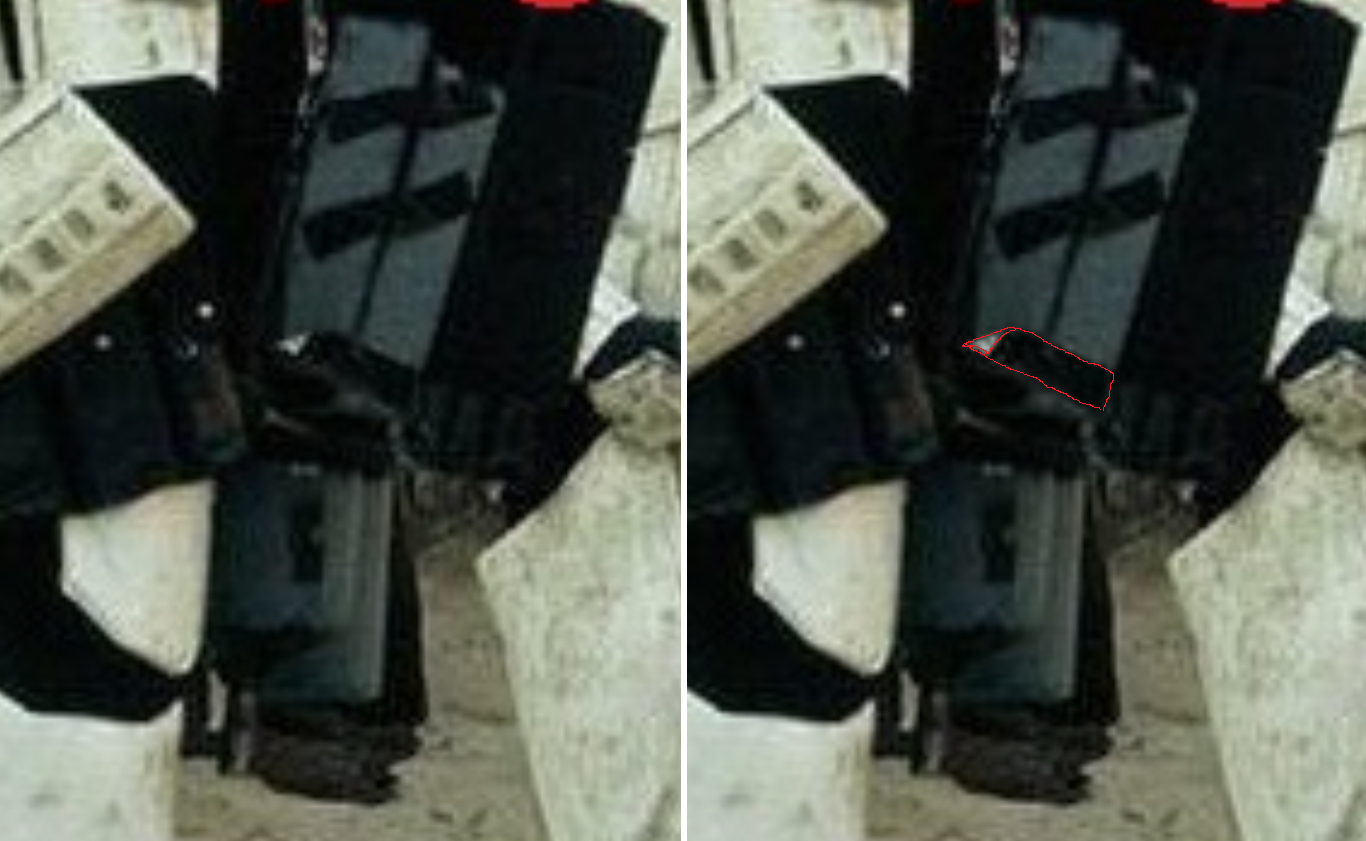
Please tell me whether I'm right.
leather straps on the bottom of the radio:
https://i.loli.net/2019/04/07/5caa0f95c105b.jpgAlthough there were some difficulties for me, but like I said, I'll never give up on this project.
Looking forward to your review!
-
1
-
-
17 hours ago, devilmonking said:
2019 加油
Thanks bro.
2018 was a busy year for me but I won’t give up. I will be back soon!
Wish you a happy new year!
-
#03505 Ordered for 5 and some other stuffs
Thank you!
-
Thank you for your suggestion. Mic tips adjusted.

I'm waiting for my new backpack parts to arrive, will proceed my work soon!
-
1
-
-
Hi Thomas, did some further work according to your review, please let know if I'm doing it right.


-
OK Thomas, I've made some fix on my bucket, here are the new pics:


And some more pics from the same angle as the movie snap for your review:


Looking forward to your comments!
-
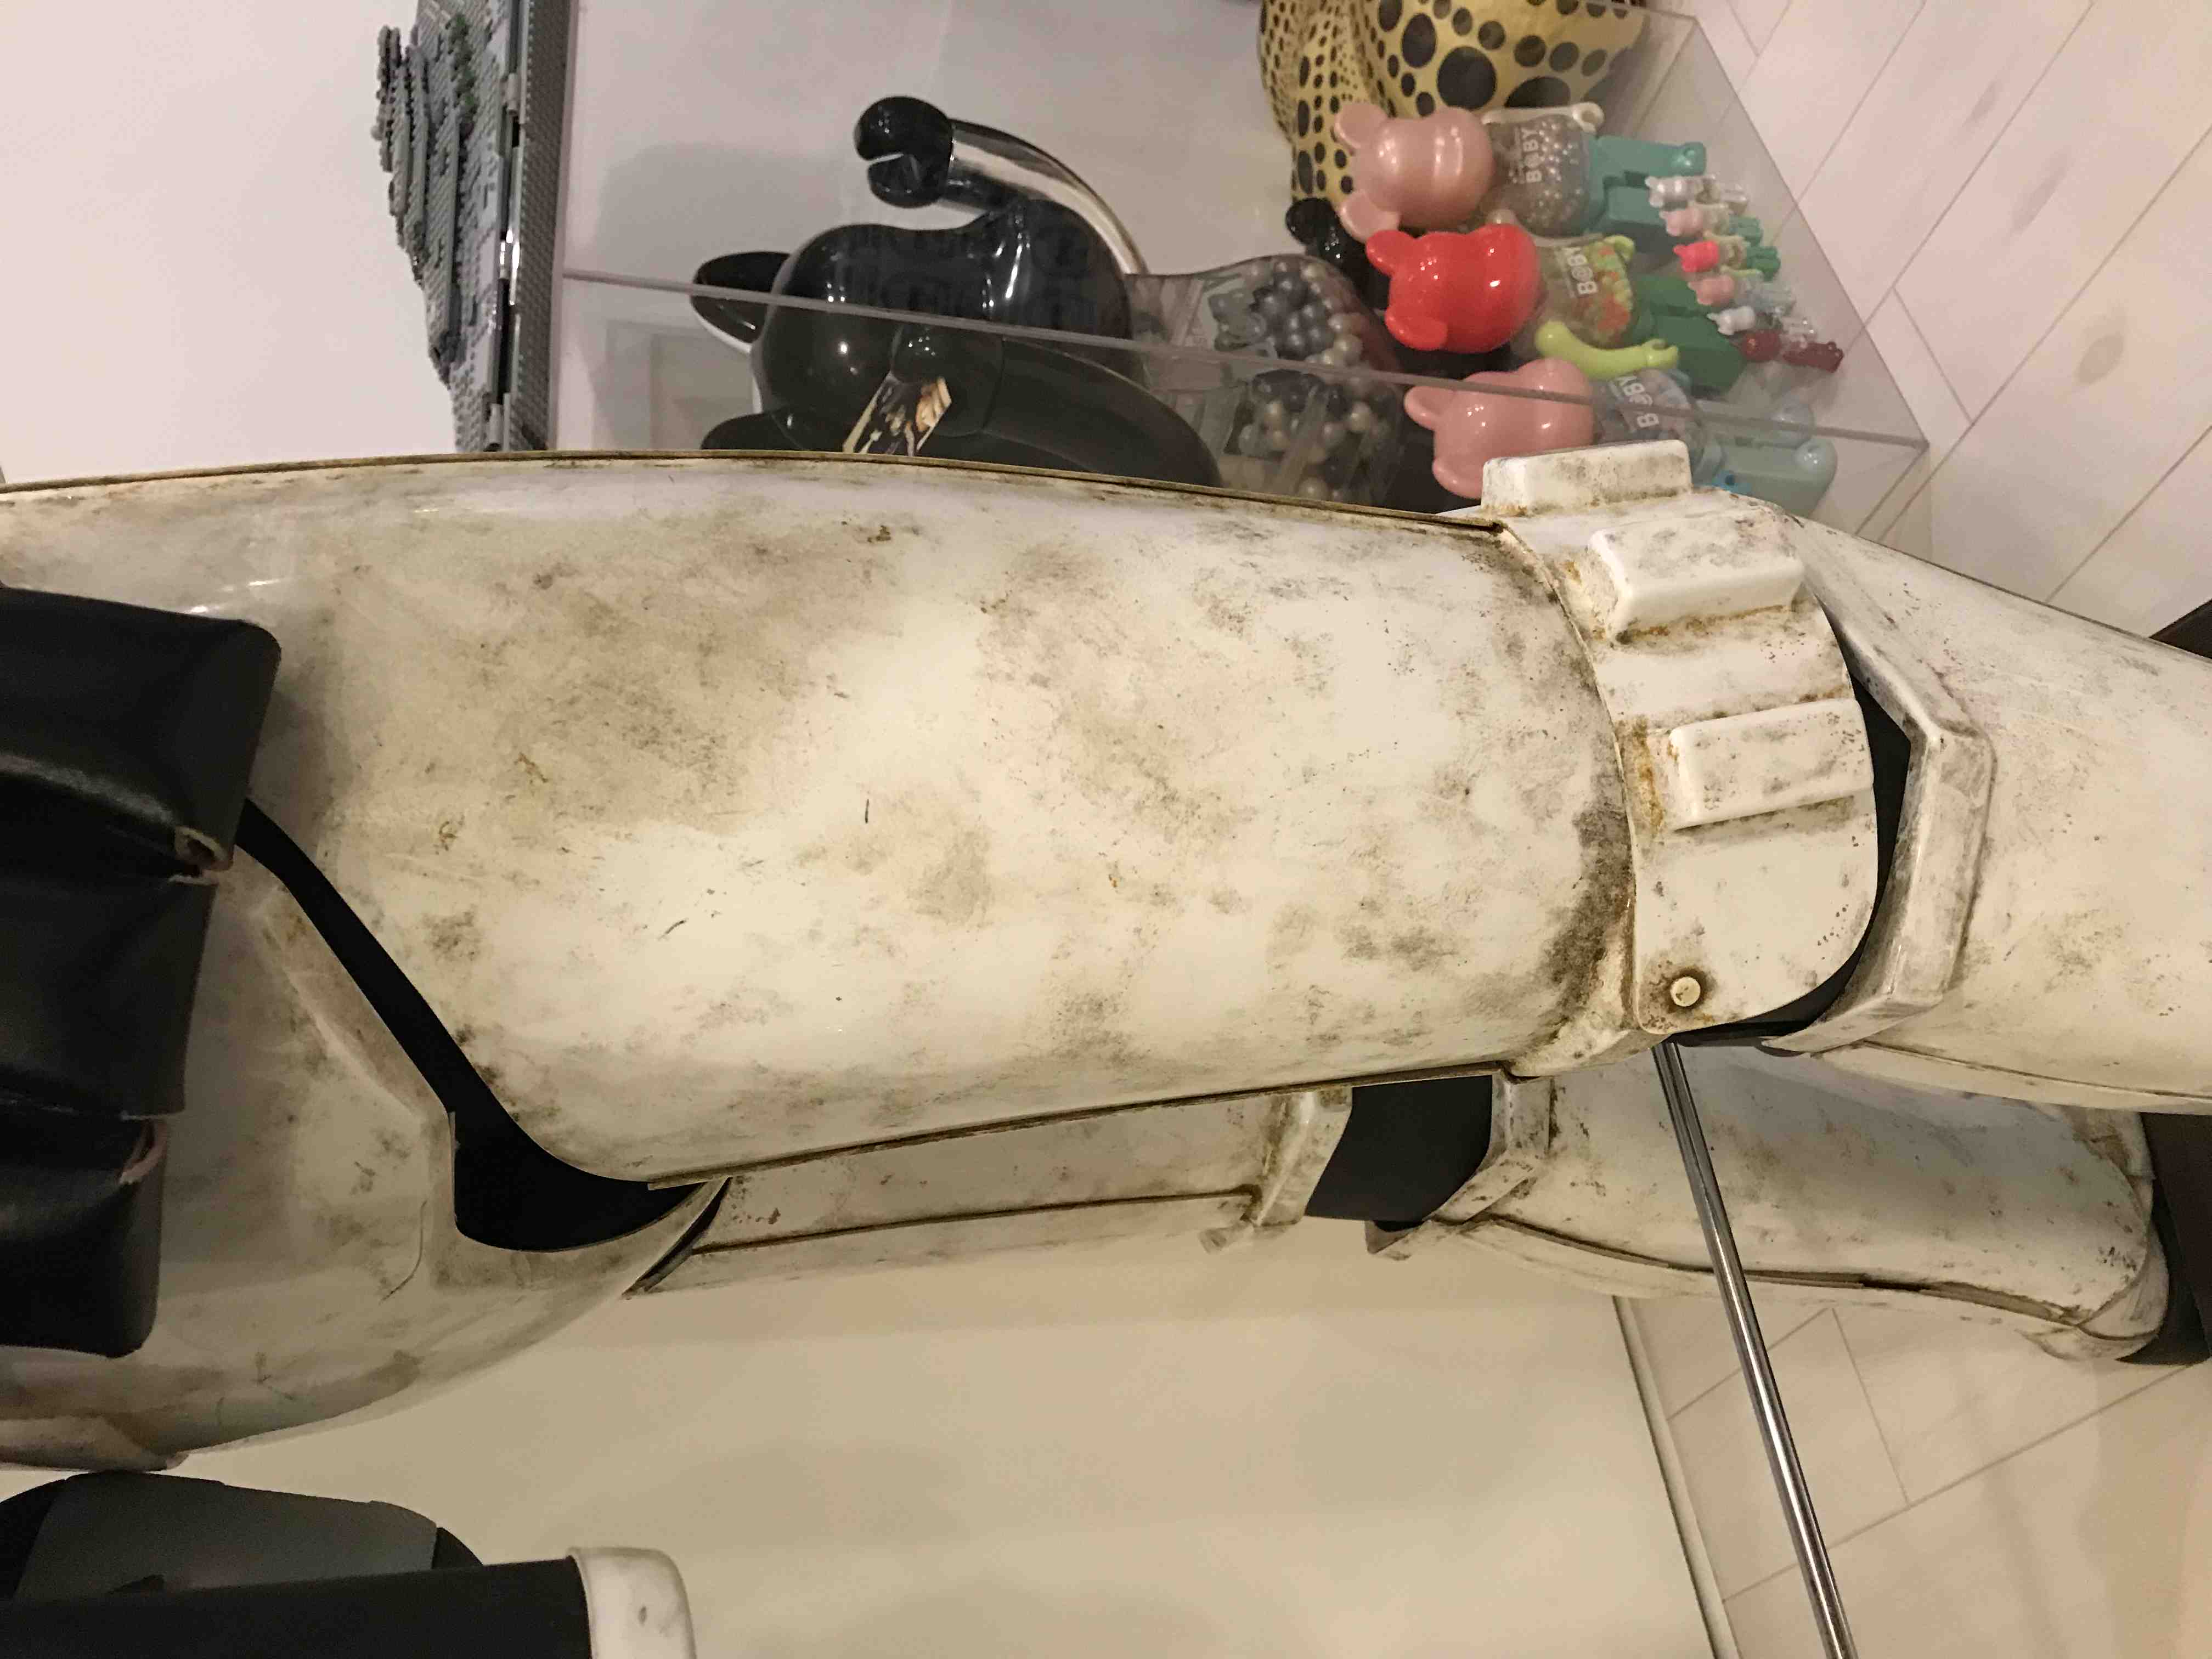
Thanks a lot Thomas, I'll start working soon.
Here is the photo of the right side of right thigh. And also whole armor photos from all side. Let me know if you need more detailed pics.


-
2 hours ago, bigwam said:
Hi Kainan,
Thanks for the new pics. I will do my best in the next time.
Note: no cable ties on the siphon! It makes sense to cut the old one?
Actually it is a Gordon ciphon, maybe I can remove the cable ties and have it upgraded?
I tried to look for a Shire UP90 replica but have found nothing... if anyone have resources please PM me...
-
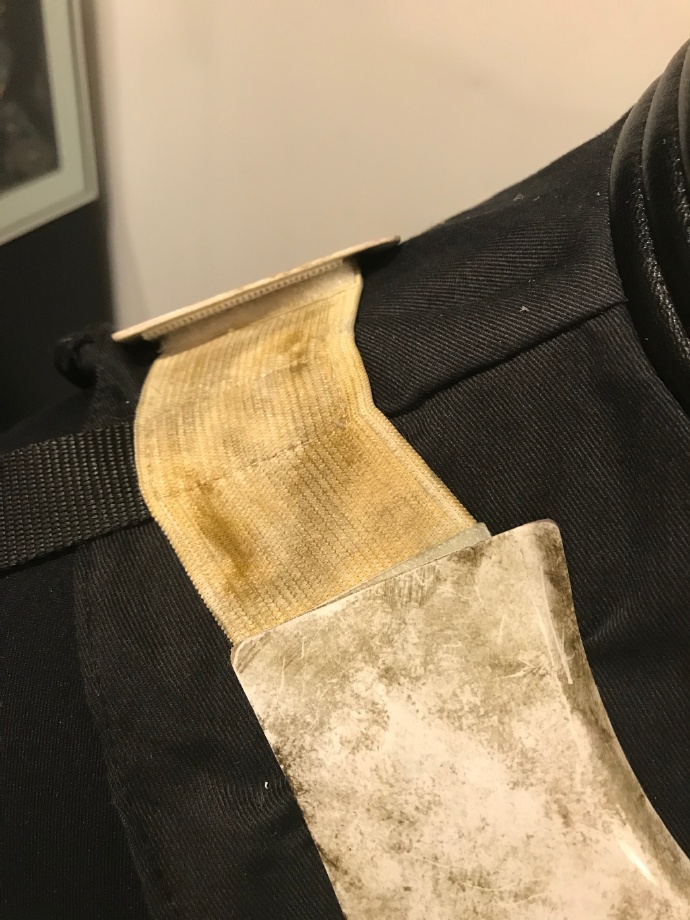
Thank you Thomas!
Fixing the elastic band and adding some close up pic of the armor...


And about the cyphon on the backpack, I wonder if it's acceptable to shorten mine by 2.5cm? Looking forward to some suggestions!
-
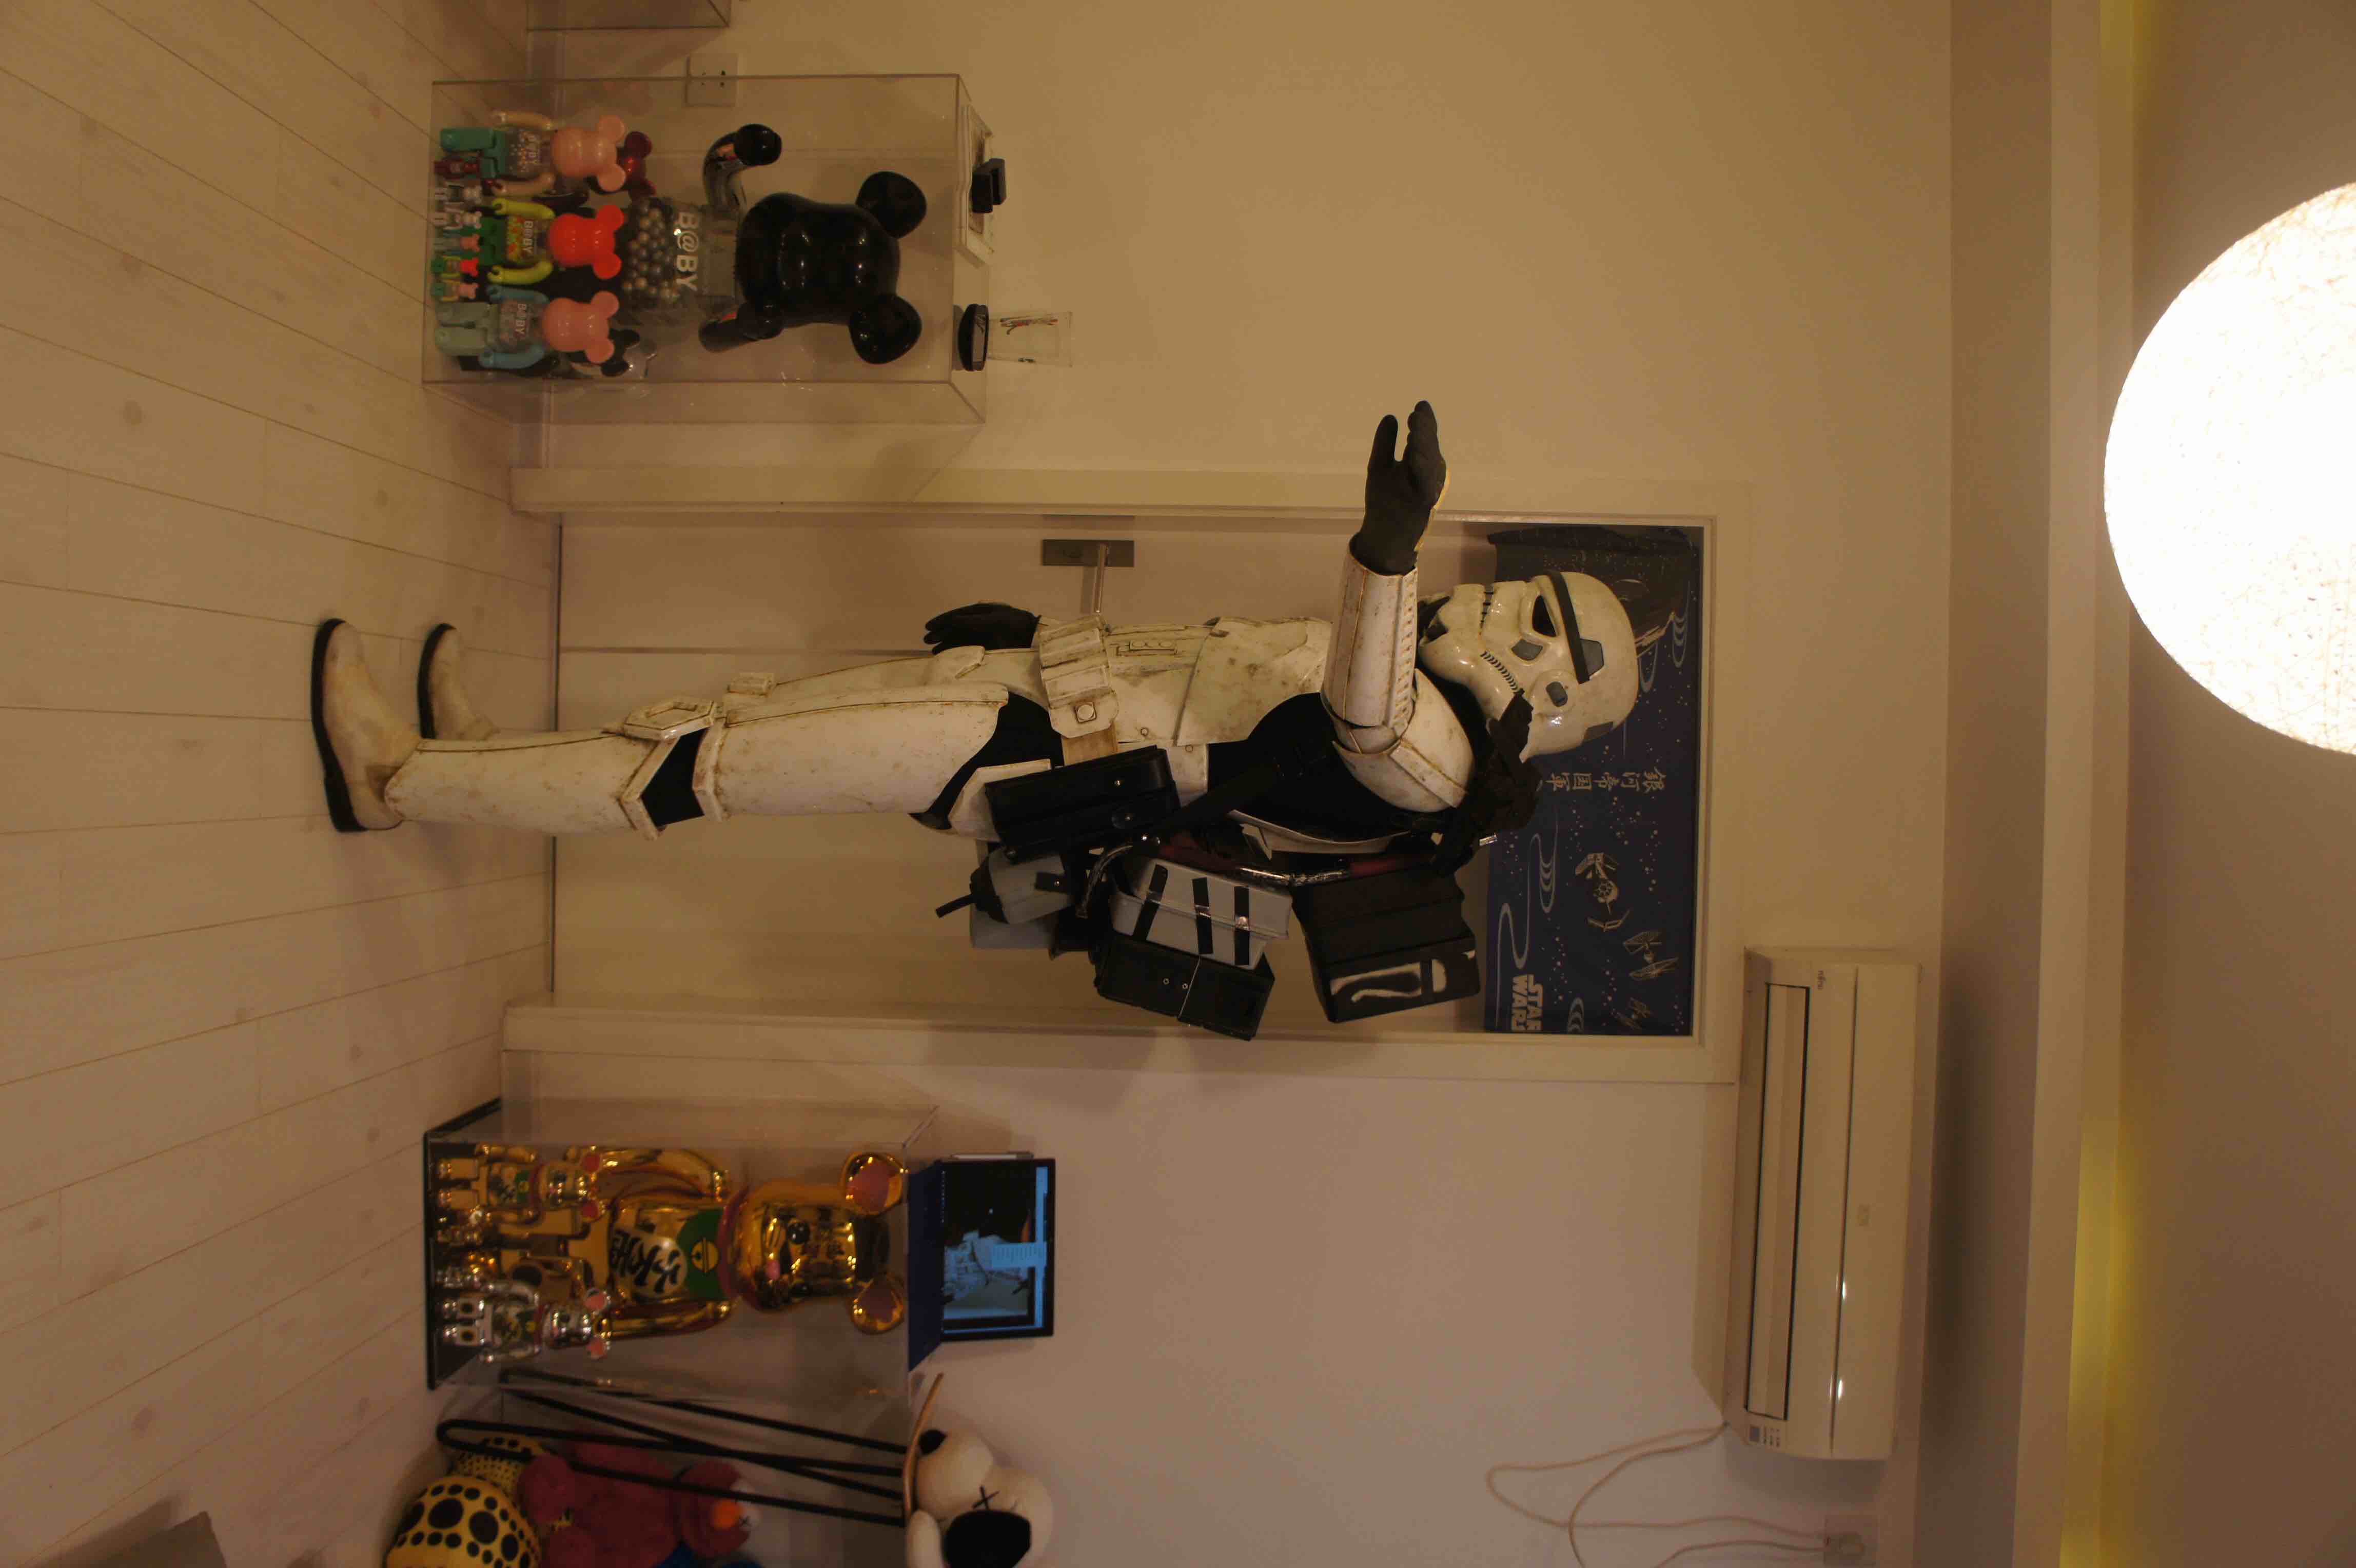
Adding more pics of my backpack for your reveiw:


-
7 hours ago, bigwam said:
Look, this is wrong. You must fix the elastic band with a snap fastener. And the snap fastener must been sewn.:
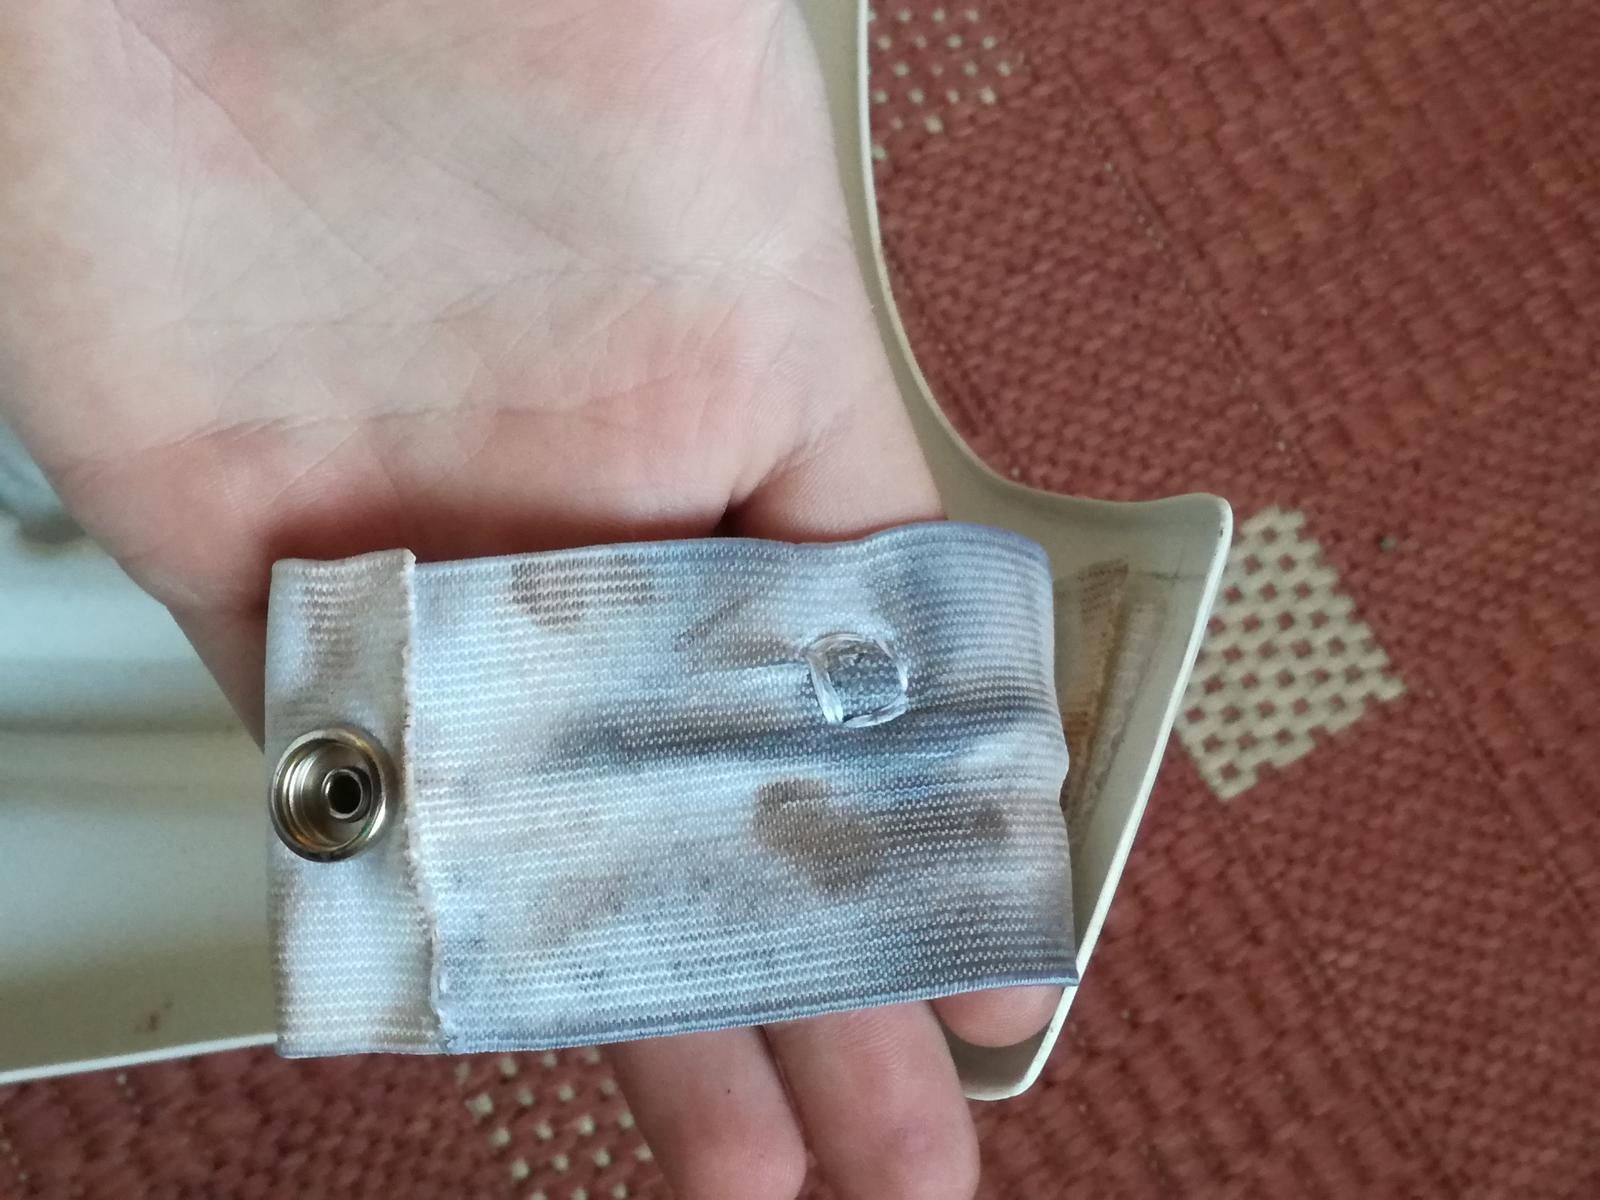
Yes sir!
-
Thank you guys, for all your help and patience
I've been through a very busy time and finally got chance to take some photos, please let me know if you have any suggestions.
Helmet :
Mic tips: white inside


Wheathering and Ears: fixed the missing dots and the special ear

Armor / Suit Details
Canvas Straps:


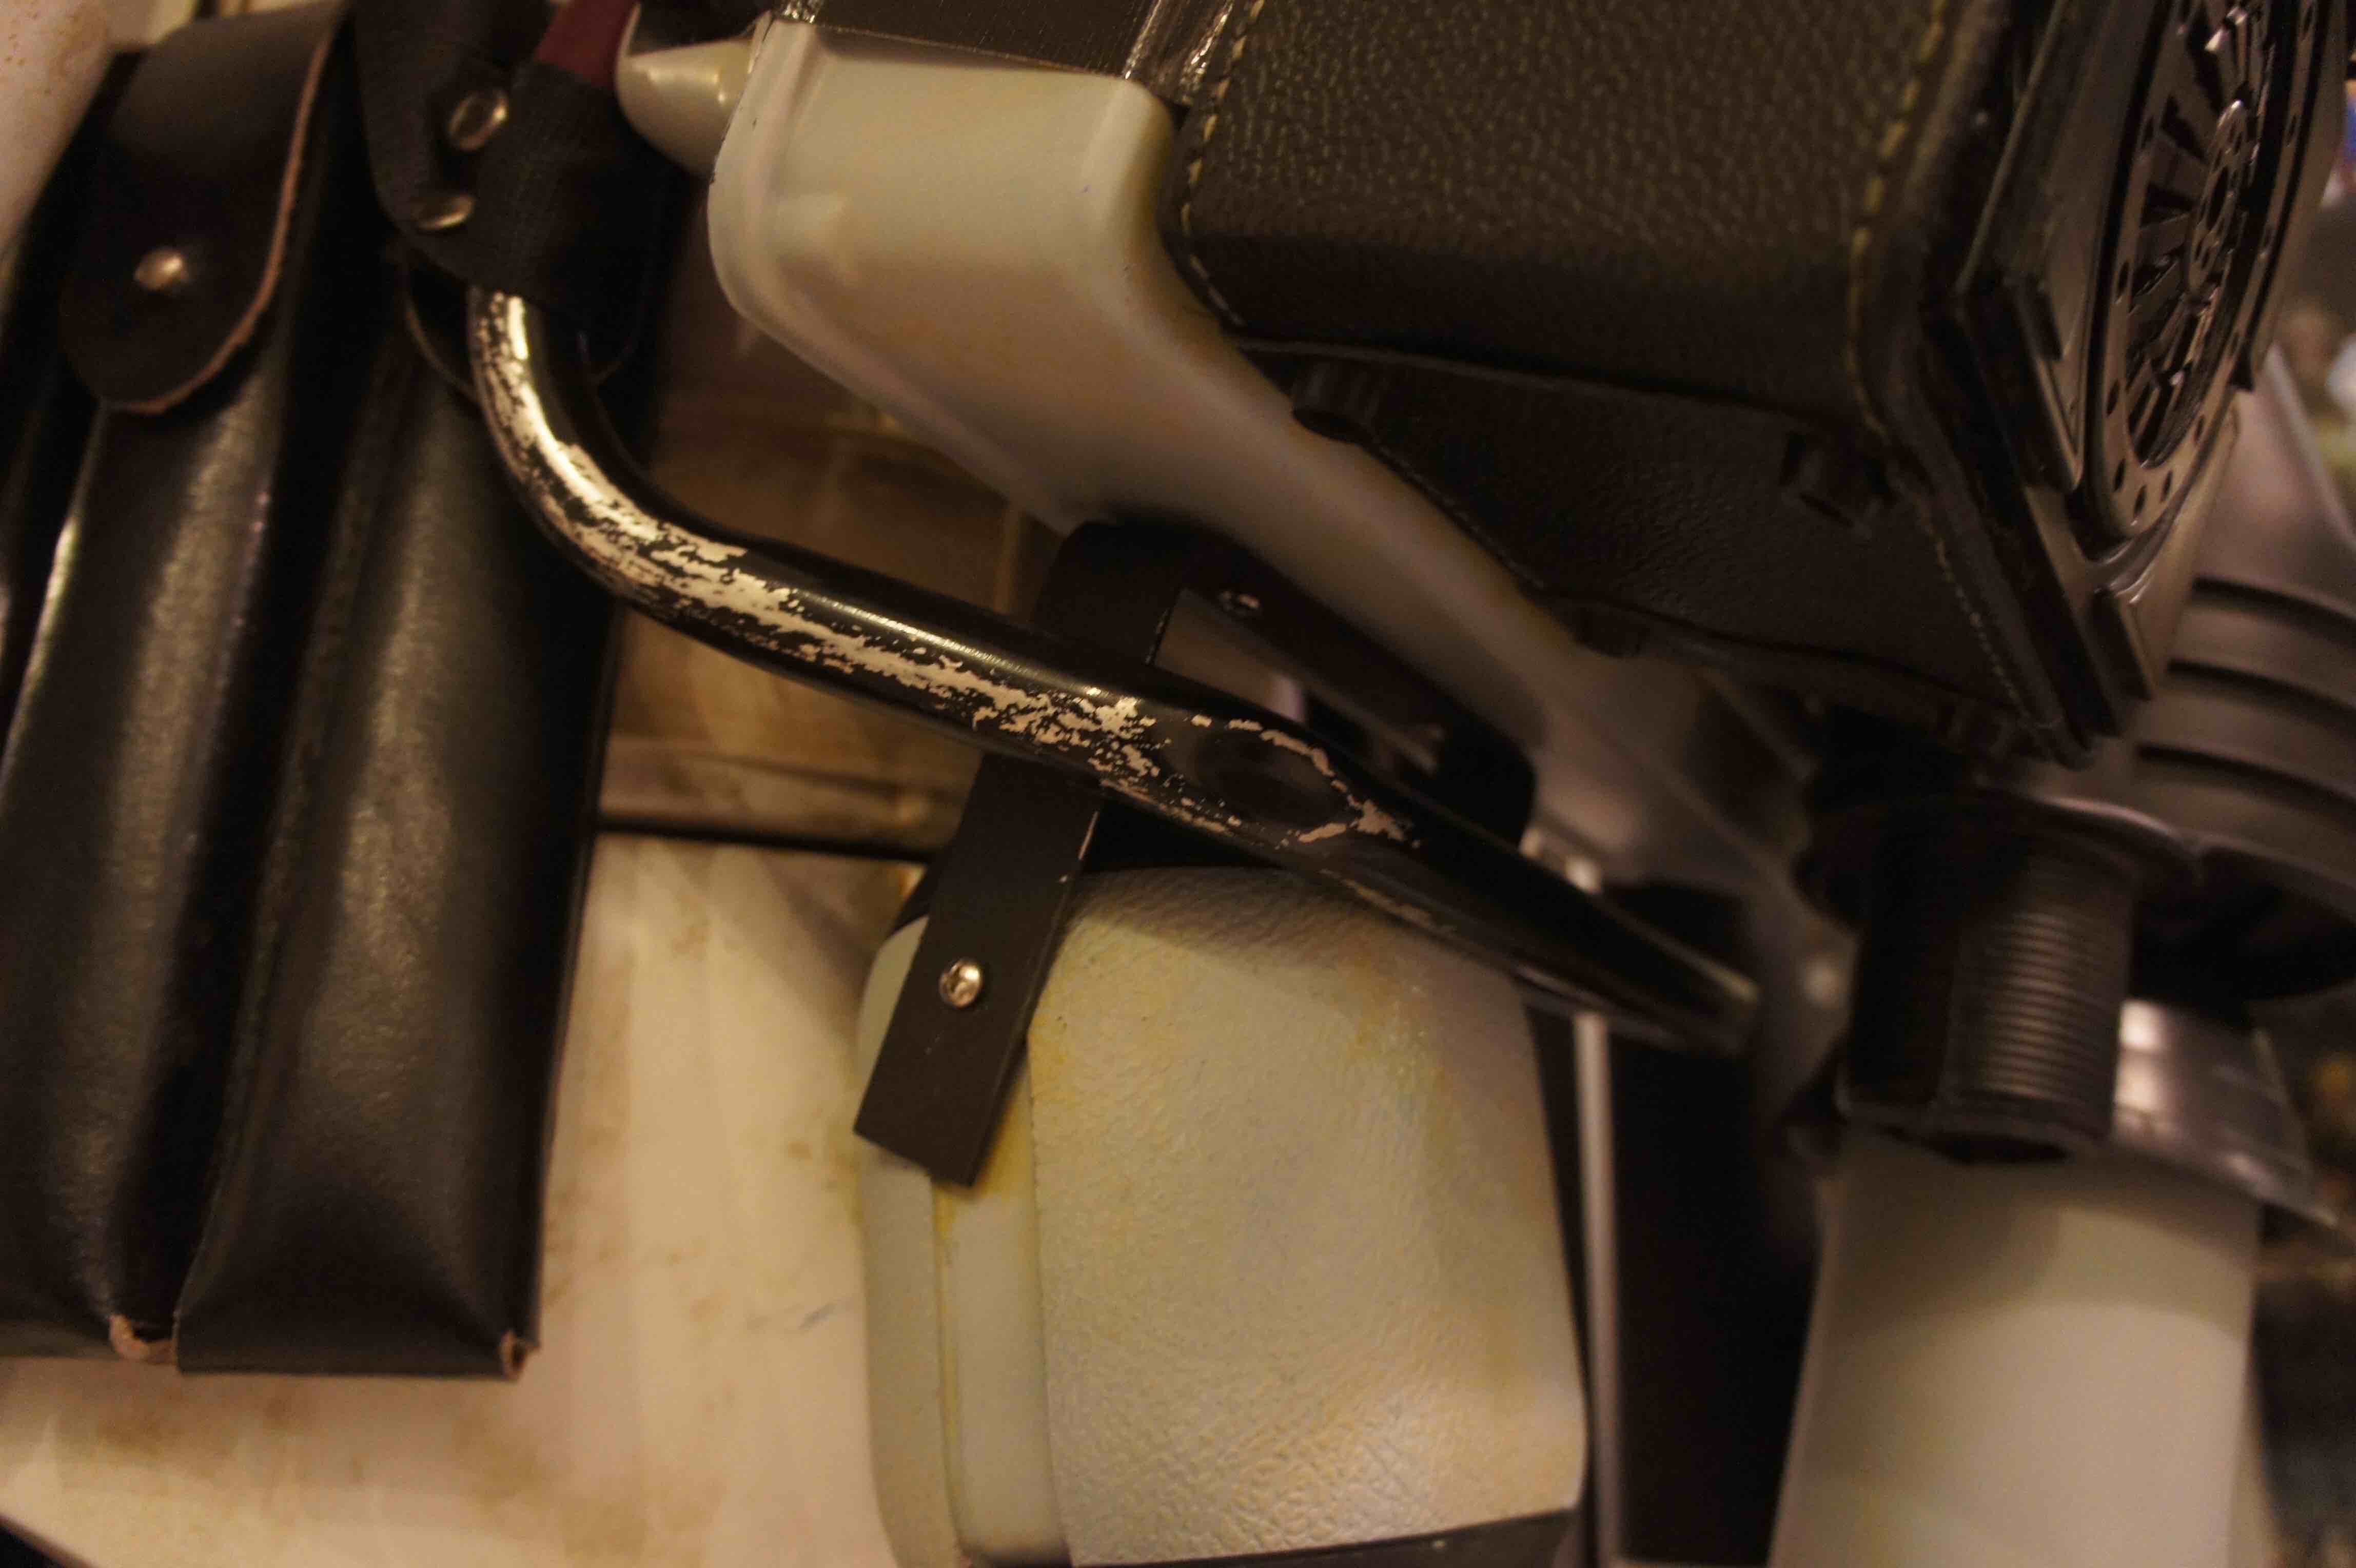
Shoulder Bells and Forearms: the black tape on the bell added; adjusting the angle of forearms

Strapping:

Boots: Less weathering on the boots

Weathering: less weathering on the armor

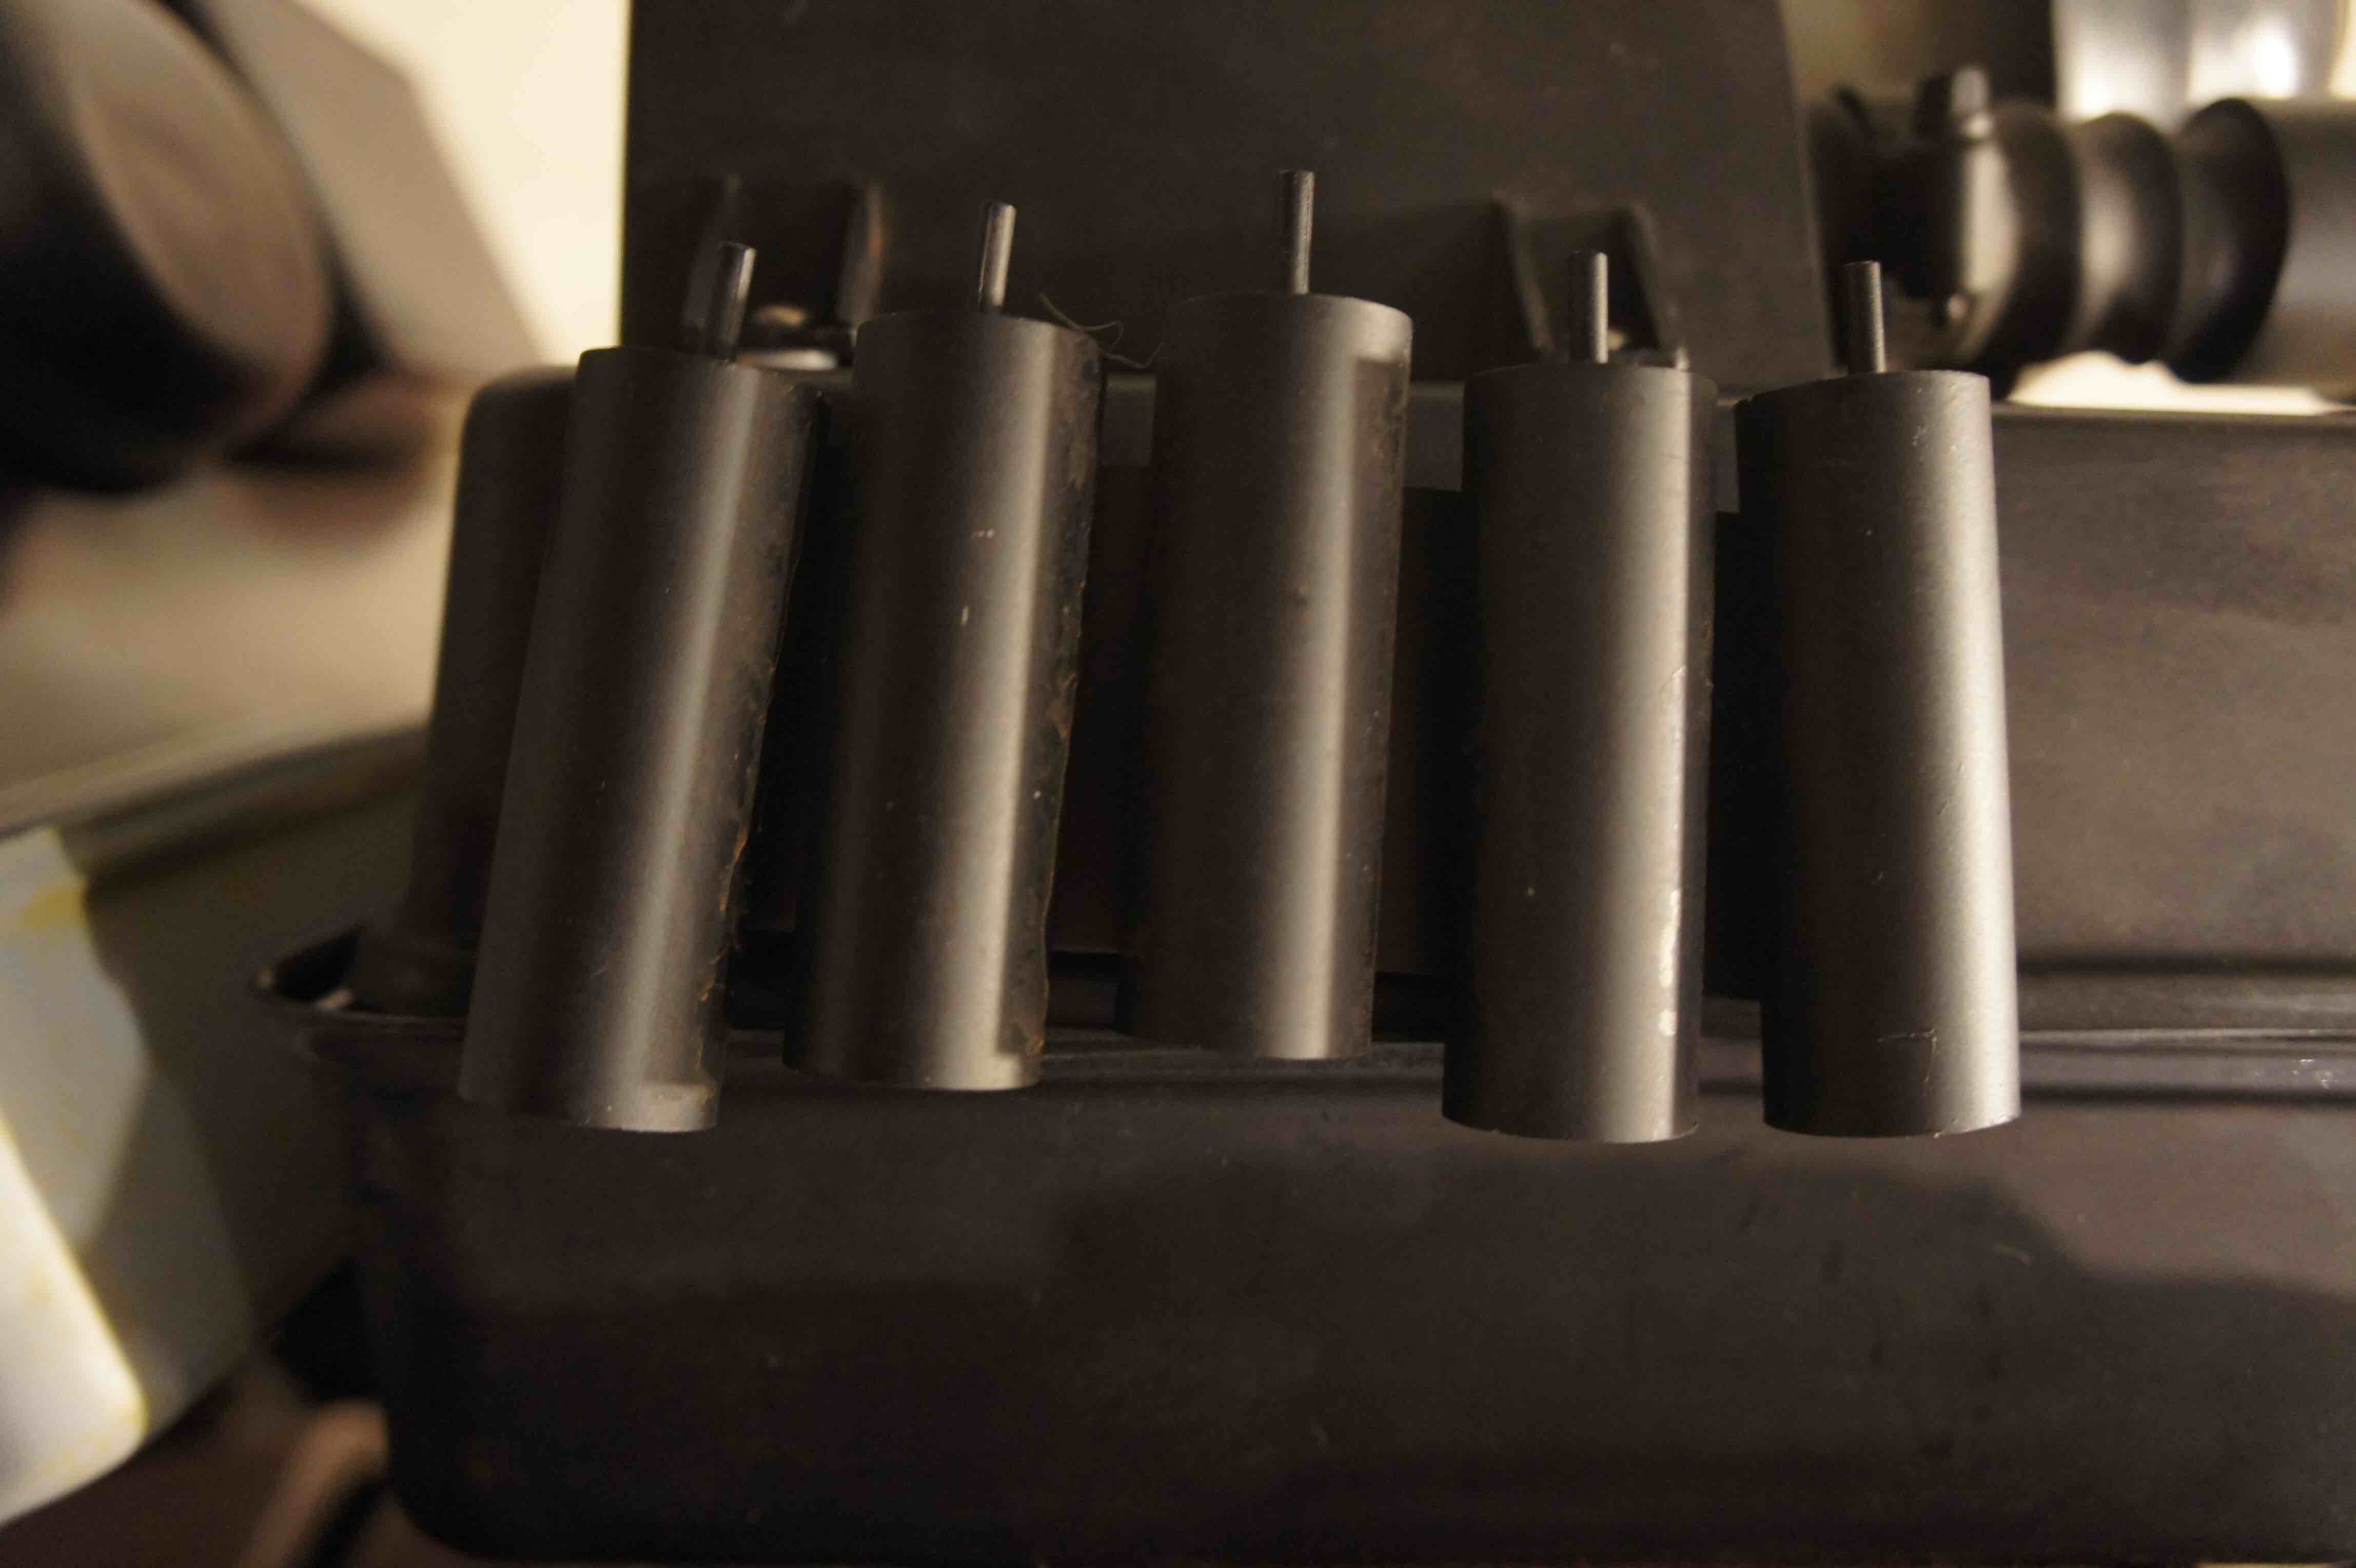
Backpack
The bee stinger cutted; The new sling holders for the radio; New Karrimor frame; Bolt on the Tupperware "sunshine" lid added; The tapes on the left fixed.


-
21 hours ago, bigwam said:
Look here:
Thanks Thomas!
-
Hi Felix, I'm back. Finally got all my new parts ready and starting the work.
Before that I have a question:
On 2017/11/6 at 8:58 PM, Felice said:- The sling holders for the radio have the wrong form/structure
Would you please let me have a reference picture for that? Thank you.
-
interested for 2
Trooping Report: Star Wars TROS China Premiere
in Tours of Duty
Posted
Not sure if I should call it trooping report... because for me it's not an ordinary in costume trooping.
The Rise of Skywalker had its China Premiere on Dec 18, the members of 501st Legion Chinese Garrison and Rebel Legion China Base have attend the event. We have trooped in the Walt Disney Grand Theatre in Shanghai Disneytown. After the movie, we entered the Shanghai Disney Land and took some amazing photo in costume in front of the castle.
I wasn't in my TD costume, because Disney China had an special arrangement. Approved by Lucas Film, my sandtrooper armor will be displayed in Star Wars Launch Bay in Disney Land for a week, along with the offical movie props.
Also I was honored to be invited as a guest speaker at the premiere with Mr.Liang Yang, our new Honorary Member, who played FN-2199 in TFA and Praetorian Guards in TLJ. I talked about the stories of 501st and MEPD's armor making. And Mr Yang shared a lot of behind scenes details of the Star Wars moives he has participated.
I was so proud and I wanna share my excitement with my MEPD brothers and sisters. Hope you all enjoy the new movie and may the force be with you!