


tk6316
-
Posts
40 -
Joined
-
Last visited
-
Days Won
3
Content Type
Events
Profiles
Forums
Everything posted by tk6316
-
*DONE* TD-69170 Requesting Deployment
tk6316 replied to HugeBadWolf's topic in MEPD Police Officer Program
Awesome kit! Congrats! -
+Done* TD-24916 Requesting Deployment
tk6316 replied to ICEBERG's topic in MEPD Police Officer Program
Good job trooper! -
*IN PROGRESS* TD-6316 Requesting SWAT Deployment
tk6316 replied to tk6316's topic in MEPD S.W.A.T. Program
Appreciate it Chris! -
*IN PROGRESS* TD-6316 Requesting SWAT Deployment
tk6316 replied to tk6316's topic in MEPD S.W.A.T. Program
Thanks Pete! Looking forward to joining the ranks -
*IN PROGRESS* TD-6316 Requesting SWAT Deployment
tk6316 replied to tk6316's topic in MEPD S.W.A.T. Program
Hi @Hausi, Thanks for the review. I guess it appears I have 'jumped the gun' on my helmet with the paint chip details and weathering and I believe I would need to wipe everything off clean and redo it to match the "Look Sir, droids" helmet but a 'lite' version instead. This however may take awhile. Noted on the comments regarding the weathering on the chest, handguard, shins and boots. These can be corrected somewhat easily. As for the radio, I already have the dial on standby from some time ago so that will be a quick work. And shall wait for the results with regards to the plastic cannister but from the screengrab photo above, I'd disagree that there is one present as the lines on the side of the radio are fairly straight suggesting the absence of the cannister. Modifications to the E11 should be a quick one as well. I already found the 3D files for the M19 scope and make a new rail and drill out the ejection port with the lever pulled back.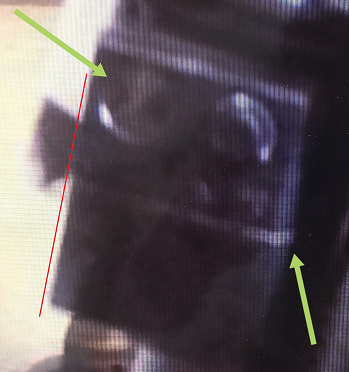
-
*IN PROGRESS* TD-6316 Requesting SWAT Deployment
tk6316 replied to tk6316's topic in MEPD S.W.A.T. Program
Good day to you @Hausi& @bigwam I hope you both are doing fine. Thank you for taking the time to review my application and would like to apologise for the long gap in my reply. My armour is actually in my new apartment and I didn't manage to find the time to take the pics. Here is the additional photos as requested. Helmet off 360 pics (with backpack Front Sides 360 photo (w/o backpack) Snaps & fasteners Backpack Do let me know if more photos is needed and changes required. Thanks guys! -
Name: Daniel Wong Legion ID #: TD-6316 Forum Name: tk6316 Garrison: Malaysia Garrison Trooper Emulated: Docking Bay 94 (Sergeant) Police Officer : On-screen trooper (right) vs Applicant (left) Photo 1 Photo 2 Helmet Armor Blaster That is all for my application and would appreciate any feedback or changes needed for my kit to be approved. Thanks!
-
*done* TD-19743 Requesting Deployment
tk6316 replied to DKK Hollywood's topic in MEPD Police Officer Program
Congrats! -
PM sent
-
*DONE* TD-6316 Requesting Deployment
tk6316 replied to tk6316's topic in MEPD Police Officer Program
Thanks @Omaha Joe! -
*DONE* TD-6316 Requesting Deployment
tk6316 replied to tk6316's topic in MEPD Police Officer Program
GREAT! Thanks @Hausi& @bigwam and I appreciate your time reviewing my application. Will now try and see if my kit is good enough for SWAT. -
*DONE* TD-6316 Requesting Deployment
tk6316 replied to tk6316's topic in MEPD Police Officer Program
Good day @Hausi & @bigwam I have made the changes as requested. Please let me know if there are more changes to be made. Redone the thighs and shins Weathered the shoulder straps Rivets and screws Thanks guys! -
*DONE* TD-6316 Requesting Deployment
tk6316 replied to tk6316's topic in MEPD Police Officer Program
Hi @Hausi& @bigwam, First of all sorry haven't update on my progress. Past few weeks been pretty busy with work and studies. So I finally got the time to try the Acetone+ABS mix and took me some time to get it right. Please have a look at the reworked back of the thighs and do let me know if its good. Will redo the weathering later on. https://imgur.com/a/fXZor8f <blockquote class="imgur-embed-pub" lang="en" data-id="a/fXZor8f" data-context="false" ><a href="//imgur.com/a/fXZor8f"></a></blockquote><script async src="//s.imgur.com/min/embed.js" charset="utf-8"></script> Thanks! -
*DONE* TD-6316 Requesting Deployment
tk6316 replied to tk6316's topic in MEPD Police Officer Program
Hi Hausi & Bigwam, Thank you for the feedback and I would like to apologies for the delay in the update of my application. I needed some time to source ABS strips to rework the thighs. With regards to the comments in italic, it was rather difficult and would look totally off if I were to bring the inner left thigh down to align the outward edge. Instead I heat gun it to bend it down as the pic below as if I were to bring the inner thigh downwards, the front would be very off As you can see, the bottom has shrunk slightly from the heat gun so I plan to cover it up with either bondo or epoxy and touch it up afterwards. I would like to know is do you think its more 'aligned' now or I should press it some more. The shins also have been done and is waiting to be weathered. -
*DONE* TD-6316 Requesting Deployment
tk6316 replied to tk6316's topic in MEPD Police Officer Program
Appreciate the feedback @Hausi and thanks for the first review. Will work on the changes right away! -
Good day team, This is my build for the Sergeant Sandtrooper from Docking Bay 94 scene which is this trooper below Here is my application Name: Daniel Wong Legion ID: TD-6316 https://www.501st.com/members/displaymember.php?userID=13767&costumeID=2 Forum name: tk6316 Garrison: Malaysia Garrison Armor: AP Helmet: AP Pauldron: Clive (BurkBench Designs) Neck seal: Tailored Gloves: Trooperbay Pouches: 1) Stolla Wein = Anthony Bailey 2) Small Spanish-Chilean Mauser = Trooperbay E11: Imperial Warfighters Field Pack: 1) Seed trays – RWA 2) Syphon – RWA 3) Frame - Vintage Karrimor Tot'em 4) Sonix Victory 75 radio – Crashmann 5) Tool box – Scratch built 6) Mushroom caps – Crookknight 7) Bottles – Shampoo bottle & Soap dispenser bottle 8) Radar dish – Vintage Tupperware 5” (ebay) 9) Bee stinger – Giostyle canteen 10) Mortar tube – Local hardware store 11) Control panel & end caps – Crookknight 12) Filter box – Scratch built (PVC sheet + paper straws) 13) Lab pipe – Scratch built (Local hardware store) Photos WITH backpack Helmet off Front Left Right Back Photos WITHOUT backpack Front Left Right Back Armor details Shoulder strap Canvas belt with pouches Ab buttons Rubber gloves & latex handguard Snaps, screws & buttons Helmet details Backpack Weapons Action pose
-
*DONE* TD-55519 Requesting Deployment
tk6316 replied to 519 Trooper's topic in MEPD Police Officer Program
Congrats Helder! -
Currently doing the tube stripes, does this look right? R = 13 stripes L = 16 stripes
-
After seeing some of the previous applicants, I think both is acceptable? Yes sir, my current blue is almost similar to Sky Blue but yeah am planning to strip the current paint scheme once I've finished building the new radio kit.
-
Also will there be any issues with using these snaps on the shoulder strap or should I replace with the sew-on ones?
-
Yeah noticed. Hope this works.
-
I know I would need a new radio but besides that is my pack worthy for PO approval?
-
Thanks for the info Jason. Will make the changes.
-
Thanks Jason. Yeah been around quite awhile and decided to take the costume up a notch. Here are some of the upgrades I made following as per Level 2 CRL requirements. Any comments/advise is much appreciated. Will post more soon. Image1 - Specific ammo pouches. Reproduction or original MP-40 ammo pouches are generally considered canon, made in either canvas or leather. Other acceptable names/designs include Stolla Wien, and the once common “Norwegian” green MP-40 pouches Image2 - Three or four “teeth” cut out on either side of helmet “frown” may be cut out. This detail is often referred to as a “Stunt” helmet variation, in addition to the flat green lenses.Frown must be painted gray and must not leave the teeth area. Image3 - Correct Hovi-Mix mic tips. Image4 - Ammo box cover, and conical disk affixed to left side of thumb grip area. Image5 - Rivets on the left side of the Abdomen / Kidney Armor: A total of (6) rivets with three on the abdomen and three on the kidney. The rivets have to be painted white. Rivets are equally spaced out along the depth of the armor and about 10mm from the edge. Image6 - One snap on the top right hand side of the Abdomen Armor: Back of male side of snap shows on outside of Abdomen Armor. Image7 - Visible fasteners under lower Codpiece center area include one split rivet or brad in the front. Fasteners need not be functional. Visible fasteners under lower Codpiece center area includes two (or 3) male snaps in the back. Fasteners need not be functional. Image8 - Flat green helmet lenses, made from lighting gel material, green welder’s mask face shield, acetate, or similar product.
-
Hello fellow troopers! I am currently in the process of upgrading my current basic TD for Level 2 certification. Looking around for mentors for guidance and to check if I am currently on the right path. Any help is truly appreciated

